|
How do I set up Audience Optimization for Facebook Ads?
This guide will walk you through setting up Audience Optimization for Facebook Ads step by step. If you haven’t already, please read the short article below first so you understand the general strategy:
Unlock Better Ad Optimization with Audience Optimization
Step 1 – Review your existing Facebook Pixel configuration
Audience Optimization will send all of your accurate conversion data back to Facebook. So the first step is to review your existing setup and make sure your Facebook Pixel is not generating any conversion events as this will pollute your data.
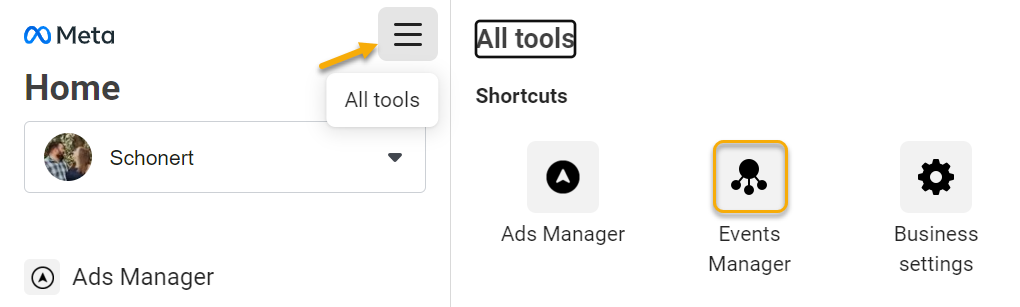
First, go to Events Manager and click any Dataset that lists Meta Pixel under “Integrations.”
Inside the Dataset, find the Meta Pixel section and open its Settings. Turn off the following if they are enabled: Auto-Setup Events, Enhanced Events, and any automatically created events such as Purchase, Lead, Initiate Checkout, etc.
Next, review the Facebook Pixel code you’ve added to your webpages.
If you previously added Facebook conversion events to your website code via GTM, plugins, theme code, or custom
fbq('track', ...) code, remove those now so your Pixel sends PageView events only.Step 2 – Create a new Facebook Dataset
Your existing Facebook Datasets are corrupted with bad data and should not be used for optimization. Instead, you’ll want to create a new Dataset that ClickMagick can send your accurate conversion data to and start fresh.
This new Dataset will receive all of your conversion events from ClickMagick via the Conversions API. Your existing Pixel stays installed on your site and will continue sending PageView only.
Go to your Facebook Events Manager ...
Click “Connect Data Sources” ...
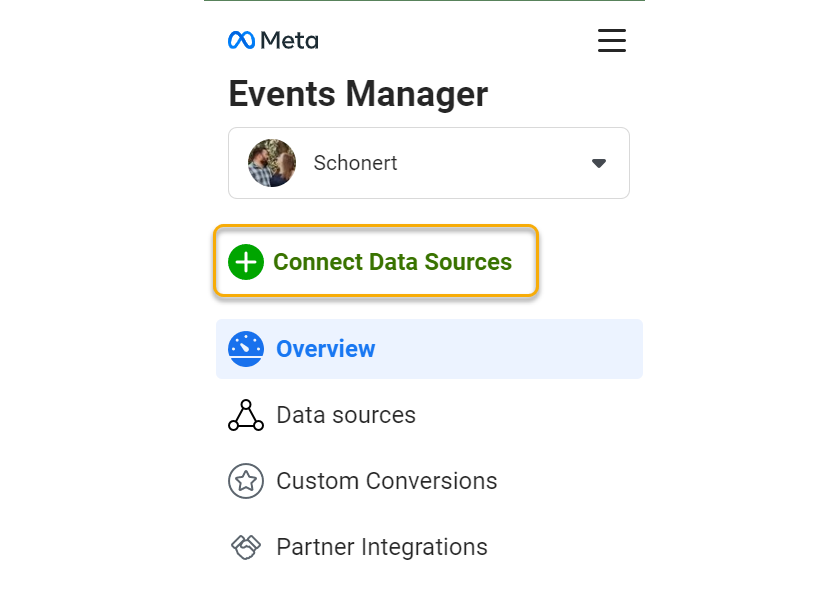
Select “Web” and then “Connect”, then give your new Dataset any name you want and click “Create.”
Once you name your Dataset and click “Create” your Dataset will be created. Facebook will then present you with instructions on how to use your Dataset, but this is not important so just close the window.
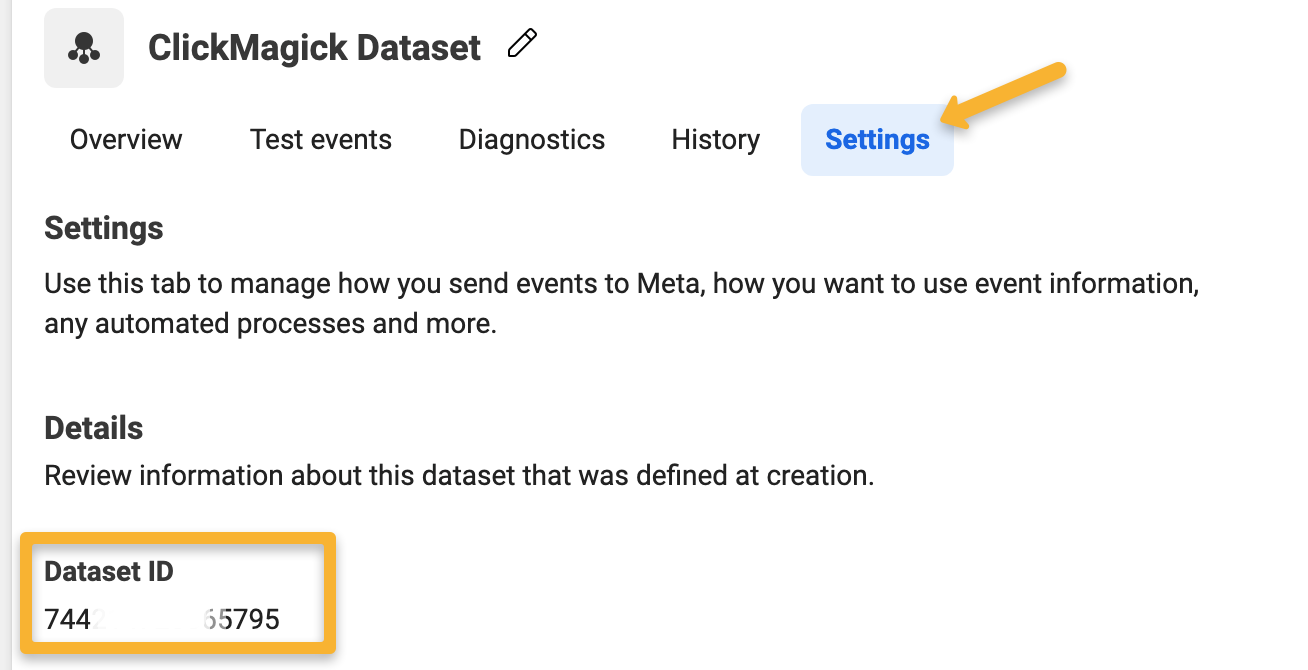
Step 3 – Copy your new Dataset ID
You should see your new Dataset listed on the Events Manager Overview page. Click on the Dataset you just created, then open its Settings tab and copy the Dataset ID from there.
Step 4 – Create an Access Token
In order for ClickMagick to be able to post your conversions to the Facebook Conversion API, you’ll need to create and provide us with a Facebook API Access Token.
Select your new dataset, then select Settings, find the Conversions API section and click on “Generate access token” under “Set up manually”. Copy this Access Token for use in the next step.

Step 5 – Add your Dataset to ClickMagick
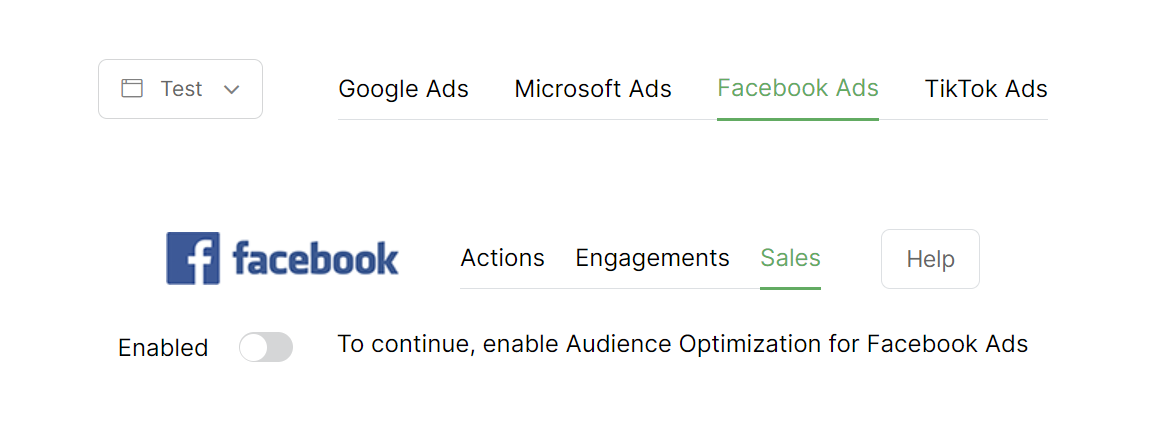
Now you need to tell ClickMagick about your new Dataset. To do this, simply navigate to the Project you want to optimize, select Audience Optimization from the Tools menu, then select the Facebook option.
Select the type of conversion you want to send to Facebook – Action, Engagement or Sale – and then flip the switch to enable Audience Optimization for Facebook Ads …
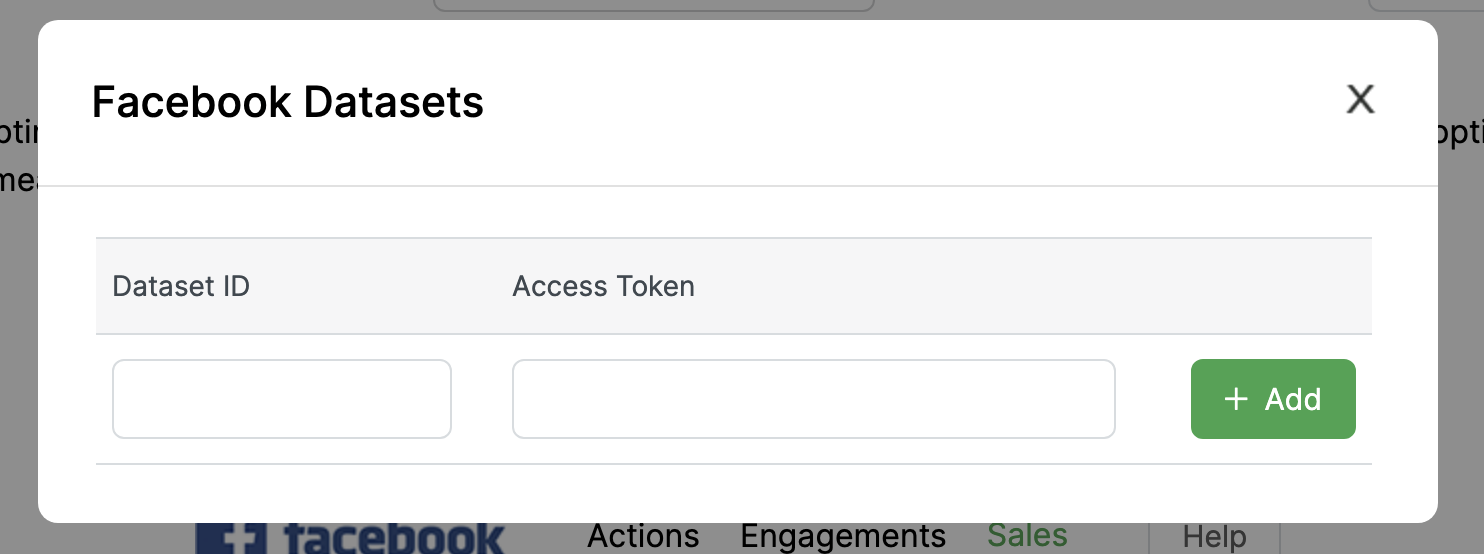
If this is your first time adding a Facebook Dataset you’ll see this screen. Enter your Dataset details to continue …
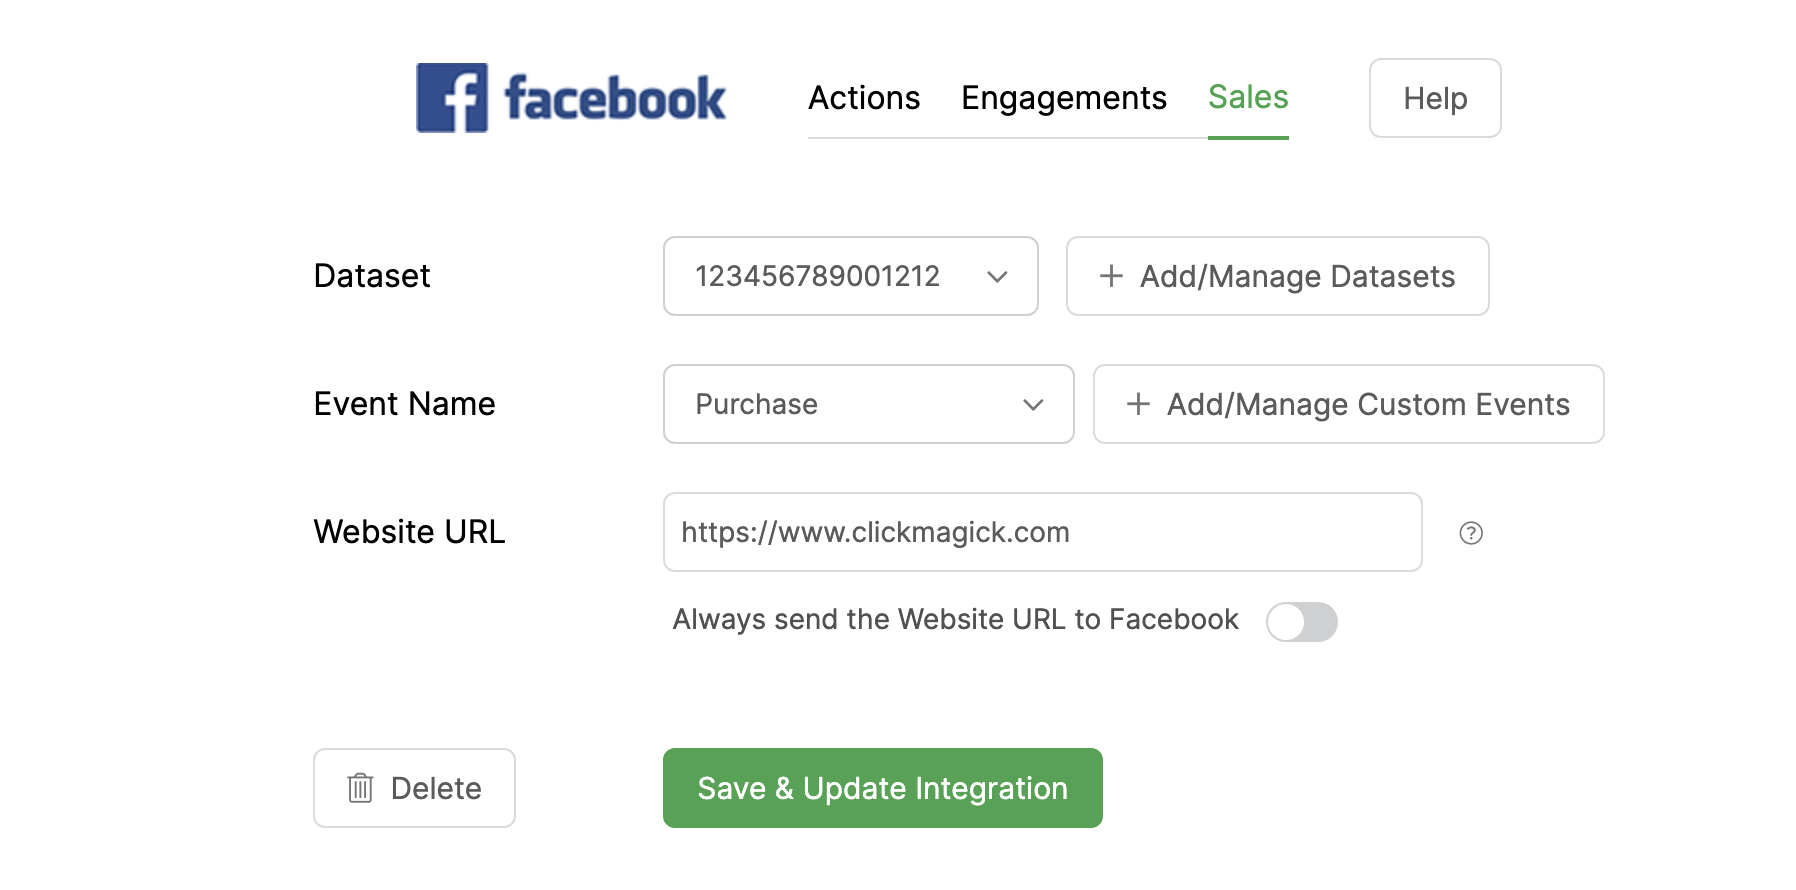
On the other hand if you’re already using Audience Optimization with Facebook Ads and just need to add a new Dataset, click “+ Add/Manage Datasets” to go ahead and add any new Dataset you want.
Finally, just select the Facebook Event Name you want to use, enter the URL of your homepage, and submit the form to enable the basic integration.
You’ll then want to repeat this process for each type of conversion you want to send to your Facebook Dataset. Ideally you’ll set up all three – Actions, Engagements and Sales.
You actually have almost unlimited flexibility in terms of which conversions you send back to specific Facebook Datasets, so if you need to do something more advanced you'll want to learn more about Advanced Rules at the link below:
How do I set up Advanced Rules for Audience Optimization?
Note: We’ll always pass the URL where a conversion occurred to Facebook’s API when one is available. When no URL is available — for example if you’re tracking affiliate sales via Postbacks — we’ll simply pass the Website URL you entered when you saved your dataset settings.
Step 6 – Capture and send visitor info with your Facebook Conversions
To help with ad optimization, you’ll want ClickMagick to send as much data about your conversions as possible.
So if you haven’t already, follow the steps in this article to allow ClickMagick to capture visitor info:
How do I capture visitor info from forms on my site in ClickMagick?
ClickMagick will then send this user data with your conversions – and you’ll get the best event matching and optimization Facebook is capable of, using their recommended partner integration method for the Conversions API.
Step 7 – Verify things are working correctly
In Audience Optimization, there’s a detailed log that you can use to verify things are working properly.
Once the log shows that conversions have been sent to Facebook successfully, wait a bit then check the activity in Events Manager to make sure your new Dataset is receiving data from ClickMagick.
Use the Meta Pixel Helper to confirm that your Pixel is only sending PageView events and is not firing any conversion events from the browser.
Finally, in Events Manager, verify that your new Dataset is receiving events marked as Server or Cloud and that no other unexpected events are appearing there.
Please note that while we send your conversions to Facebook in real-time, things are not real-time on their end and it can take anywhere from 15 minutes to 6+ hours for things to be visible on their end.
Article 927 Last updated: 11/27/2025 9:28:54 AM
https://www.clickmagick.com/kb/?article=927