|
How do I track link or button clicks on my website?
With ClickMagick, in addition to tracking your incoming traffic, you can also track outgoing clicks off your site, or any link or button on any of your pages for that matter.
There are two methods for doing this, and it just depends on whether the link or button redirects to another URL when clicked, or whether it does something else e.g. an order bump or video play button.
You can also do this with Smart Links, but you’ll need to use the second, more complicated method, and you really should be using a TrueTracking Project for conversion tracking if you can.
Note: Tracking clicks as described on this page is generally reserved for offsite clicks to other sites you don’t control e.g. affiliate links, or for Smart Links or buttons that don’t redirect to another page e.g. a video play button.
If the link or button you want to track leads visitors to another page you control, it’s generally simpler to track those clicks as described in the article below:
What are the different ways to track events and conversions?
If the link or button you want to track leads visitors to another page you control, it’s generally simpler to track those clicks as described in the article below:
What are the different ways to track events and conversions?
If the link or button you want to track redirects visitors to another page when clicked, you’ll want to use the
cmc_redir function to track it.It doesn’t matter if you control the page that you’re linking to. It could be another page of yours, it could be a link to a Facebook post, or it could be an affiliate offer that you have no control over.
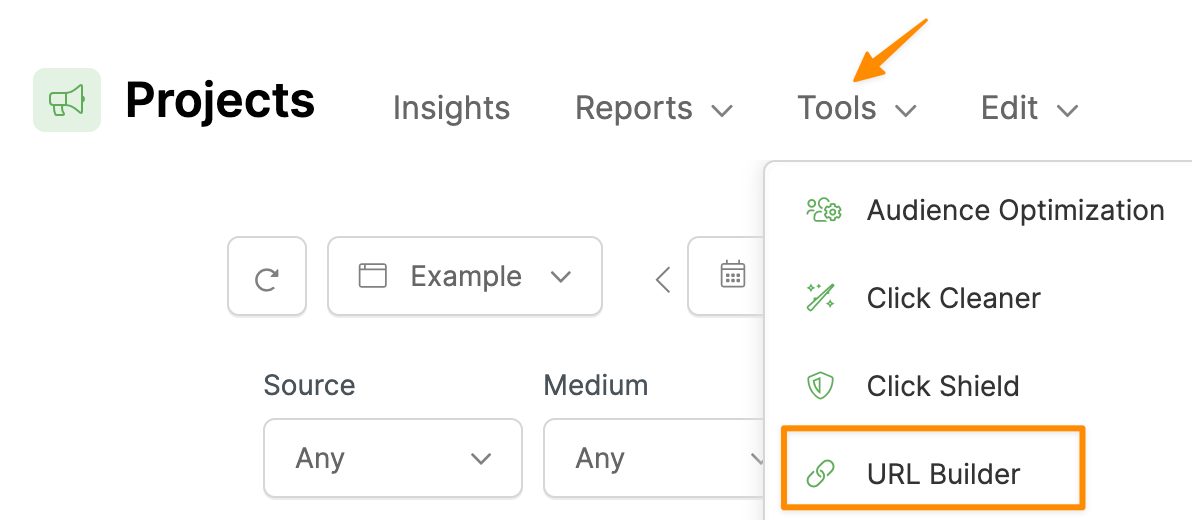
Step 1 – Go to your Project Dashboard, then Tools, then URL Builder.
Step 2 – Enter the URL of any page that contains your tracking code. It doesn’t matter which page, because users won’t see this page at all.

Step 3 (Optional) – If you want to track a click when the link or button is clicked, as opposed to a goal, enter the UTMs you want to use to identify the clicks, including
utm_source, utm_medium and utm_campaign.Step 4 – On the second tab of the URL Builder, enter the final URL you want visitors redirected to in the
cmc_redir field at the bottom. This is the URL visitors will be redirected to when they click the link or button.Step 5 (Optional) – If you want to record an Action or Engagement when the link or button is clicked, as opposed to a click, under
cmc_goal, select “Action” if you want to fire an Action, or “Engagement” if you want to fire a Engagement.While technically not required, you should also add a unique
cmc_ref value e.g. presell-page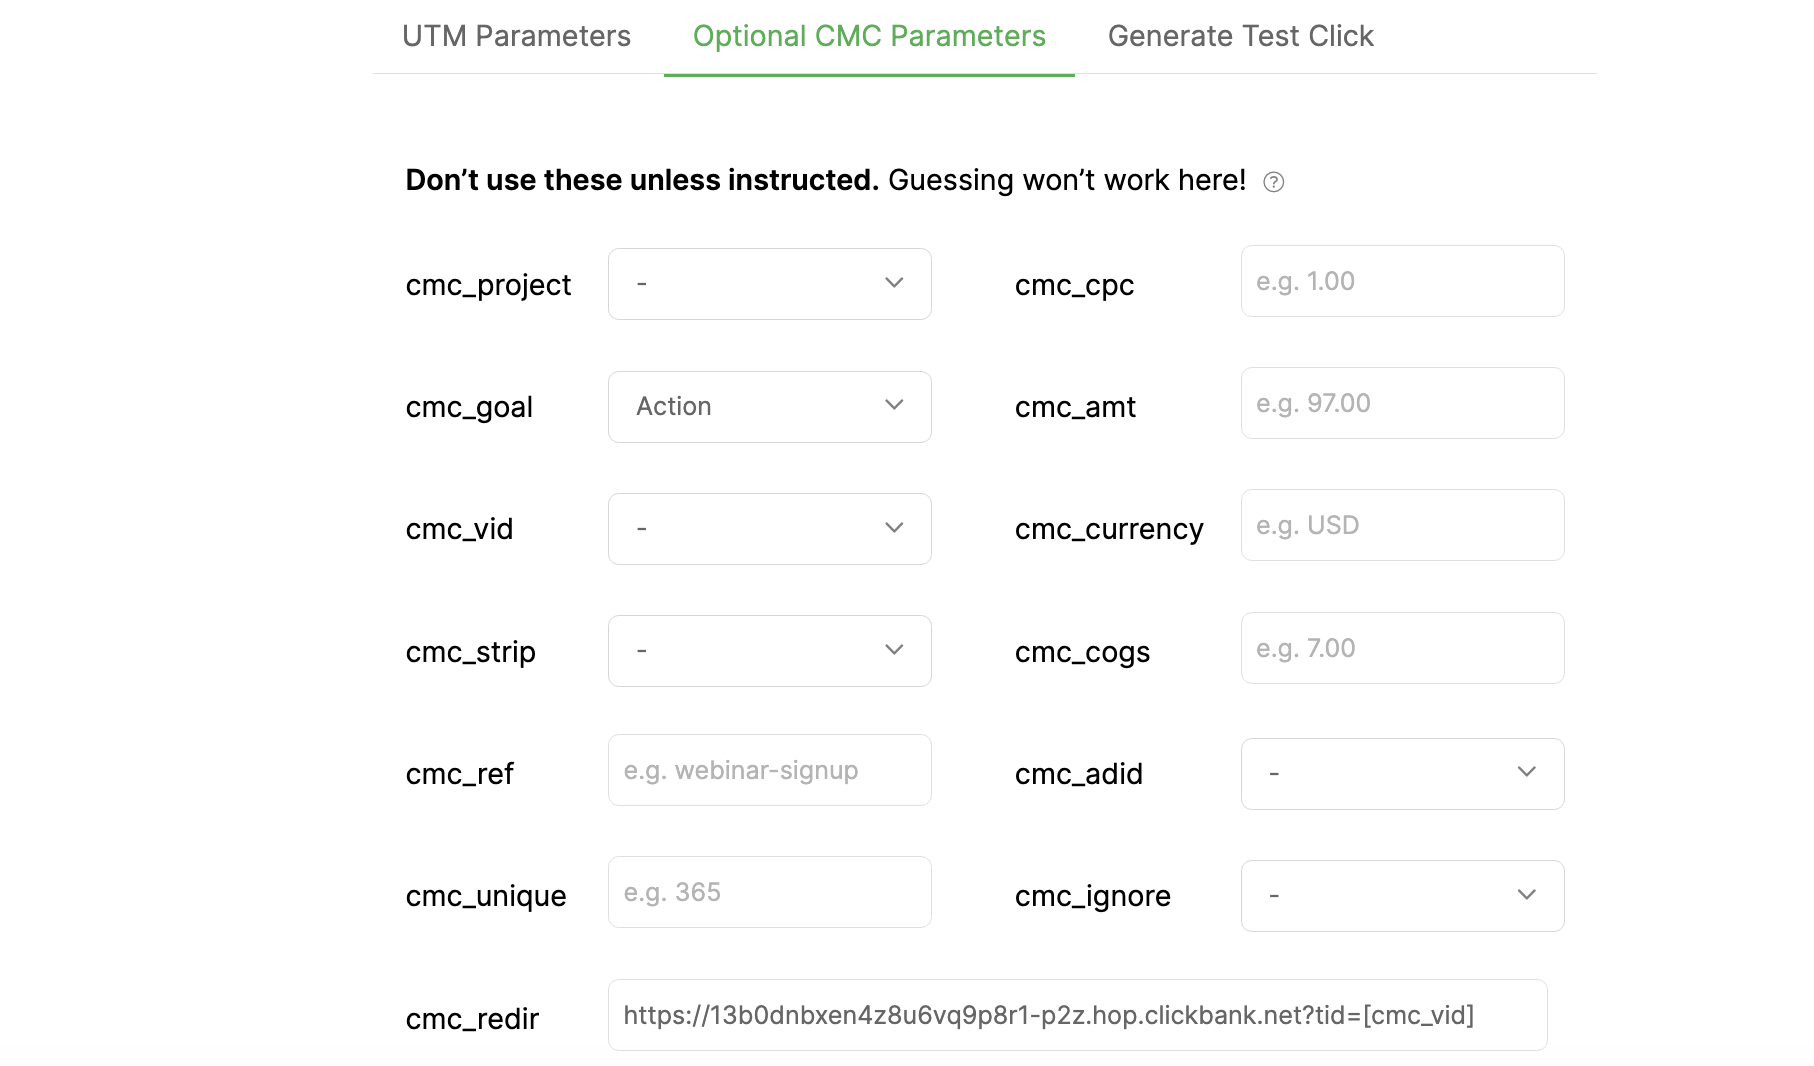
Step 6 – Copy the URL generated by the URL Builder, and use this URL for the link or button you want to track.

Caution: If you don’t have your tracking code in the <head> of your landing page, your landing page may start to load before the visitor is redirected.
If you’re going to use this feature you’ll want to make certain that you’ve added your tracking code to the <head> of your page for a “clean” redirect.
If you’re going to use this feature you’ll want to make certain that you’ve added your tracking code to the <head> of your page for a “clean” redirect.
If you want to track link or button clicks that don’t redirect the visitor to another page, or you’re using Smart Links, you’ll need to use the more technical
log_xxx function.This requires a basic understanding of HTML, so you may need help with this. If you don’t have someone on your team who can do this, just submit a ticket and we’ll be happy to help.
If you do, be sure to provide the URL of the page in question, and let us know exactly which links or buttons you want to track, and how you want to track them e.g. record an action when the link is clicked, process an order bump etc.
If you want to take a stab at it yourself, just select which system you’re using below ...
Step 1 – Find or add an Element ID to your link or button
An Element ID uniquely identifies an element on a webpage – including your links and buttons – and you’ll need this to track it. So if it doesn’t already have one, you’ll need to add an ID to the link or button you want to track.
You can use any value for the ID as long as it’s unique e.g.
id='myButton'Some page builders, like ClickFunnels, automatically assign random IDs to your links and buttons and they can’t be changed. But don’t worry, that’s fine too …
In this case, just note the ID assigned to your button (e.g.
button-142996) because you’ll need it in the next step.If you aren’t sure how to find these IDs, use the guides below:
How to find the Element ID in different page builders
Step 2 – Modify your Tracking Code
You’ll have to modify the tracking code on your page slightly. This small tweak will tell ClickMagick to monitor your link or button and record a conversion event when the link or button is clicked.
To record an Action, the new line of code you need to add looks like this:
log_action: 'myButton',To record an Engagement, the code you’d add looks like this:
log_engage: 'button-142996',To record a Sale, add both an element ID and an
:amount value like this: log_sale: 'buy-button:9.95',To record an Upsell, add both an element ID and an
:amount value like this: log_upsell: 'upsell-button:4.95',To record an Order Bump, add both an element ID and an
:amount value like this: log_orderbump: 'bump-button:100.00',You can also add an optional “ref” value by adding
:refvalue to the end of the previous examples:log_action: 'myButton:optin',
log_engage: 'button-142996:salespage',
log_sale: 'buy-button:9.95:golfclubs',
log_upsell: 'upsell-button:4.95:golfbagupsell',
log_orderbump: 'bump-button:100.00:combo-pack',If you don’t specify a “ref” value, “ref” will be set to match your link or button’s ID.
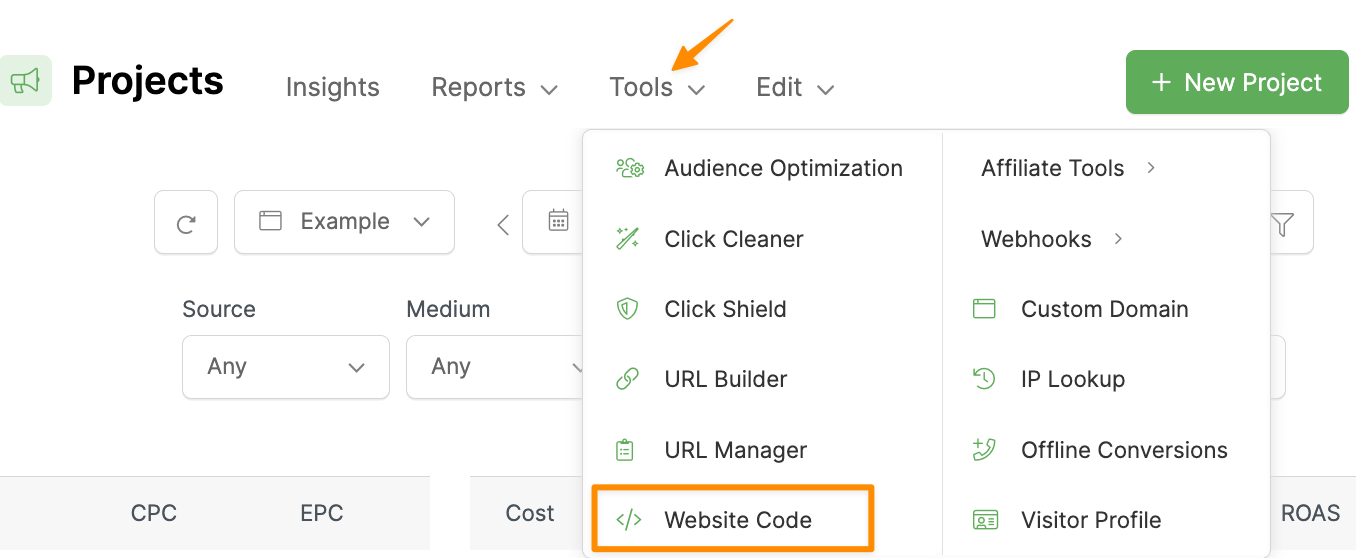
To easily add your ID to your tracking code, go to your Project Dashboard, click Tools, then Website Code:
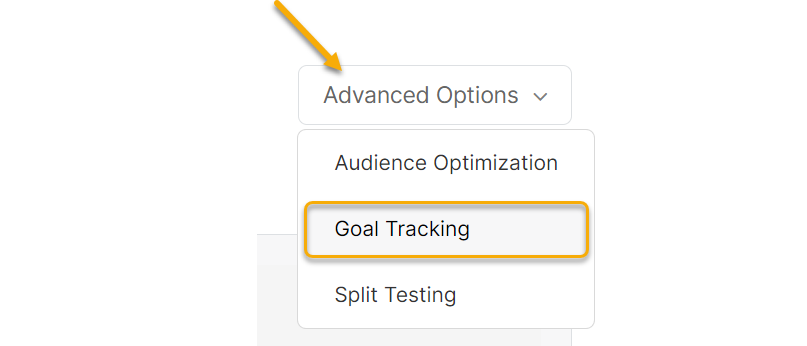
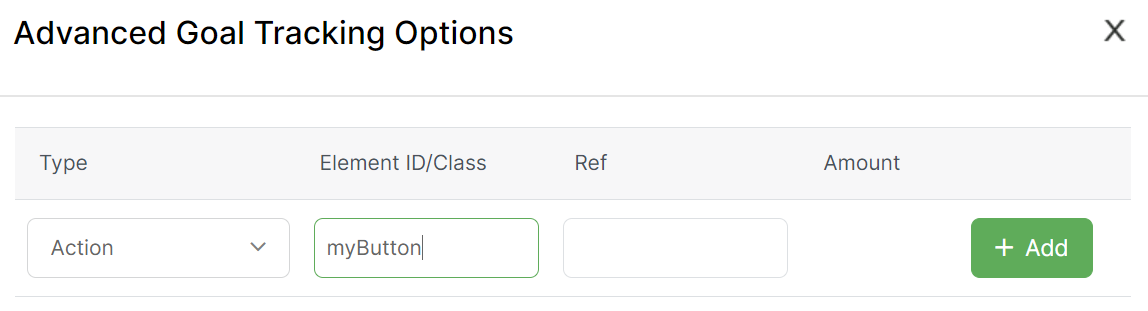
Click on “Custom Website Code,” click on “Advanced Options,” and then choose “Goal Tracking.”
Select what you want to log in the “Type” section, add your Button or Image ID, and click on Add:
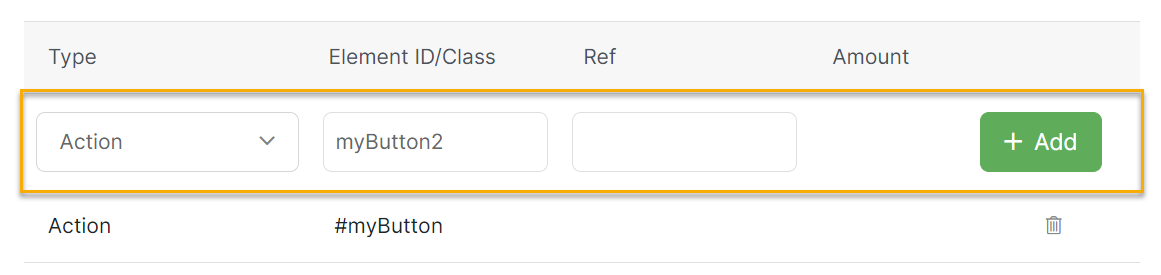
To track multiple buttons or images, enter the second ID after adding the first:
Step 3 – Add your modified Tracking Code to your page
The final step is to add or update your tracking code with the new code generated after following the steps above, so that it will track the additional link or button clicks.
If you need a refresher on how to add your tracking code, please reference the guide below:
How do I add tracking code or JavaScript to my page builder?
Tip: You can use “class” names instead of Selector IDs. Just follow the instructions above, and make sure the class names you use in your code start with a period to designate that it’s a class name e.g.
log_action: '.className',For advanced users, you can also record conversions using JavaScript in any way that makes sense for you. To learn how to do that, please see the article below:
Can I record a conversion or goal using JavaScript?
Here’s an example that records an action when someone clicks the play button on an embedded video in an iframe …
<script type="text/javascript">function iframeclick() {
document.getElementById("theiframe").contentWindow.document.body.onclick = function() {
clickmagick_cmc.log('a', 'video');}
}
</script>


...
<iframe id="theiframe" … onload="iframeclick()"></iframe>Article 896 Last updated: 10/22/2025 1:35:24 AM
https://www.clickmagick.com/kb/?article=896