|
How do I set up Audience Optimization for TikTok Ads?
This guide will walk you through setting up Audience Optimization for TikTok Ads step by step. If you haven’t already, please read the short article below first so you understand the general strategy:
Unlock Better Ad Optimization with Audience Optimization
Step 1 – Review your existing TikTok Pixel configuration
Audience Optimization will send all your accurate conversion data to TikTok. So the first step is to review your existing setup and make sure your TikTok Pixel is not generating any conversion events, as this will pollute your data.
Review your TikTok Pixel setup in GTM, plugins, Shopify apps, WordPress add-ons, TikTok’s auto-tracking features, or any manually added tracking code.
TikTok can also auto-generate browser-side conversion events through integrations such as Shopify, WooCommerce, or CMS plugins, so disable those as well to prevent any unwanted conversion tracking from the Pixel.
If you previously added TikTok conversion events via GTM, plugins, theme code, TikTok Pixel Helper auto-tracked events, or
custom ttq.track(…) code, remove or disable those now so your TikTok Pixel sends only the PageView event and no conversion events from the browser.Step 2 – Create a new TikTok Pixel
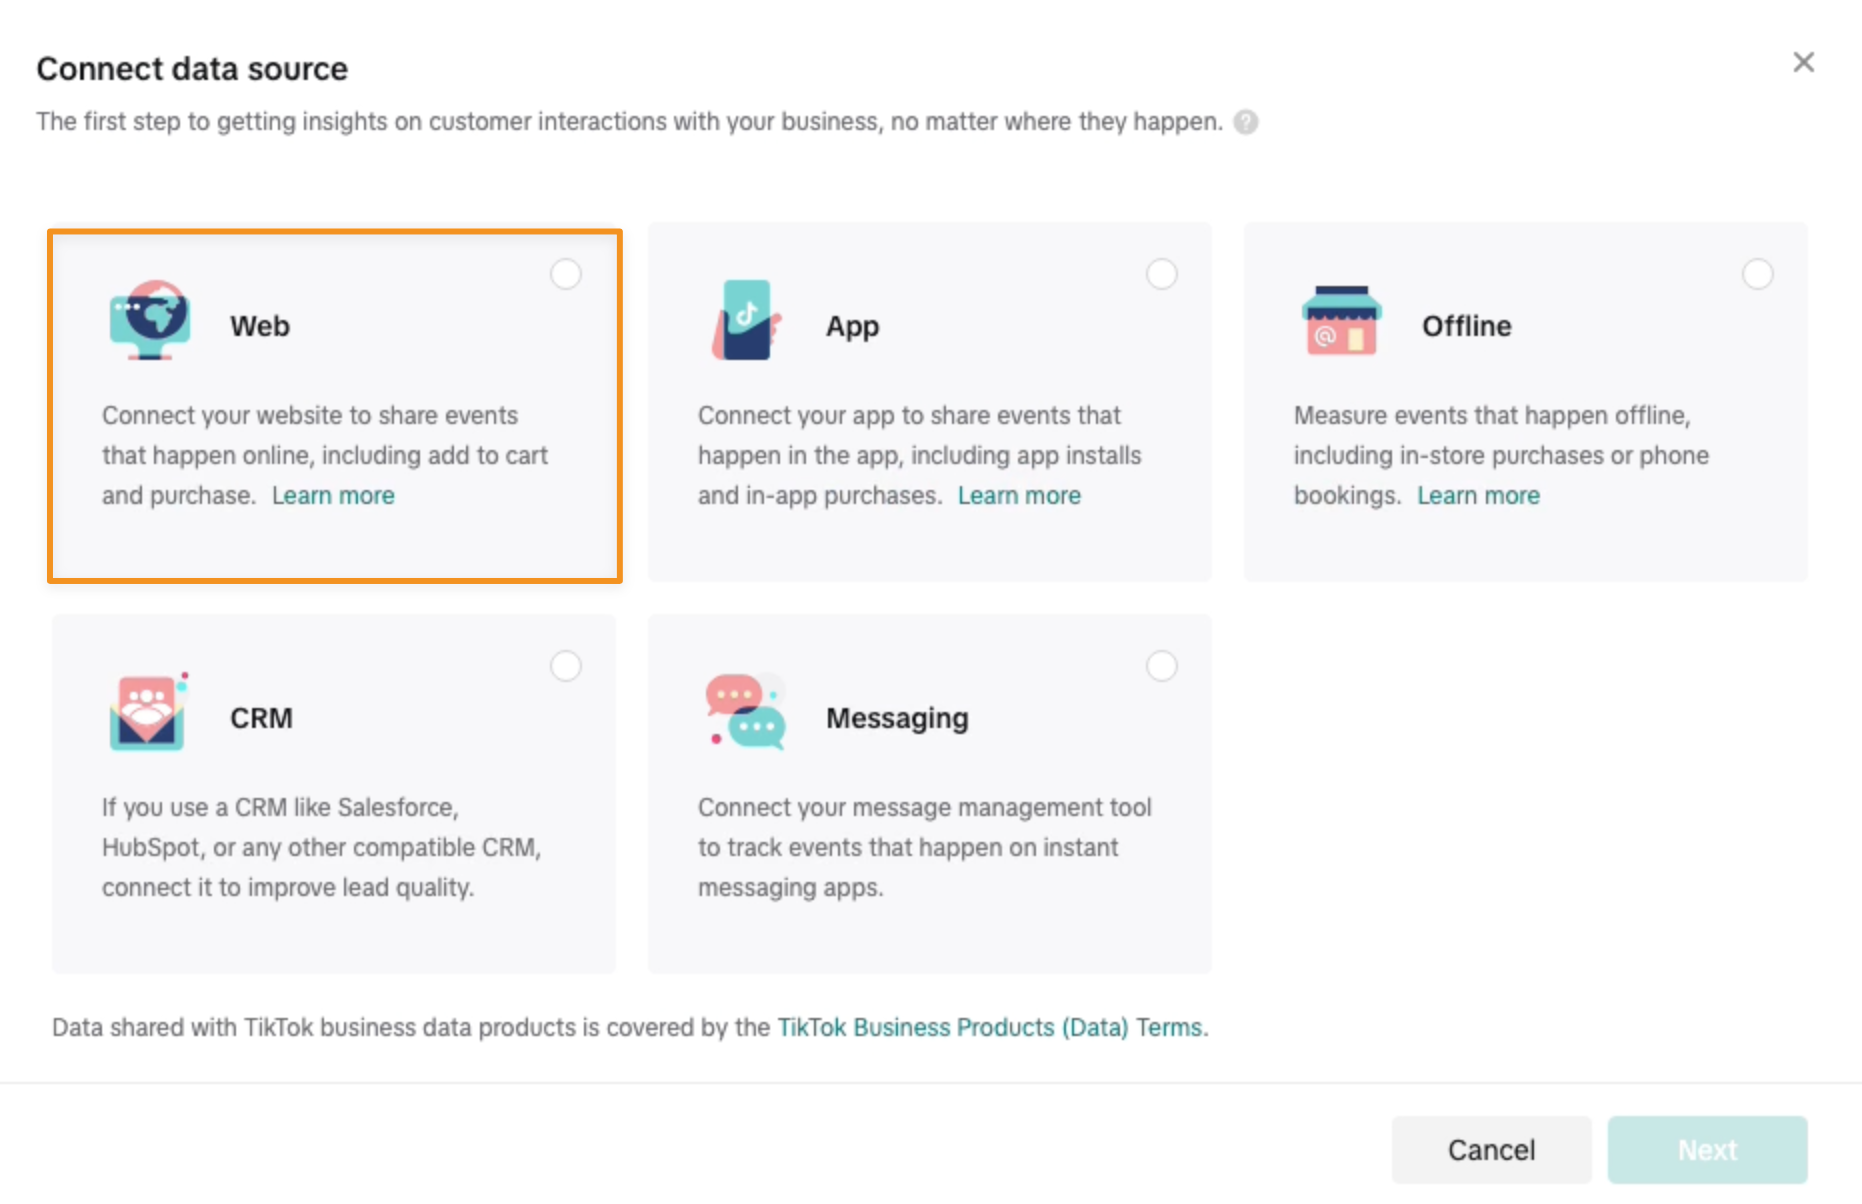
In your TikTok Ads account head to the Events Manager and then click on "Connect Data Source” button.
Choose “Web” as the data source.
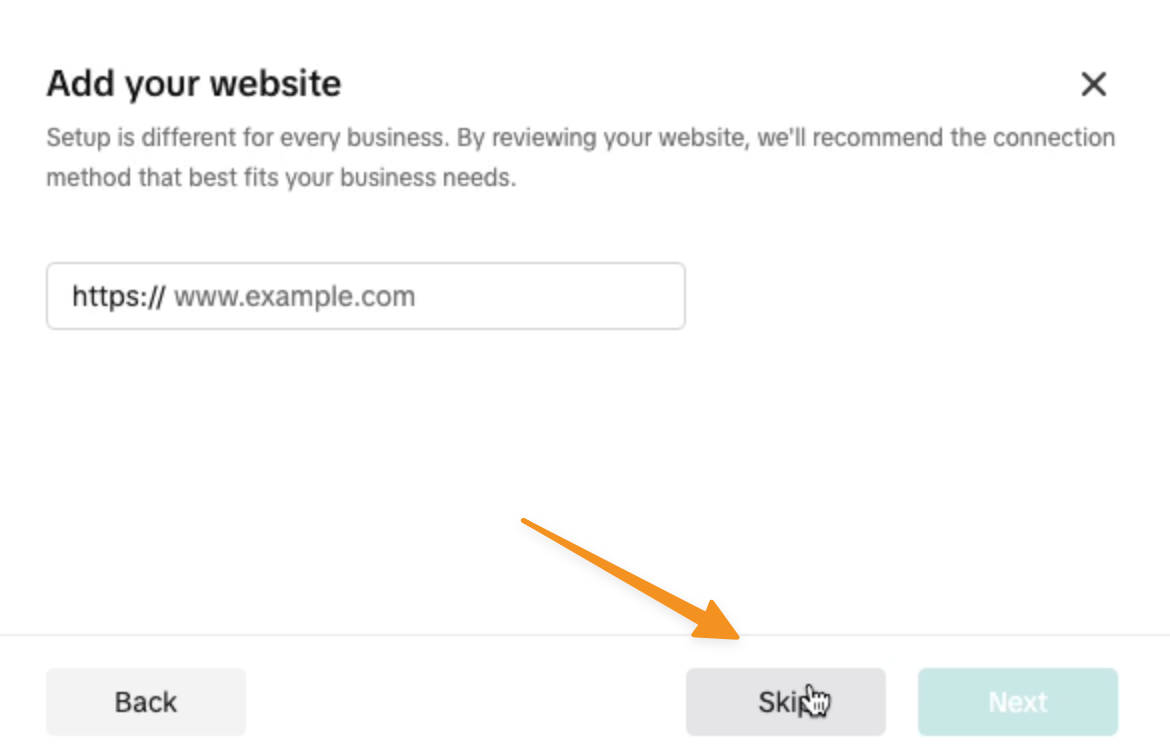
Next step will ask you to connect your website. Just click on “Skip”.
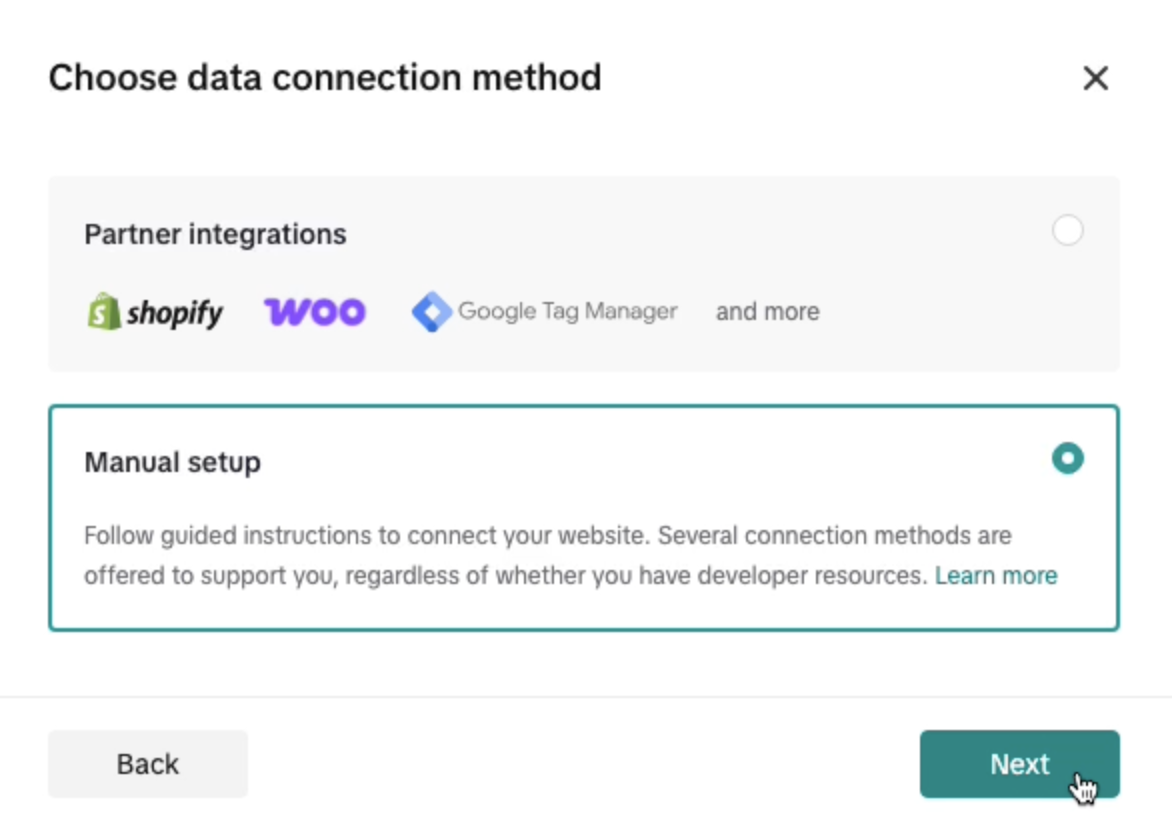
Under Data connection setup, choose manual setup and click on the Next button.
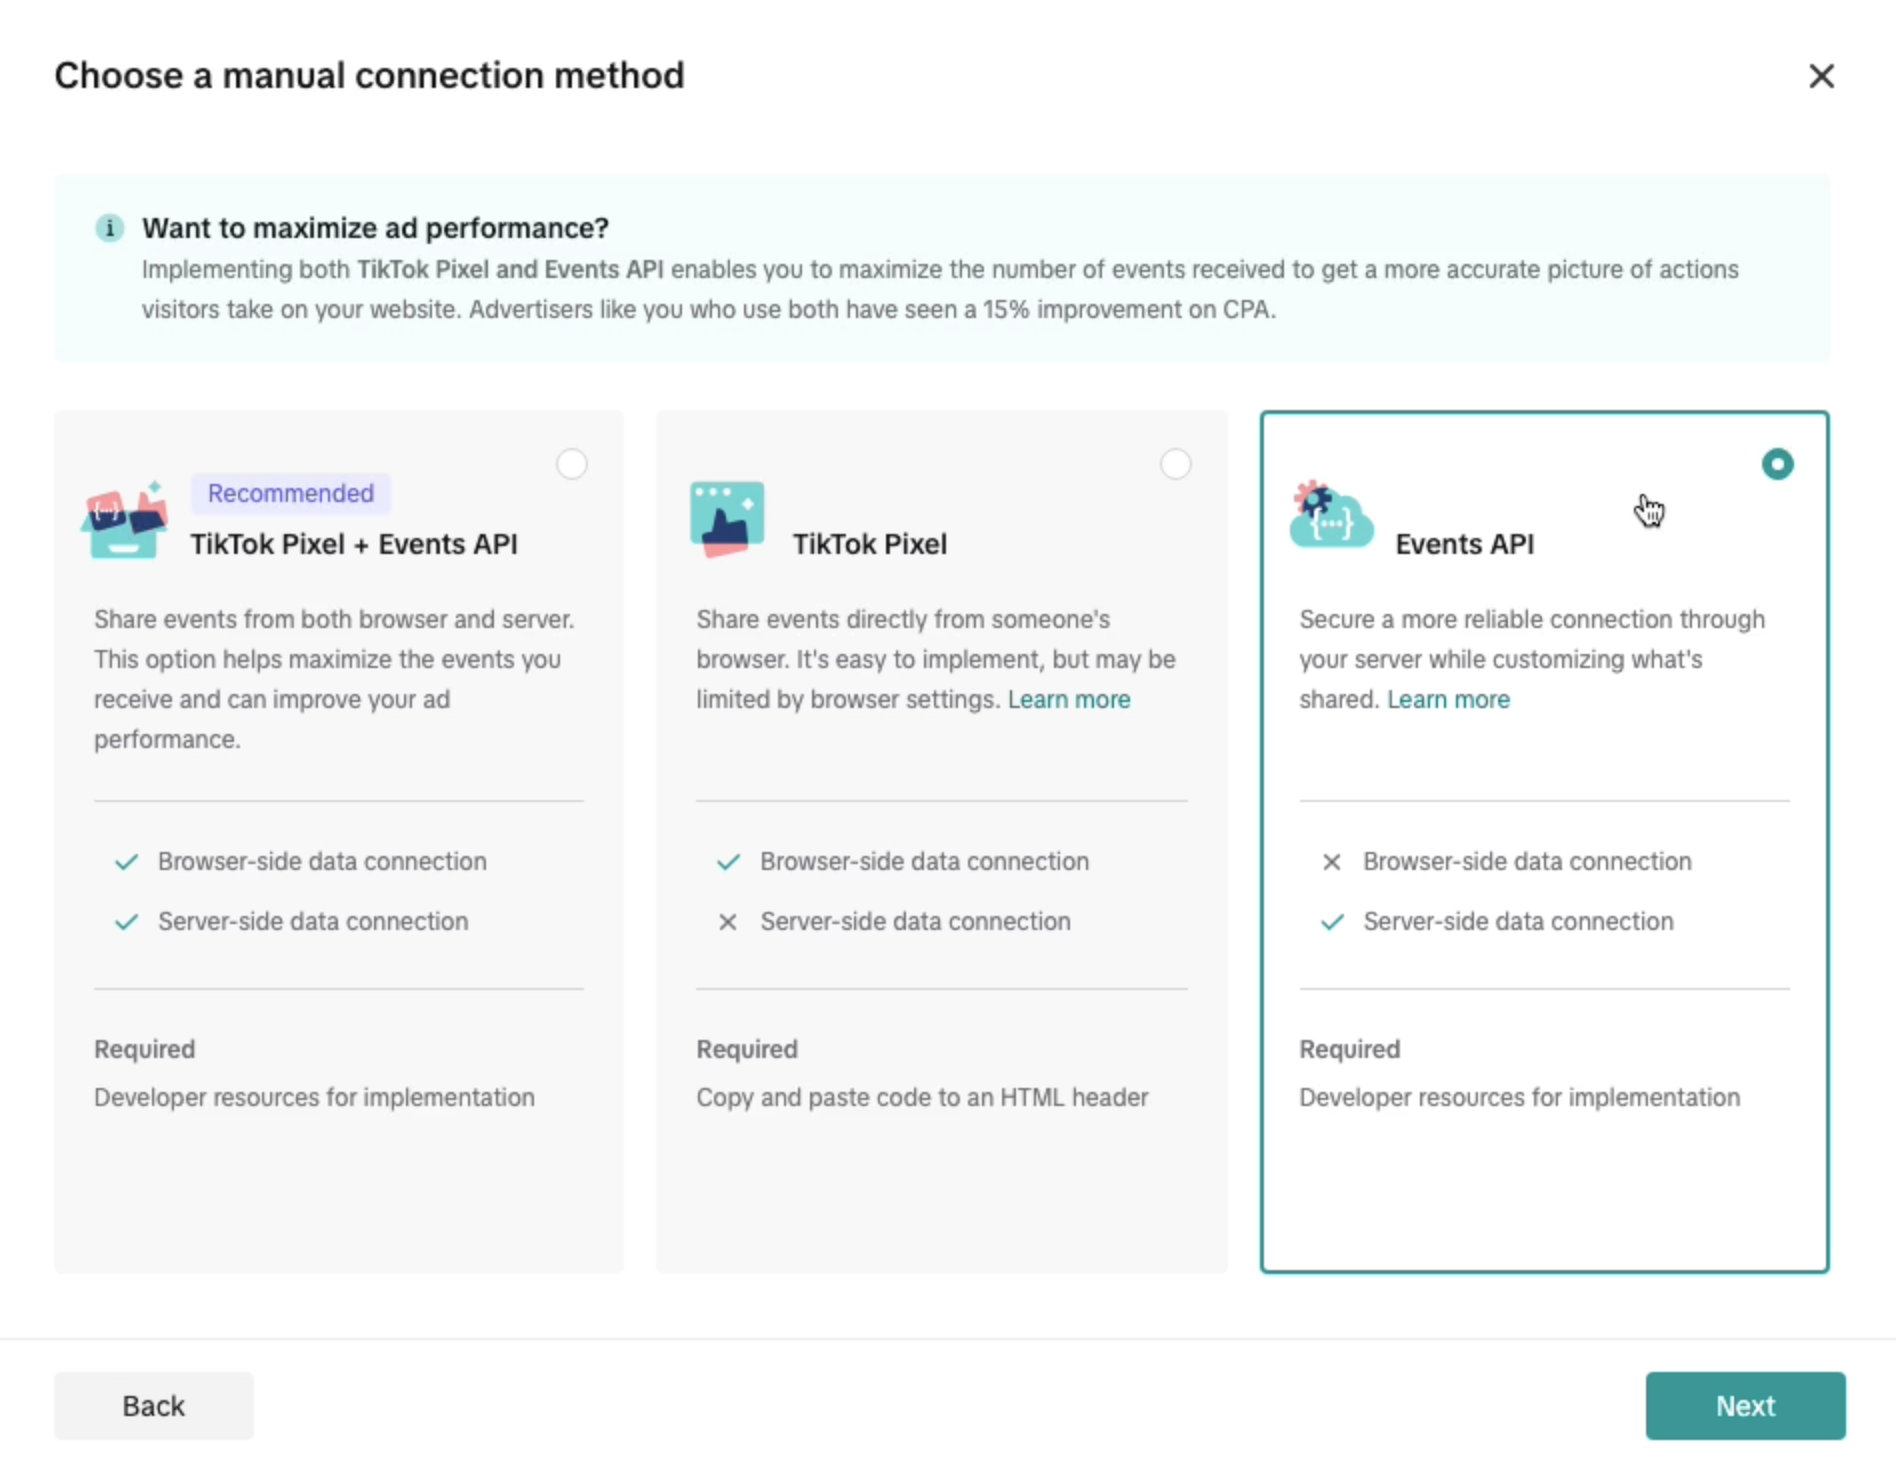
Next, select Events API.
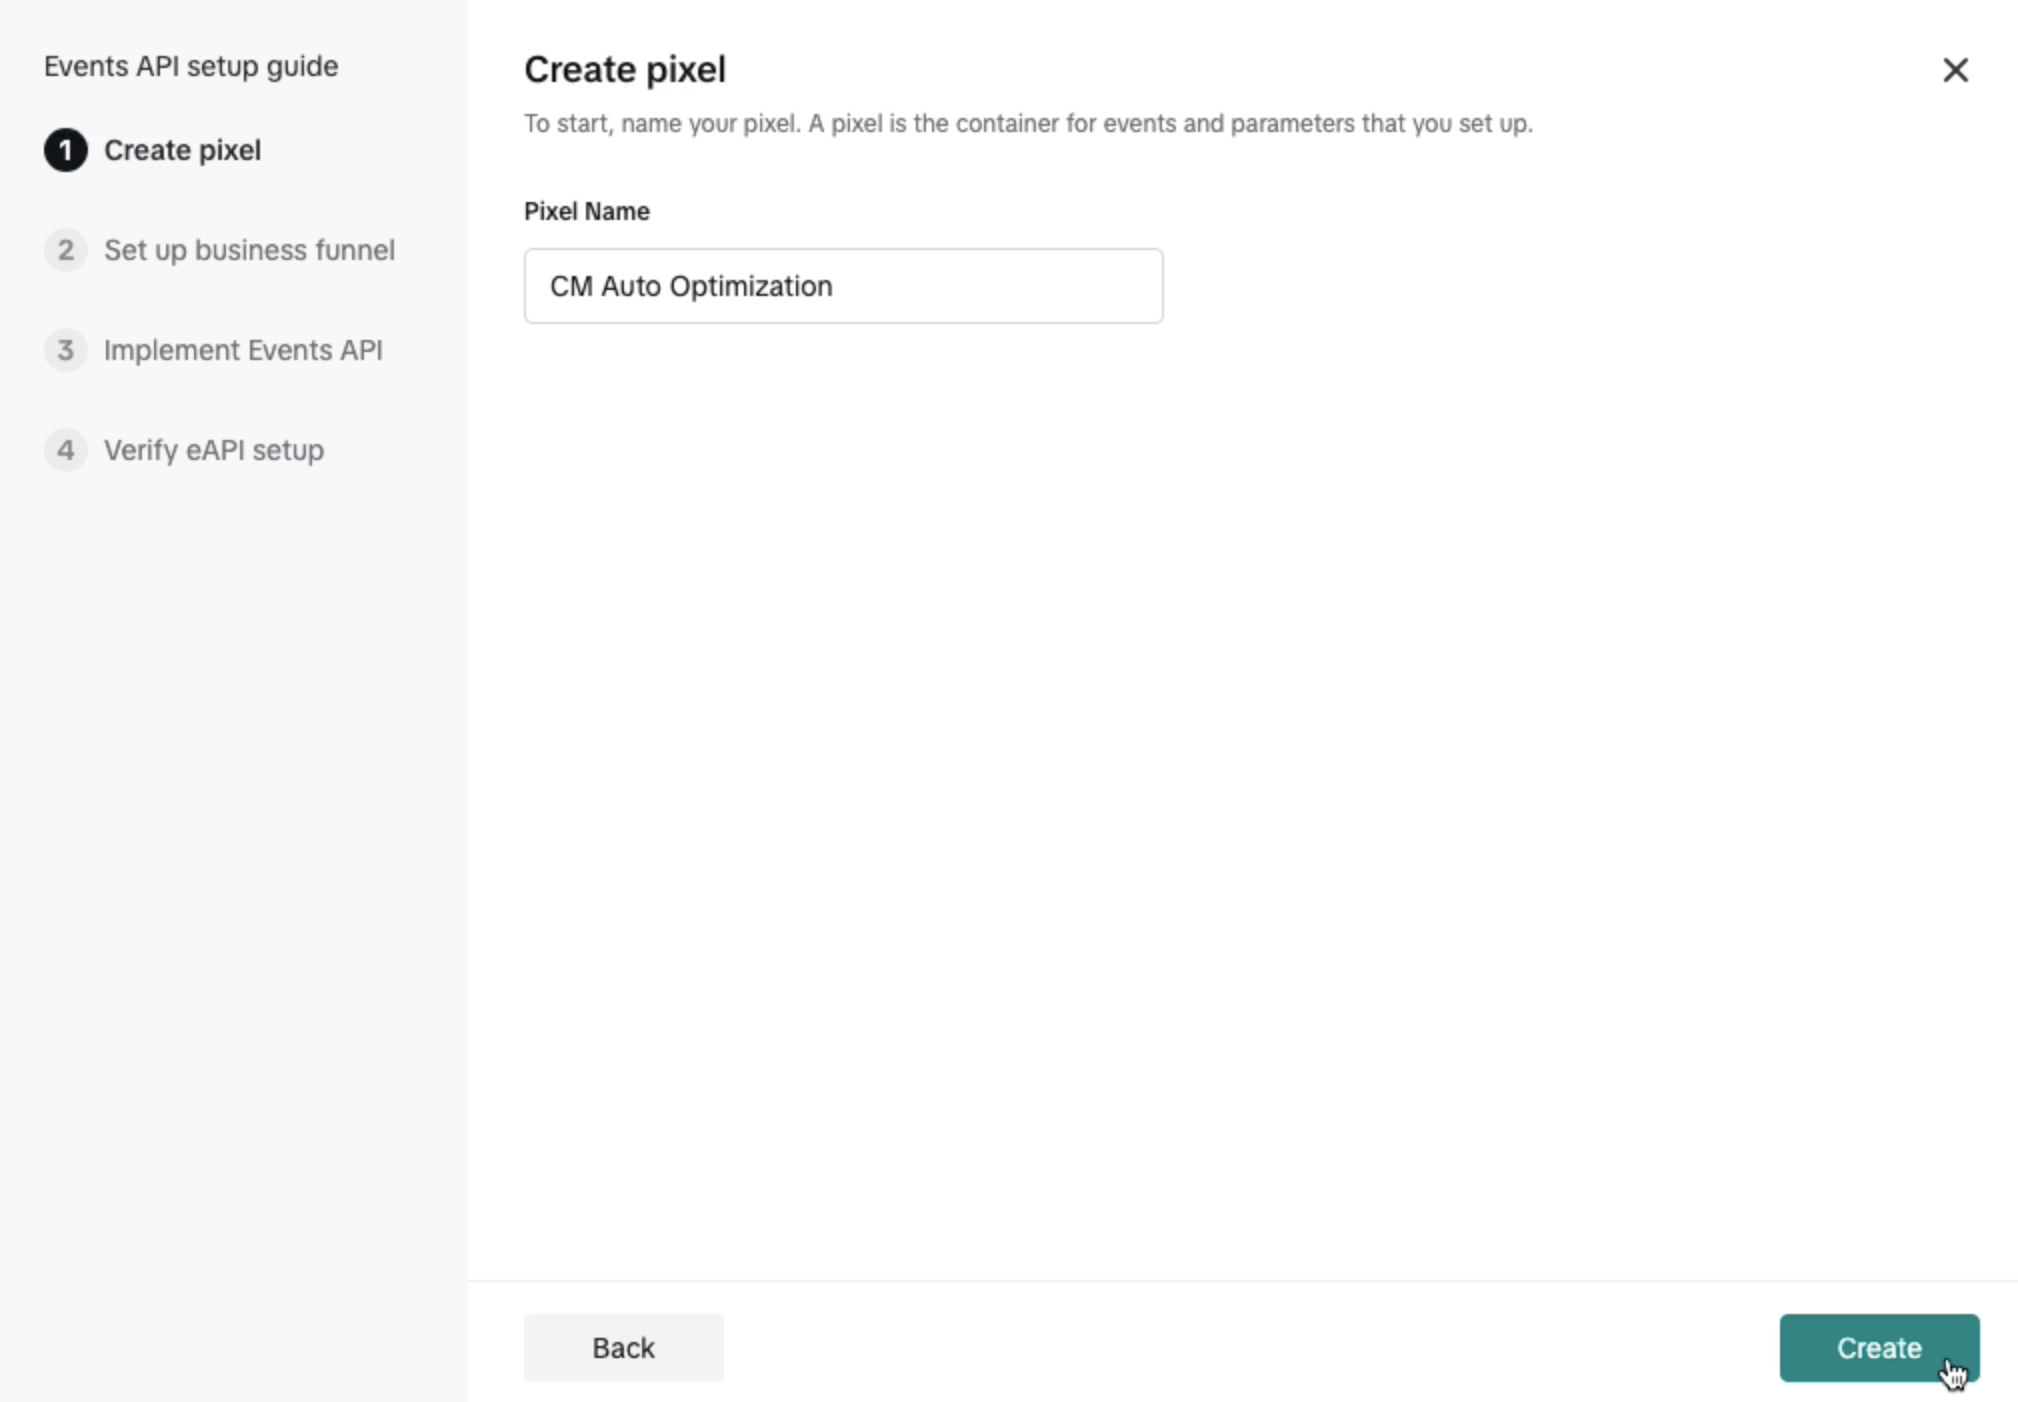
When done, you just need to name your new pixel and skip all other steps.
Note: Your new pixel may not show up until you get a conversion. Continue using your old pixel in the meantime. During this time, ClickMagick will still send conversion data to your new pixel, warming it up.
Caution: Do not, under any circumstances, add this new pixel to your website. If you do, it will become corrupted with bad data, and you’ll have to start over from scratch.
Step 3 – Integrate your TikTok Ads account with ClickMagick
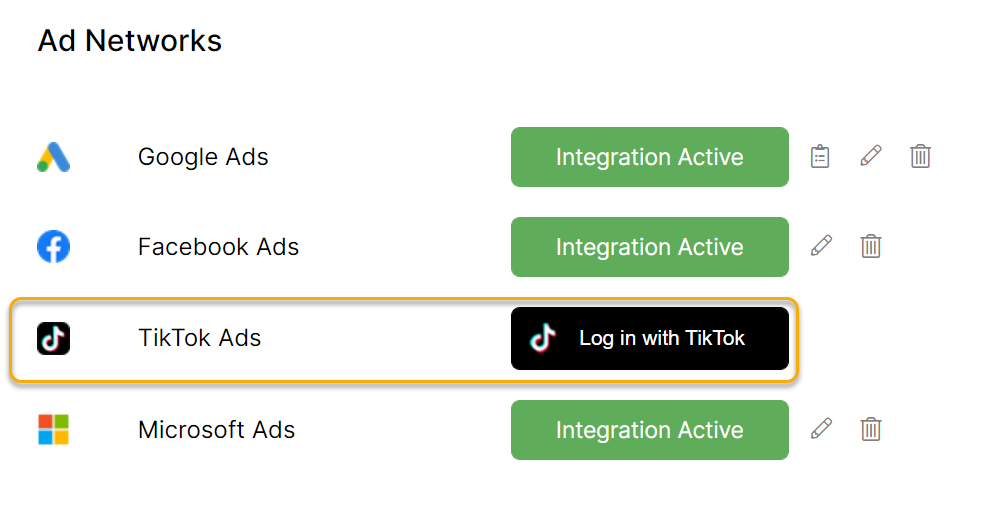
Head to the Integrations page, and you'll see the option to log in with TikTok.
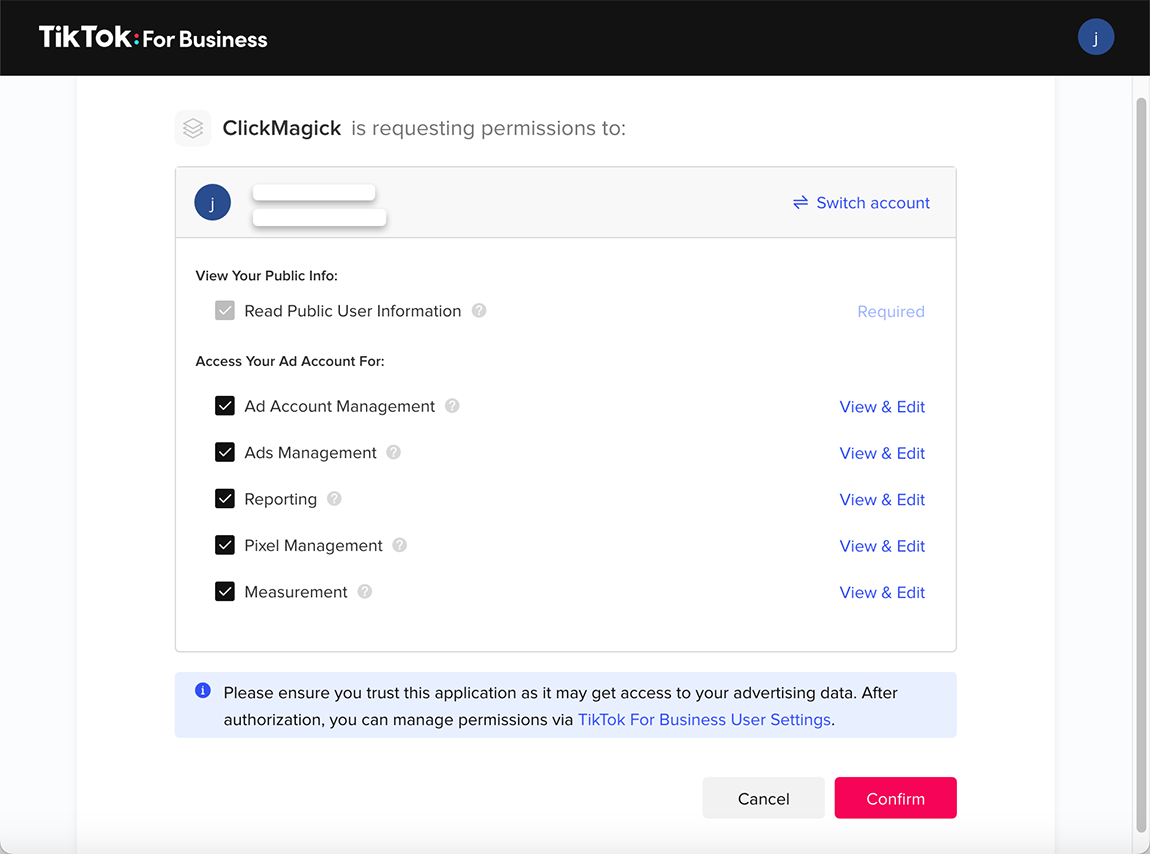
Follow the prompt and click “Confirm” to continue and select the ad account you want to integrate. Make sure to select all check boxes as shown in the image below.
Step 4 – Add your TikTok Pixel to ClickMagick
Head on over to the Audience Optimization Page and select TikTok Ads
Toggle the enable option and select the Advertiser Account, the new pixel you created and the Event name most appropriate for the conversions you'll be sending to TikTok.
Enter the URL of your homepage and submit the form, and you're done with the integration.
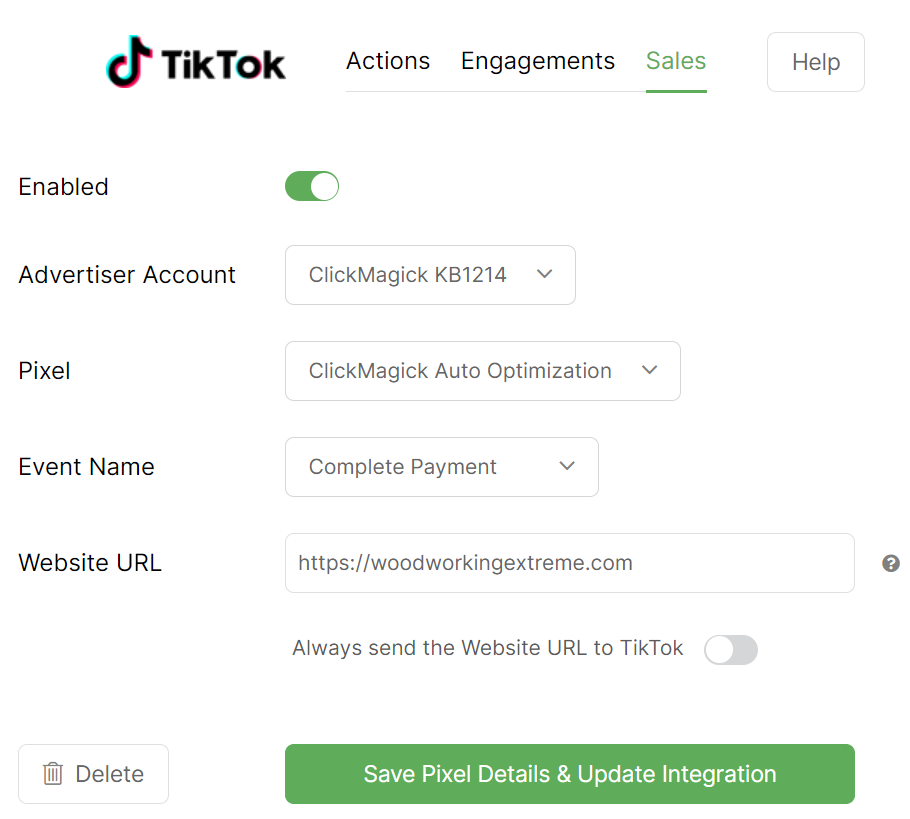
Note: We’ll always pass the URL where a conversion occurred to TikTok’s API when one is available. When no URL is available — for example if you’re tracking affiliate sales via Postbacks — we’ll simply pass the Website URL you entered when you saved your pixel settings. If you want ClickMagick to always send the Website URL you entered, simply enable that option.
Tip: While you can technically send Action, Engagement and Sales conversions to your pixel, TikTok only allows you to select a single event to optimize for.
So for example if you know you’re only ever going to optimize for Sales, there’s really no benefit in sending Action or Engagement conversions to your pixel.
You can however add as many TikTok Pixels as you want to ClickMagick, and use Advanced rules to determine which conversions to send to which pixels.
Step 5 – Capture and Send Visitor Info with your TikTok Conversions
To help with ad optimization, you’ll want ClickMagick to send as much data about your conversions as possible.
So if you haven’t already, follow the steps in this article to allow ClickMagick to capture visitor info:
How do I capture visitor info from forms on my site in ClickMagick?
TikTok only requires the addition of a visitor’s email address or phone number to achieve the best event matching they are capable of, and ClickMagick will automatically send this info with each conversion if it’s available.
Step 6 – Verify things are working correctly
In Audience Optimization, there’s a detailed log that you can use to verify things are working properly.
Once the log shows that conversions have been sent to TikTok successfully, wait a bit, then check your new TikTok Pixel in Events Manager to make sure it is receiving data from ClickMagick.
Use the TikTok Pixel Helper Chrome extension to confirm that your TikTok Pixel is only firing the PageView event and is not firing any conversion events from the browser.
Finally, in TikTok Events Manager, verify that your new server-side events are appearing under the Events API connection and that no unexpected browser-side conversion events are showing up.
Please note that while ClickMagick sends your conversions to TikTok in real time, TikTok may take anywhere from 15 minutes to several hours to display new events in Events Manager.
Article 929 Last updated: 11/27/2025 6:29:00 AM
https://www.clickmagick.com/kb/?article=929