|
Most landing page builders can fire a webhook when someone submits the form in a 2-step checkout but some of them are unable to pass the required s1 parameter.
The only way you can know if your landing page builder can do that is if you test it or ask them directly. If they can, follow the article below to set it up.
How do I track 2-step checkouts using webhooks?
In cases where this is not possible, you can use a tool like Zapier to achieve this goal.
We will use Systeme.io for this example.
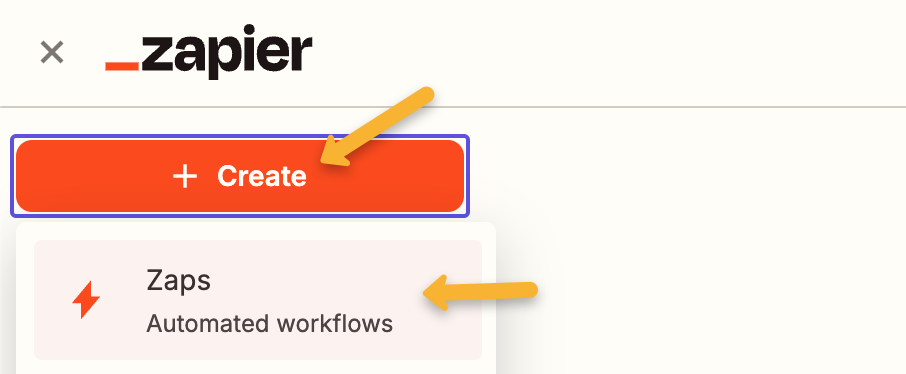
Step 1 – Create a Zap and Add a Trigger
In Zapier, click “Create”, then click “Zaps”.
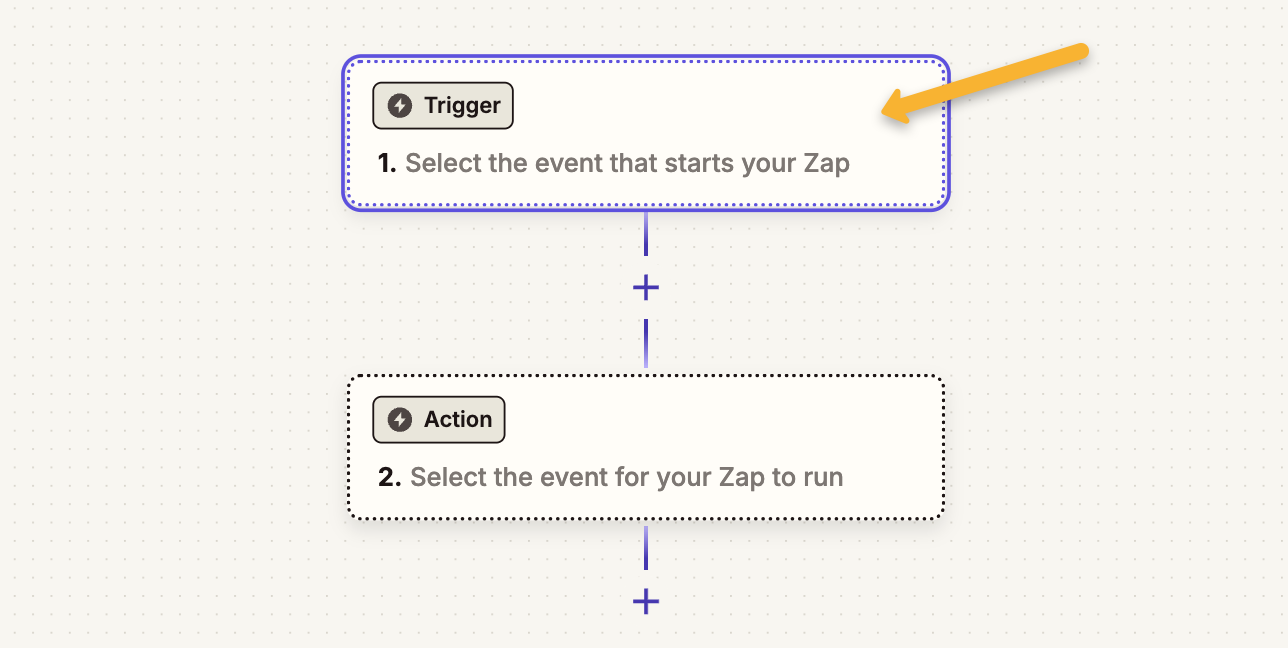
Next, we’re going to add a trigger. Click the “Trigger” area to add one.
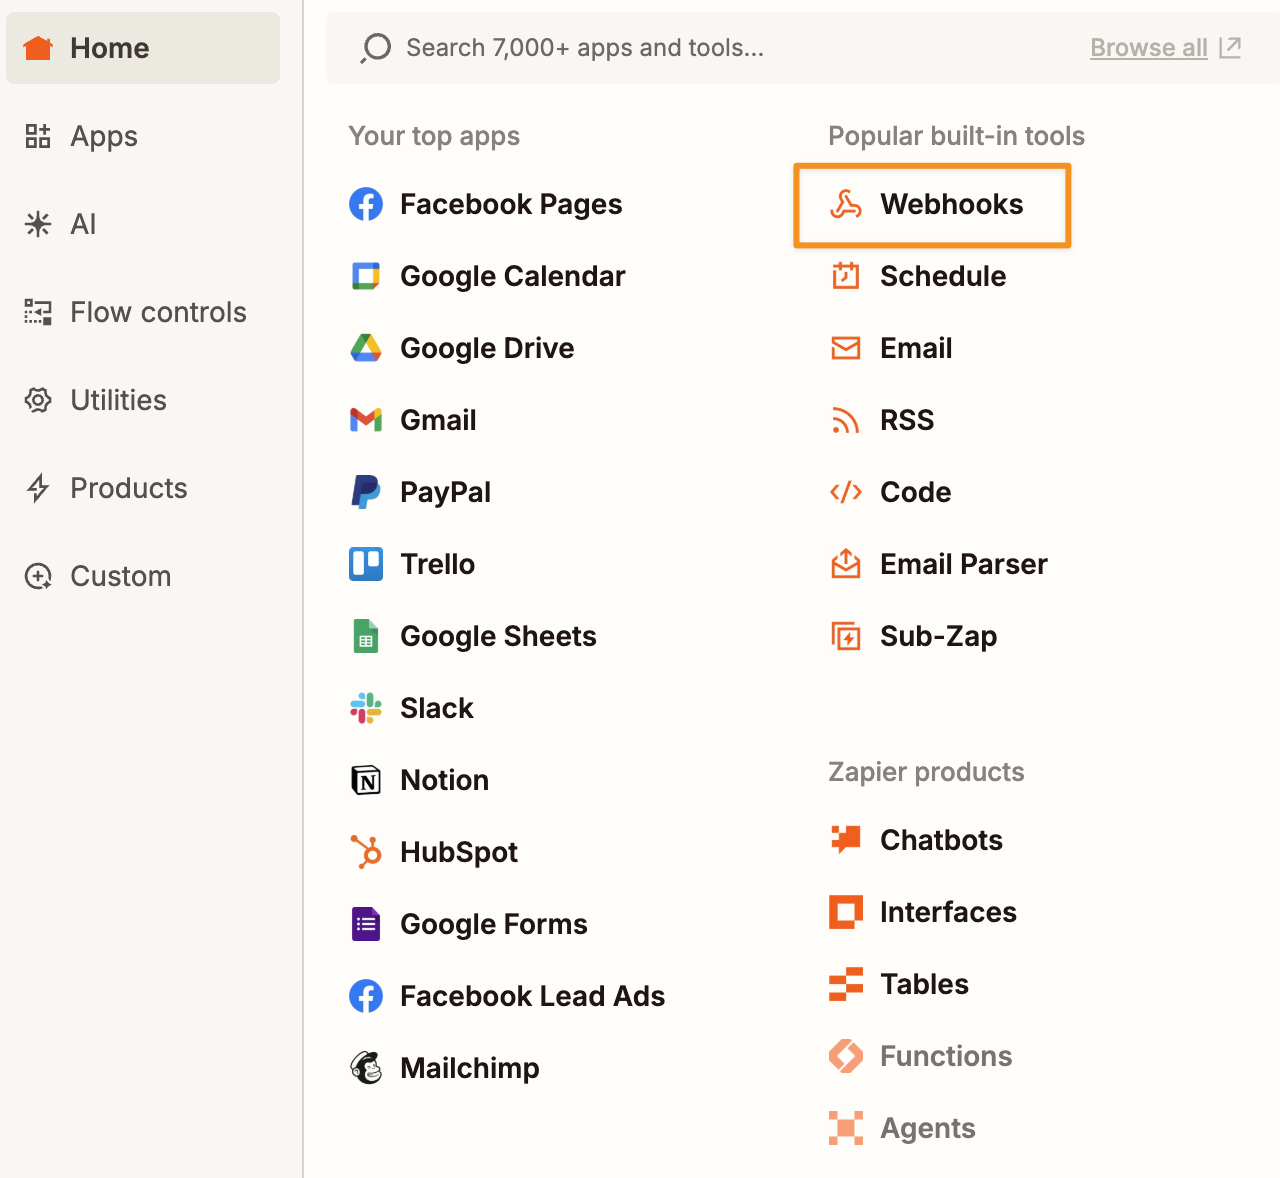
Select Webhooks as the trigger and “Catch Hook” as the trigger event.
Follow the the process until you get your Webhook URL. Copy this URL to your clipboard.
We also want to test the trigger by sending some data through it. This will be needed later on.
Click on the “Test trigger” button and fill the form yourself.
Step 2 – Create an Automation Rule in Systeme.io
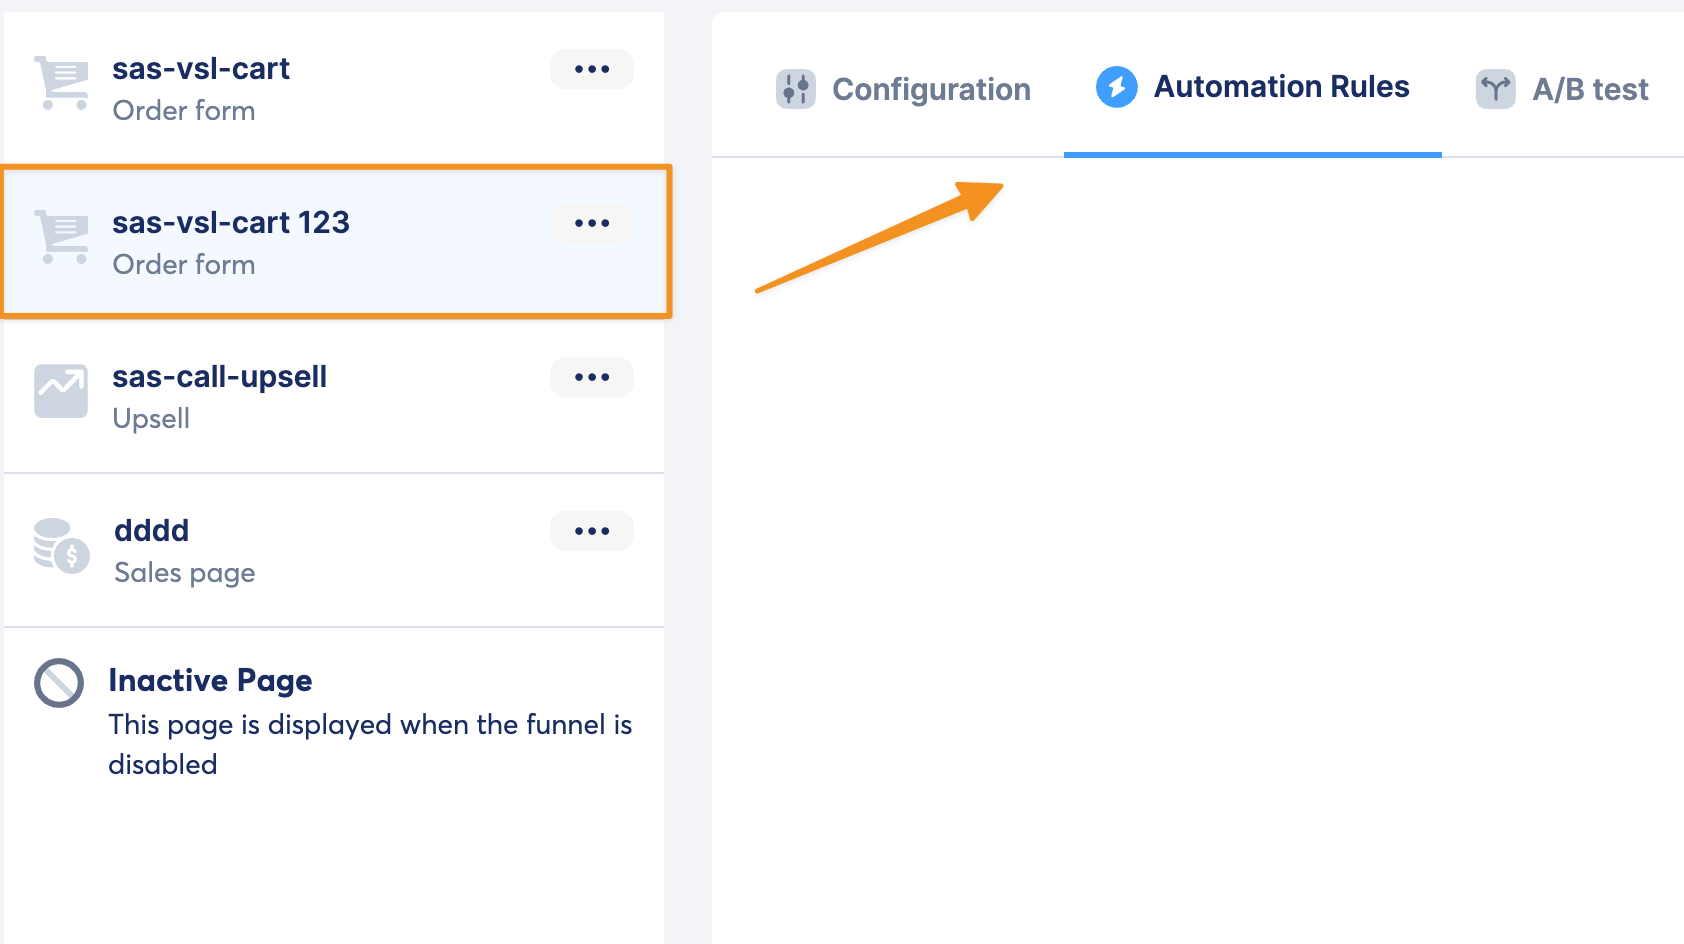
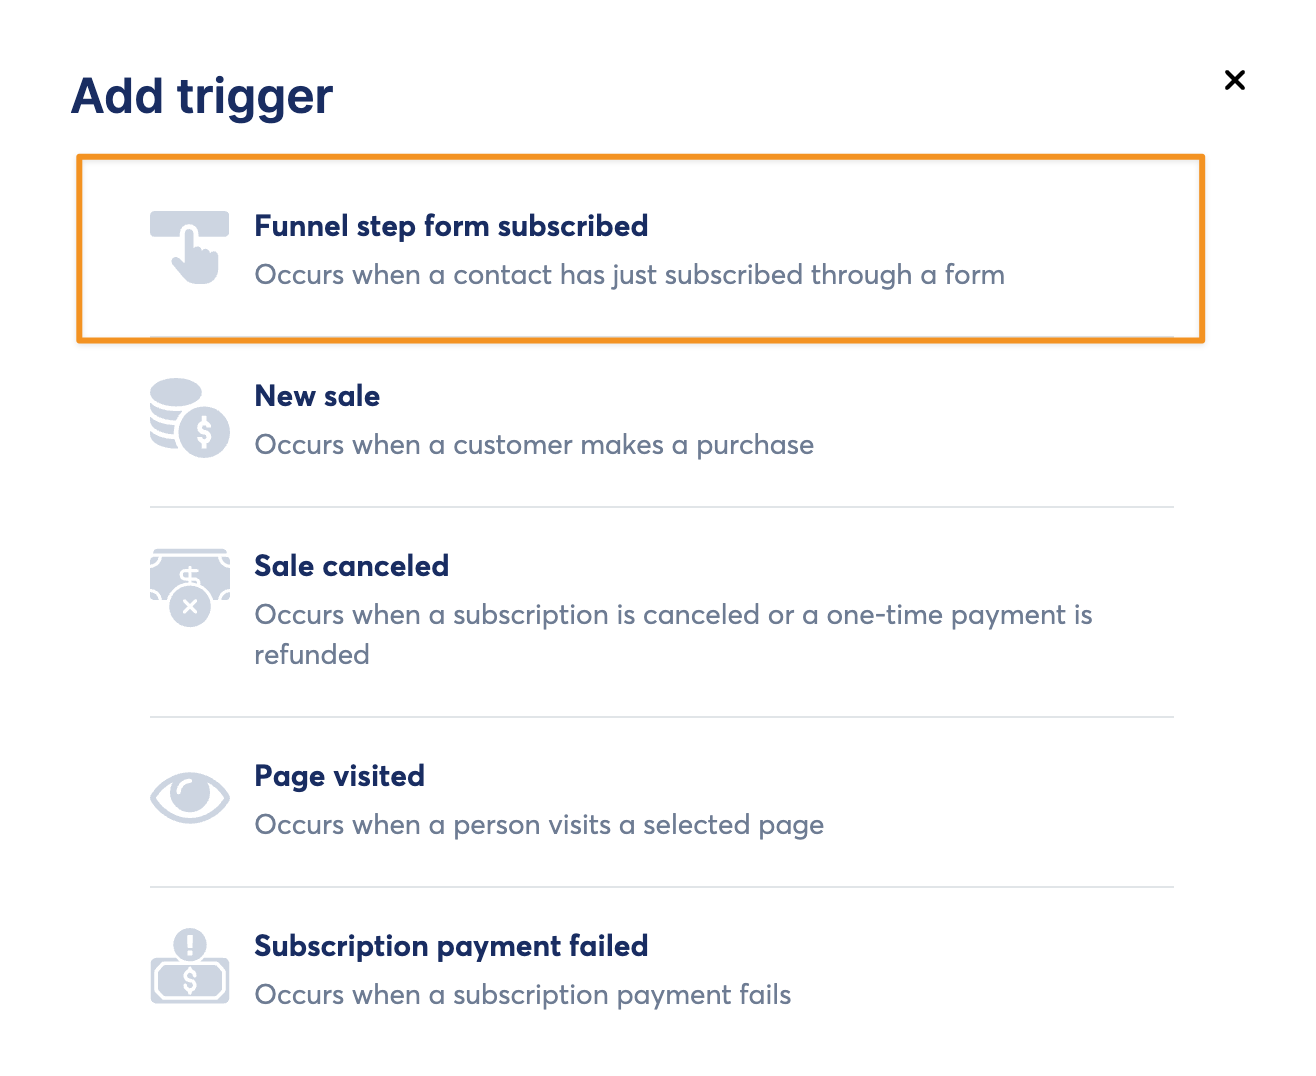
In your Systeme.io account, locate the funnel step where the conversion occurs, click on “Automation Rules” and add a new rule.
Select “Funnel step form subscribed” as the trigger.
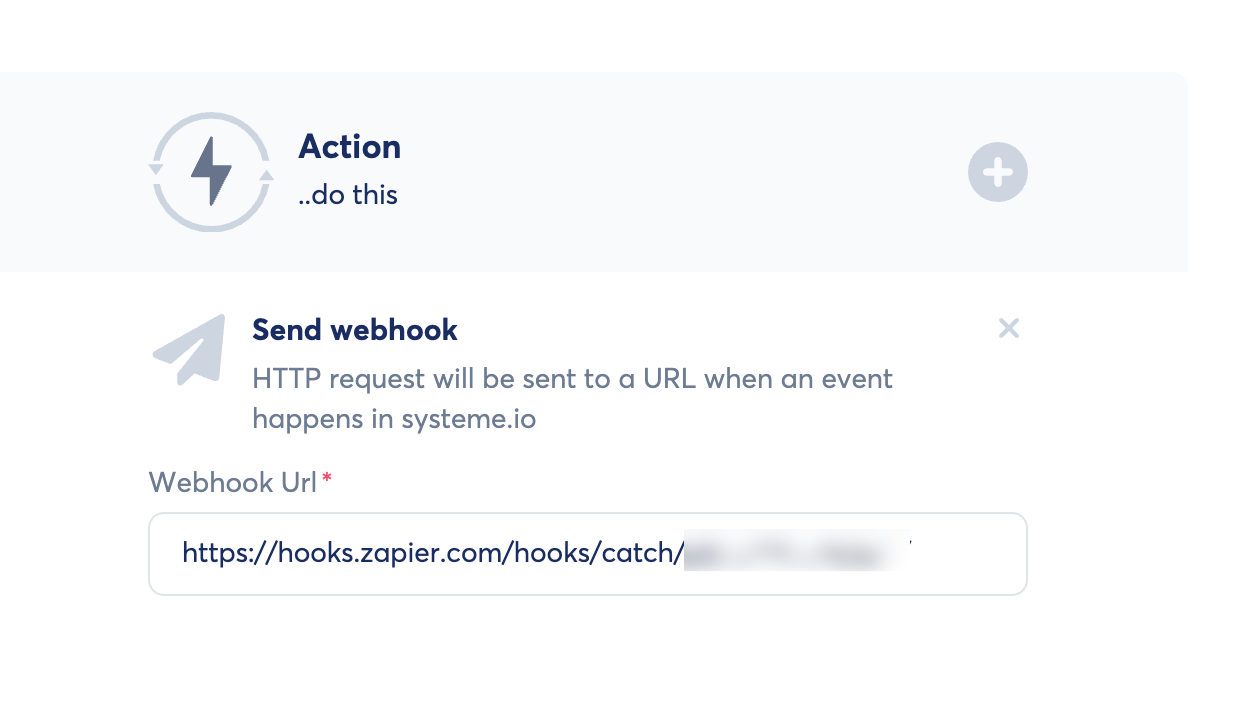
Select “Send Webhook” as the action, paste the URL from Zapier and save the rule.
Now, we also want to test the trigger in Zapier by sending some data through it.
Click on the “Test trigger” button and fill the 2-step form yourself.
Step 4 – Create an Action in Zapier
Select “Webhooks” and “GET” as the “Action event”.
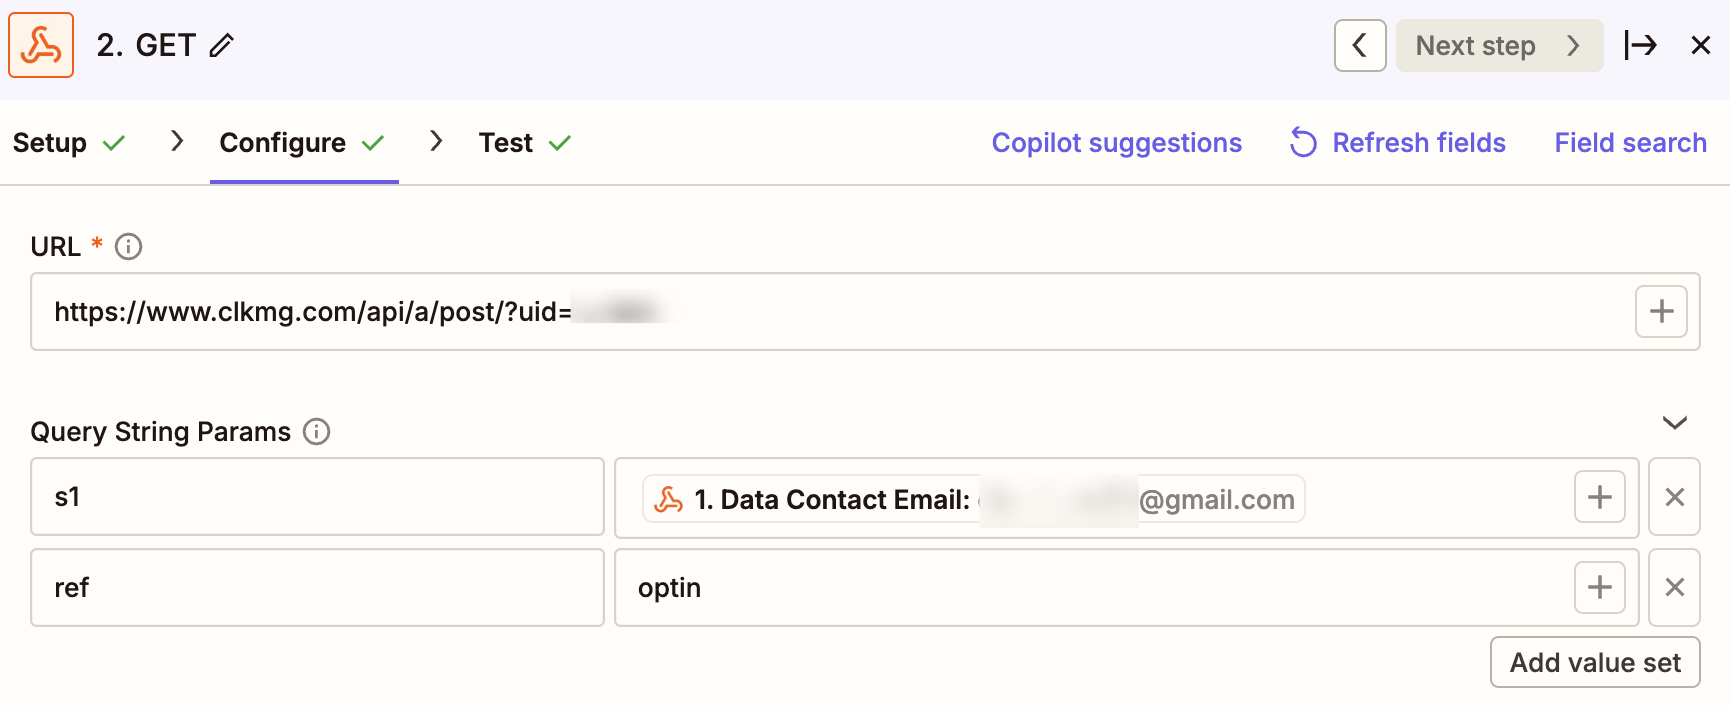
Depending on which conversion you want to track in ClickMagick, use one of the following URLs in the “URL” box:
| Actions | https://www.clkmg.com/api/a/post/?uid=[USERID] |
| Engagements | https://www.clkmg.com/api/e/post/?uid=[USERID] |
Next, under “Query String Params”, enter
s1 into the first box. Then click the “+” icon next to “Enter text or insert data”.Select the customer email address from whatever app you’re using.
Next, click on “+ Add value set” and add in
ref in the left hand box. In the “Enter text or insert data” box, enter what the conversion is. For example, if it’s a lead conversion, you can enter
lead or optin.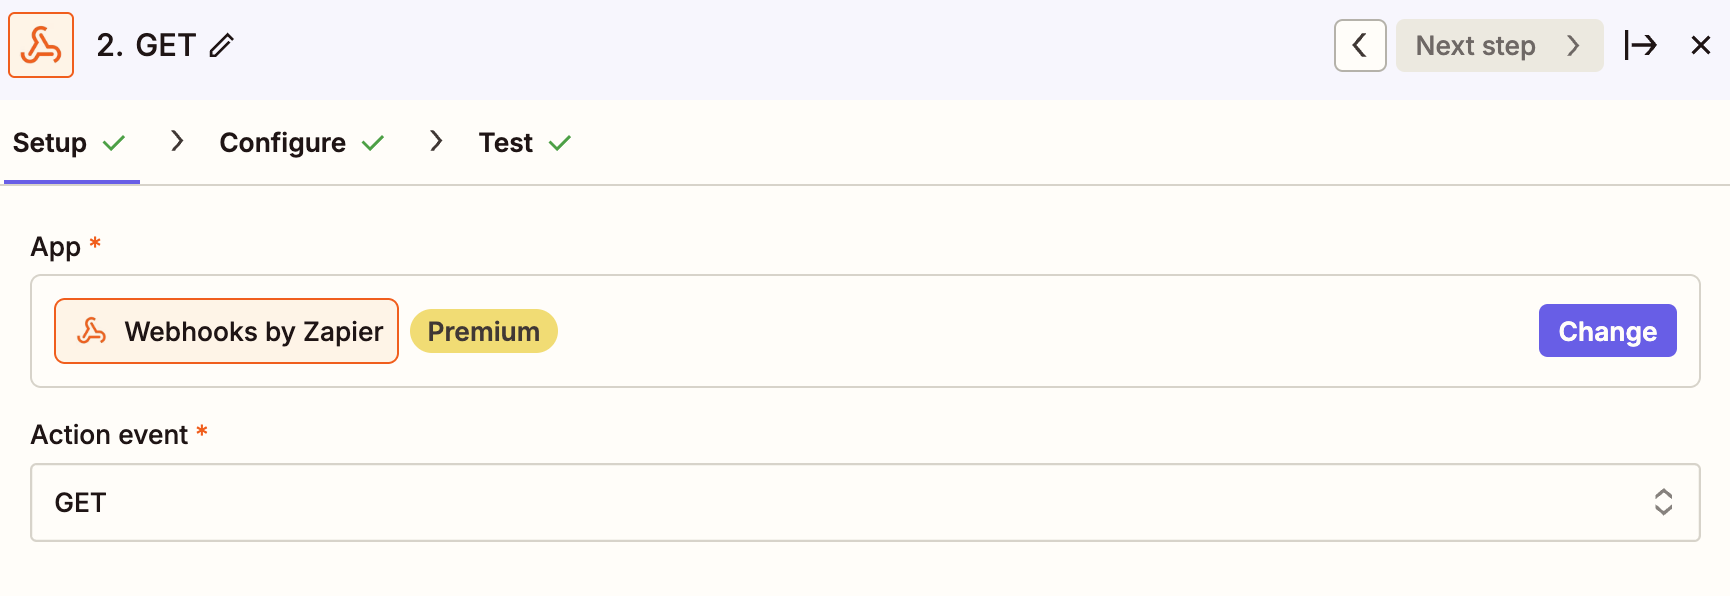
Finally, test and save your Zap and that’s it! Your 2-step checkout form submissions will automatically be sent to ClickMagick.
Article 1033 Last updated: 08/25/2025 12:22:15 AM
https://www.clickmagick.com/kb/?article=1033