How do I set up a brand new domain for Smart Links and Rotators?
Custom tracking domains allow you to use any domain you want for your Smart Links and Rotators.
And, if you want to do any social media or email marketing with Smart Links, setting up a custom tracking domain is required – because you can’t use our generic clkmg.com and clkmr.com tracking domains for either of those things.
But, even if you’re not doing social media or email marketing, you may still want to use custom tracking domains for the “branding” and other benefits they provide.
This article shows you step by step exactly how to set it up …
Note: We strongly recommend buying an entirely new domain to be used only for tracking as this is safer for you and much simpler to set up.
Setting up a custom tracking domain requires modifying the domain’s DNS records. If you do this incorrectly for a domain already pointing to an existing website, you could temporarily break your website.
With all that being said, please select whether you will use a new domain or if you want to use an existing domain ...
The following guides help you through the steps required to set up your custom tracking domain if you bought a brand new domain:
Note: If you bought a brand new domain, you do not need to follow the steps outlined in the “I’m using an existing domain” tab.
RECOMMENDED: How To Set Up A Secured Custom Domain In CloudFlare
1. Log in to CloudFlare (or create a new account if you have not already).
2. If you are buying a new domain, choose the “Buy Domains” option in CloudFlare and search for the domain you want, then follow the process to purchase.
3. If you use an existing domain, locate the domain you want to use and click on it.
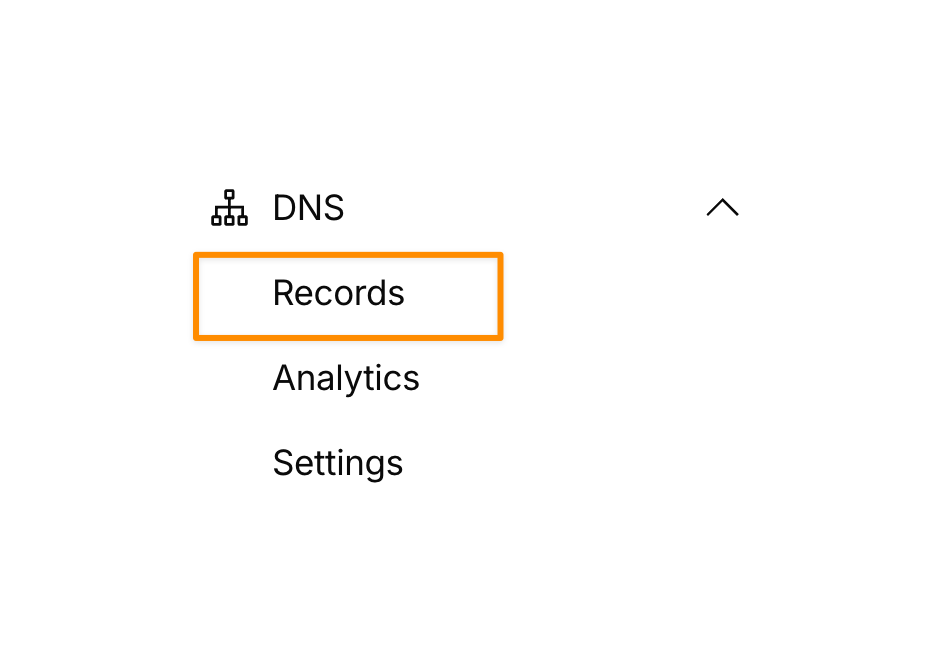
4. Click on "DNS" in the menu on the left and then “Records”.
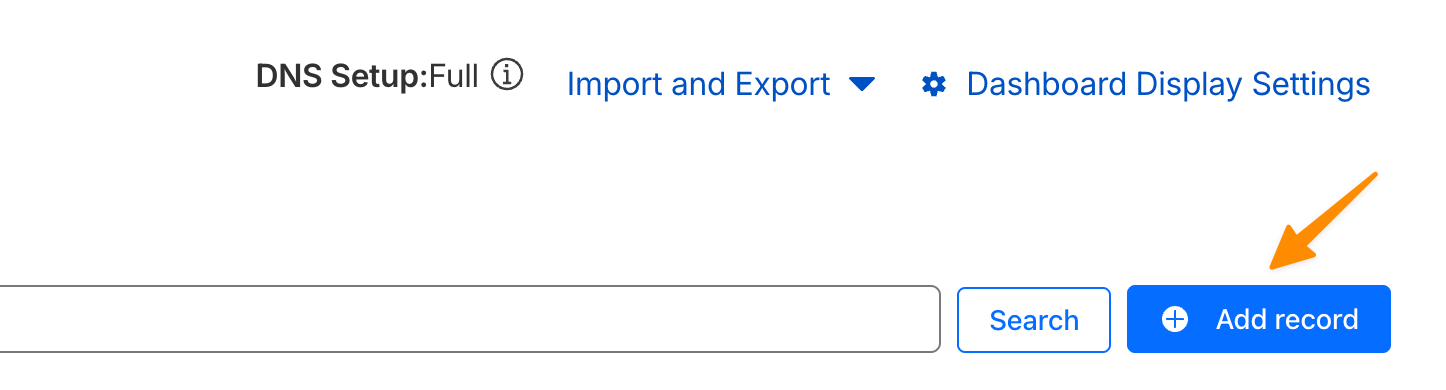
5. Click “Add Record” to add a new record.
6. Choose “A” as the record type, use the @ symbol for the name, and put in the appropriate IP address as the value (listed below in this article) for which type of tracking domain you are using, whether that is Rotators or Tracking.
7. Click Save.
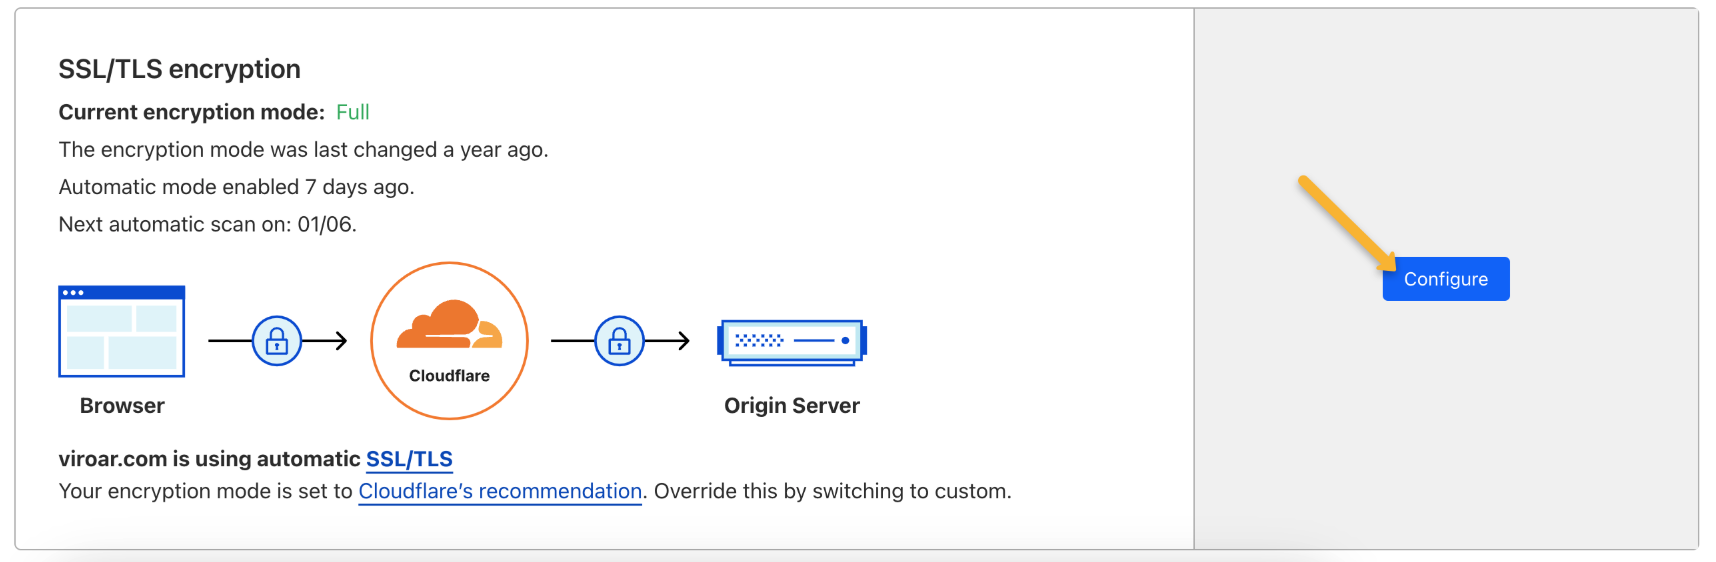
8. Click on “SSL/TLS” and then on “Overview”.
9. Click on “Configure” next to “SSL/TLS encryption”.
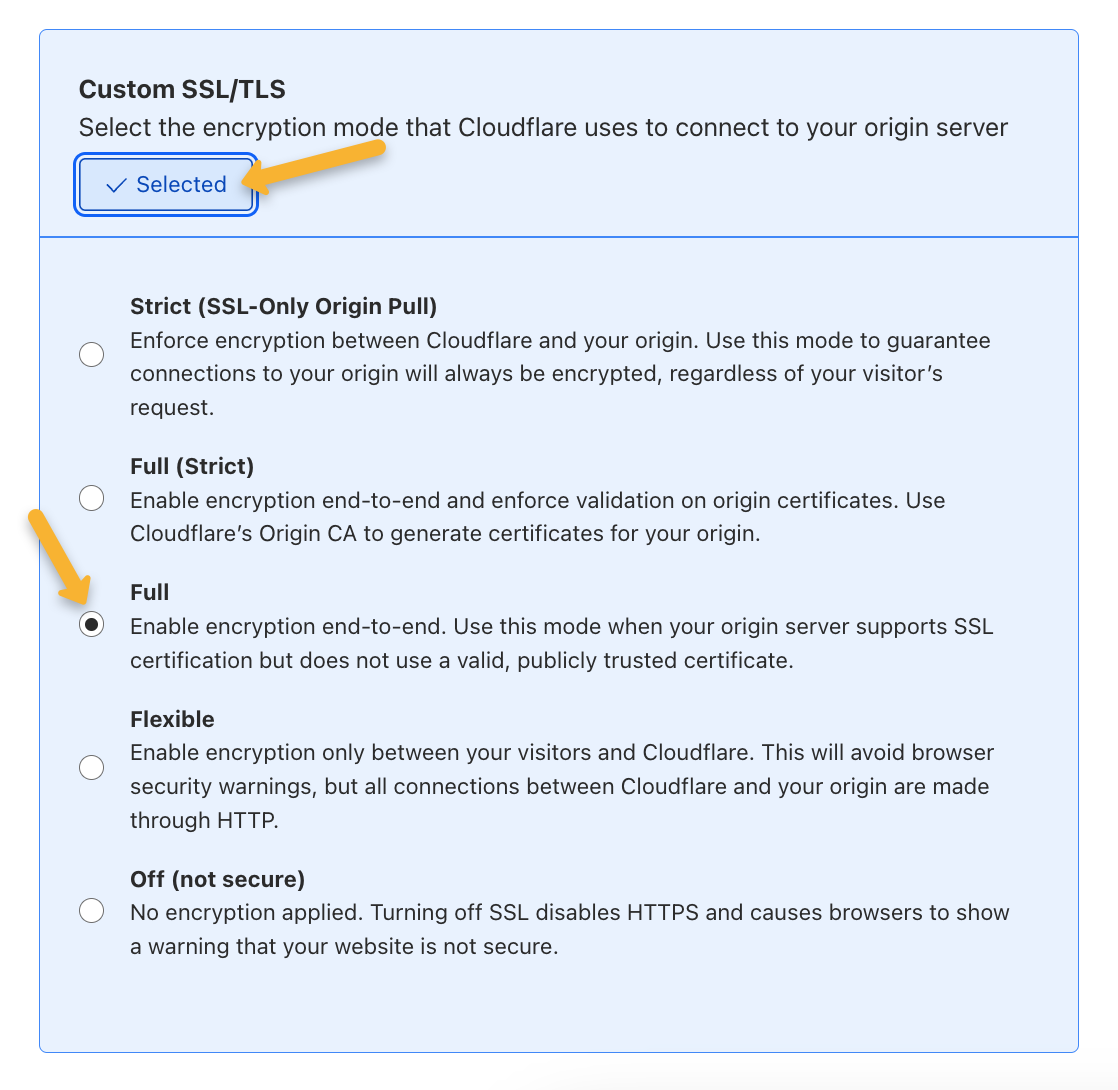
Select “Custom SSL/TLS”, then “Full” and save your changes.
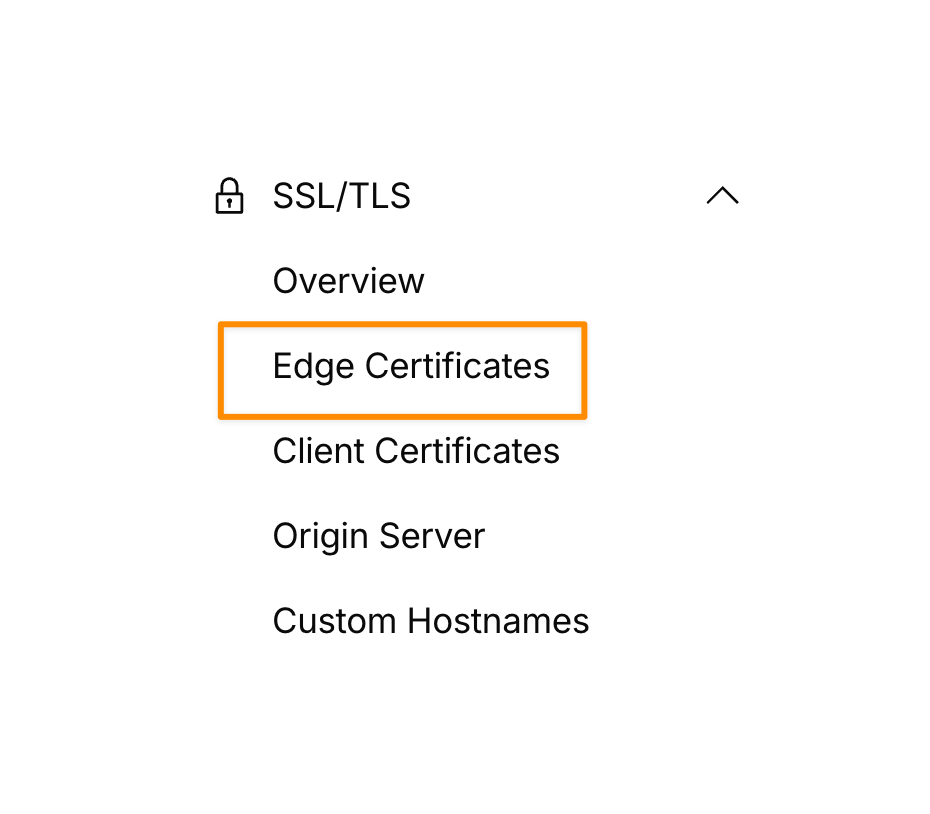
10. Click on the “Edge Certificates" section.
Ensure that “Always Use HTTPS” is on.
11. Now, your domain is ready. You can use the link below to go to the domain manager and add your new domain to your account.
Note: When adding your new domain to ClickMagick, choose “CNAME DNS or A Record" for the setup option, and choose the appropriate “For Use With" option based on which IP address you used when setting up your DNS in your registrar.
How To Set Up A Secured Custom Domain In Namecheap
1. Log in to CloudFlare (or create a new account if you have not already).
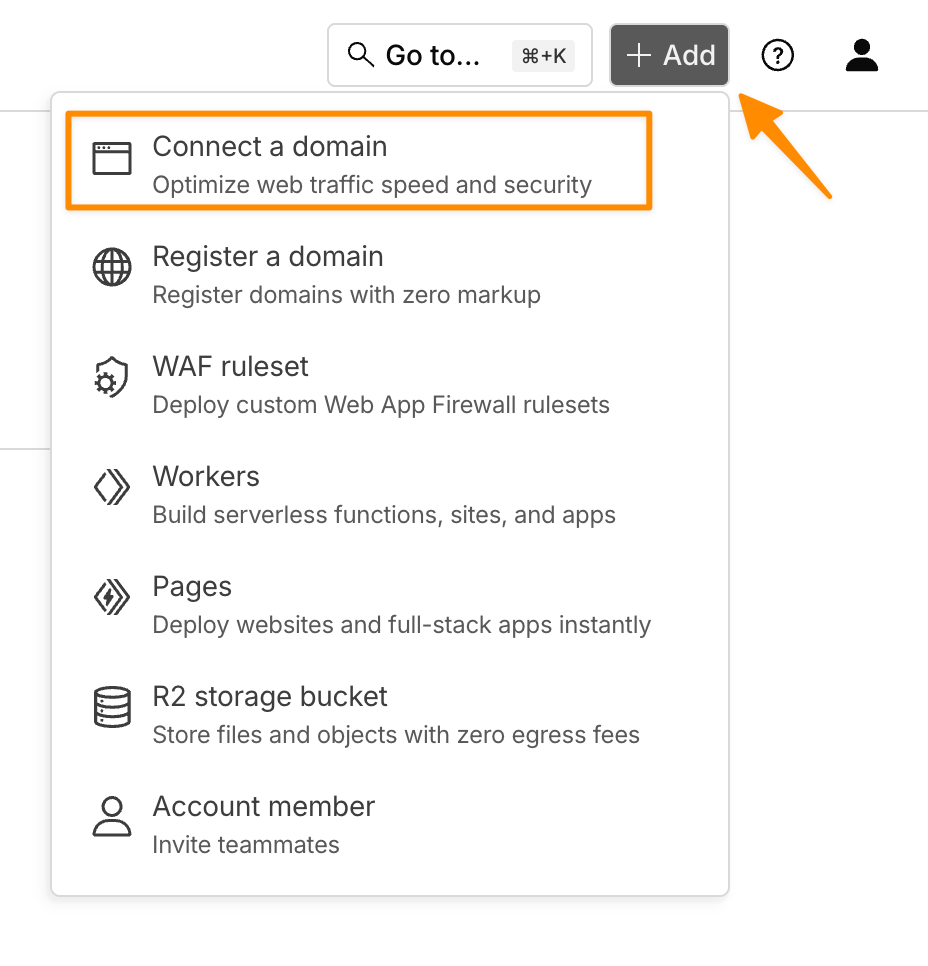
2. Click On "Connect Domain" in the top right of the page.
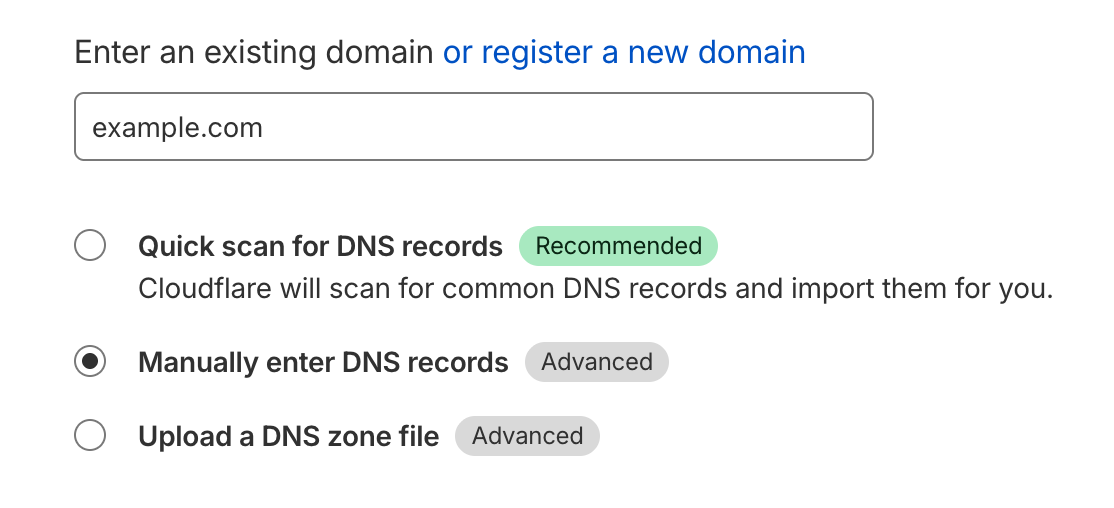
3. Enter the domain name and select “Manually enter DNS records”
4. Select the free plan when prompted and then find the record that shows type "A” with the name that matches your domain name.
5. Replace the content of that record with the appropriate IP address you want to use (found below in this article), whether for use with Smart Links or Rotators.
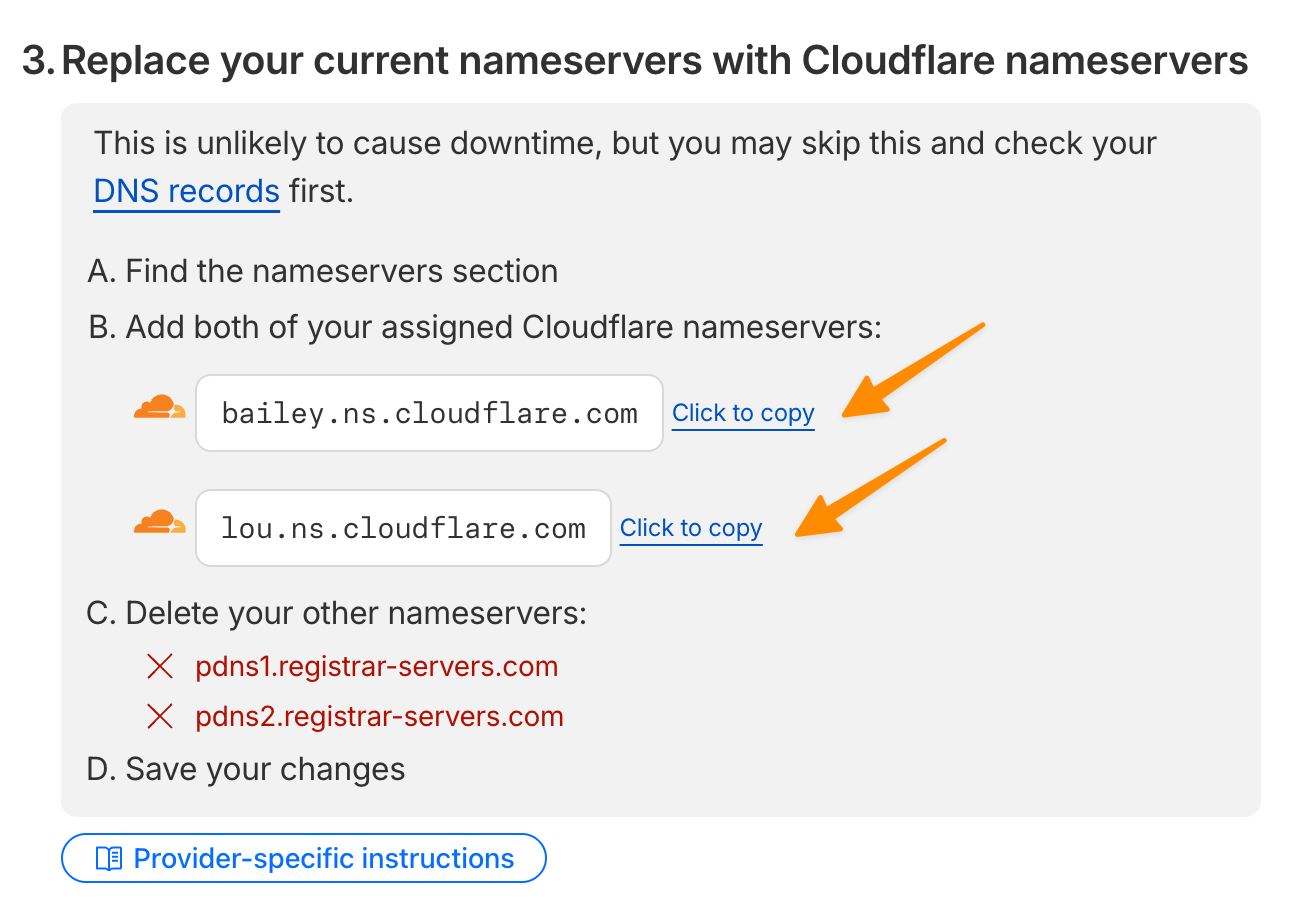
6. Next, you will see a prompt to update your nameservers. Copy the CloudFlare name servers…
Go back to Namecheap, manage the domain you're setting up here, and change the Nameservers setting from “Namecheap Basic DNS" to “Custom DNS”.
Add the nameservers from CloudFlare and click the green check mark to save the settings:
7. Back in CloudFlare, click on “SSL/TLS” and then on “Overview”.
8. Click on “Configure” next to “SSL/TLS encryption”.
Select “Custom SSL/TLS”, then “Full” and save your changes.
9. Click on the “Edge Certificates" section.
Ensure that “Always Use HTTPS” is on.
11. Once your domain is confirmed to be connected to CloudFlare, go to the Domain Manager in ClickMagick to add your custom domain.
1. Log in to CloudFlare (or create a new account if you have not already).
2. Click On "Connect Domain" in the top right of the page.
3. Enter the domain name and select “Manually enter DNS records”
4. Select the free plan when prompted and then find the record that shows type "A” with the name that matches your domain name.
5. Replace the content of that record with the appropriate IP address you want to use (found below in this article), whether for use with Smart Links or Rotators.
6. Next, you will see a prompt to update your nameservers. Copy the CloudFlare name servers…
7. Go back to GoDaddy > My Products and go to the DNS settings of the domain you are using here
8. Scroll down on the page until you see the section for nameservers, then click the button to change the nameservers.
9. Click the link that says, “Enter my own nameservers (advanced)”
10. Add the nameservers you copied from CloudFlare and click Save
11. Now, go back to CloudFlare and continue the setup process.
12. Back in CloudFlare, click on “SSL/TLS” and then on “Overview”.
13. Click on “Configure” next to “SSL/TLS encryption”.
Select “Custom SSL/TLS”, then “Full” and save your changes.
14. Click on the “Edge Certificates" section.
Ensure that “Always Use HTTPS” is on.
15. Once your domain is confirmed to be connected to CloudFlare, go to the Domain Manager in ClickMagick to add your custom domain.
How To Set Up A Secured Custom Domain In Hostgator
1. Log in to CloudFlare (or create a new account if you have not already).
2. Click On "Connect Domain" in the top right of the page.
3. Enter the domain name and select “Manually enter DNS records”
4. Select the free plan when prompted and then find the record that shows type "A” with the name that matches your domain name.
5. Replace the content of that record with the appropriate IP address you want to use (found below in this article), whether for use with Smart Links or Rotators.
6. Next, you will see a prompt to update your nameservers. Copy the CloudFlare name servers…
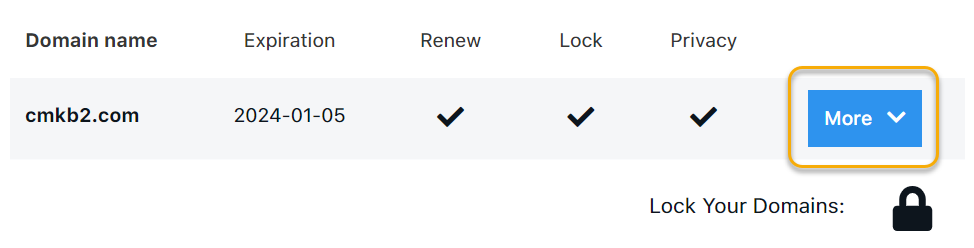
7. Head back to Hostgator and click on the More button next to the domain you are using
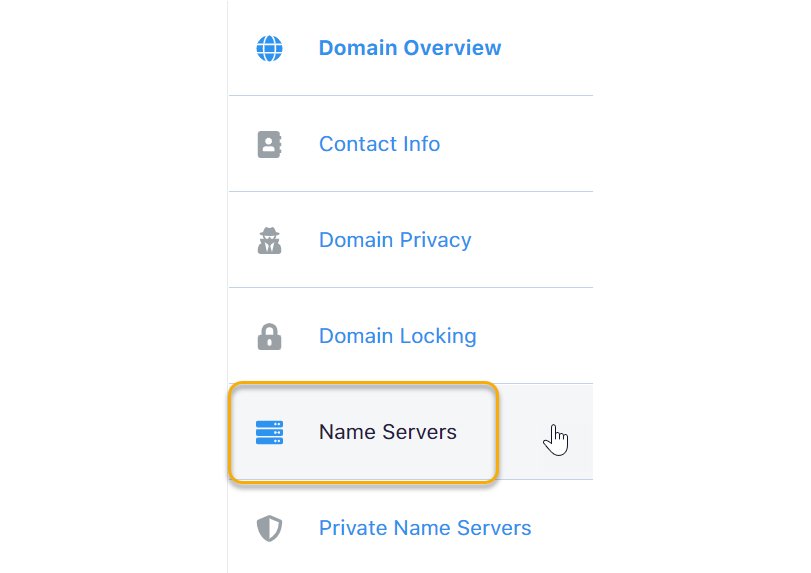
8. Click on the option for “Name Servers” on the left-hand menu (you may have to hover your mouse over the menu to show the names)
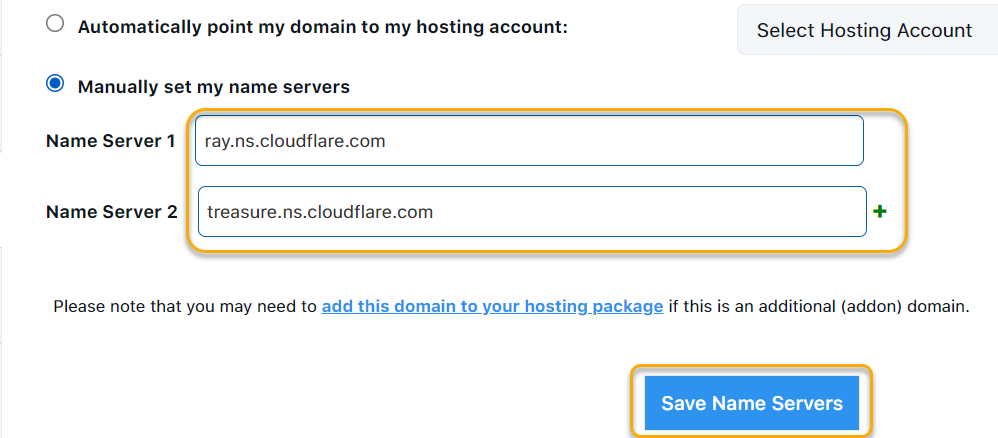
9. Make sure the option for “Manually set my name servers” is selected and update the name servers to what you already copied from CloudFlare, then save your changes.
10. Now, go back to CloudFlare and continue the setup process.
12. Back in CloudFlare, click on “SSL/TLS” and then on “Overview”.
13. Click on “Configure” next to “SSL/TLS encryption”.
Select “Custom SSL/TLS”, then “Full” and save your changes.
14. Click on the “Edge Certificates" section.
Ensure that “Always Use HTTPS” is on.
15. Once your domain is confirmed to be connected to CloudFlare, go to the Domain Manager in ClickMagick to add your custom domain.
1. Log in to CloudFlare (or create a new account if you have not already).
2. Click On "Connect Domain" in the top right of the page.
3. Enter the domain name and select “Manually enter DNS records”
4. Select the free plan when prompted and then find the record that shows type "A” with the name that matches your domain name.
5. Replace the content of that record with the appropriate IP address you want to use (found below in this article), whether for use with Smart Links or Rotators.
6. Next, you will see a prompt to update your nameservers. Copy the CloudFlare name servers…
7. Head back to Bluehost and click on the Manage button next to the domain you are using here.
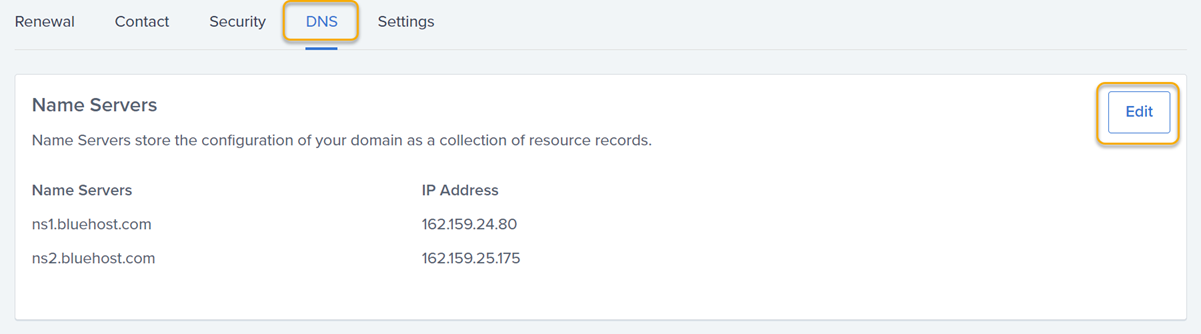
8. Click the DNS menu option and then the “Edit” button to update the name servers.
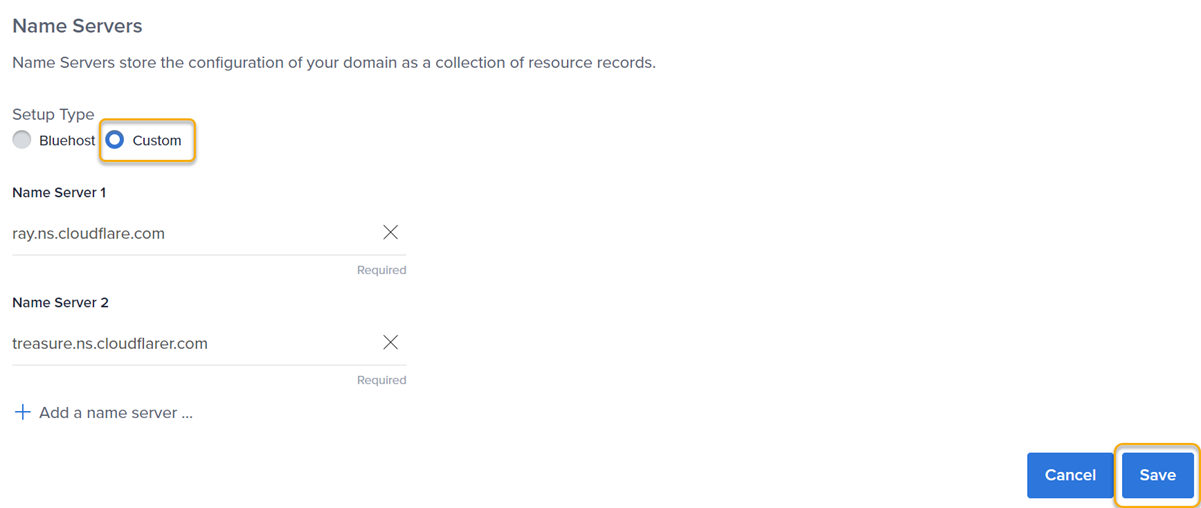
9. Change the setup type to “Custom”, update the name servers to those you copied from CloudFlare, and then save your changes.
10. Now, go back to CloudFlare and continue the setup process.
11. Back in CloudFlare, click on “SSL/TLS” and then on “Overview”.
12. Click on “Configure” next to “SSL/TLS encryption”.
Select “Custom SSL/TLS”, then “Full” and save your changes.
13. Click on the “Edge Certificates" section.
Ensure that “Always Use HTTPS” is on.
14. Once your domain is confirmed to be connected to CloudFlare, go to the Domain Manager in ClickMagick to add your custom domain.
How To Set Up A Secured Custom Domain In Siteground
1. Log in to CloudFlare (or create a new account if you have not already).
2. Click On "Connect Domain" in the top right of the page.
3. Enter the domain name and select “Manually enter DNS records”
4. Select the free plan when prompted and then find the record that shows type "A” with the name that matches your domain name.
5. Replace the content of that record with the appropriate IP address you want to use (found below in this article), whether for use with Smart Links or Rotators.
6. Next, you will see a prompt to update your nameservers. Copy the CloudFlare name servers…
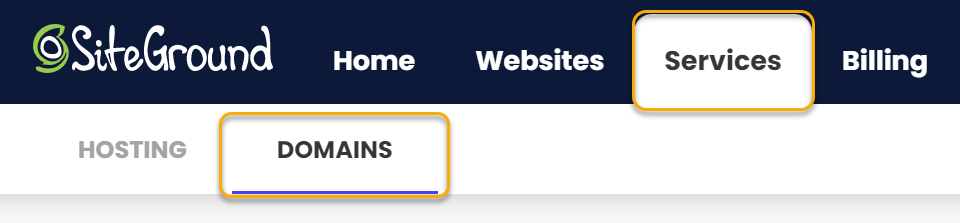
7. Head back to Siteground, go to the Services menu, and click “Domains".
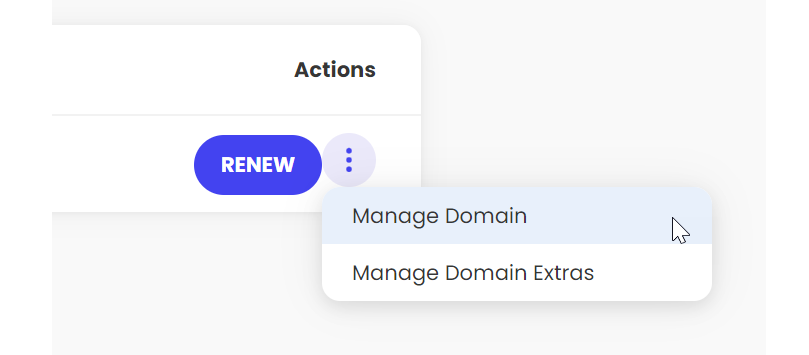
8. From there, click on the three dots next to the domain and choose “Manage Domain”
9. Click “Manage Nameservers” on the right-hand side, update your name servers to what you copied from CloudFlare, and then confirm your changes.
10. Now, go back to CloudFlare and continue the setup process.
11. Back in CloudFlare, click on “SSL/TLS” and then on “Overview”.
12. Click on “Configure” next to “SSL/TLS encryption”.
Select “Custom SSL/TLS”, then “Full” and save your changes.
13. Click on the “Edge Certificates" section.
Ensure that “Always Use HTTPS” is on.
14. Once your domain is confirmed to be connected to CloudFlare, go to the Domain Manager in ClickMagick to add your custom domain.
Here are the IP Addresses you can use for Smart Links and Rotators:
For Smart Links use:
13.248.180.39
For Rotators use:
13.248.160.45
Note: Do not use both IP addresses when setting up a single custom domain. The Smart Links or Rotators features will not work correctly if you do. If you want a custom domain for each feature, you need to either use different domains entirely (e.g., mytracking.com and myrotating.com) or use separate subdomains of the same domain (e.g. track.mydomain.com and rotator.mydomain.com).
How to Add the Custom Tracking Domain to ClickMagick
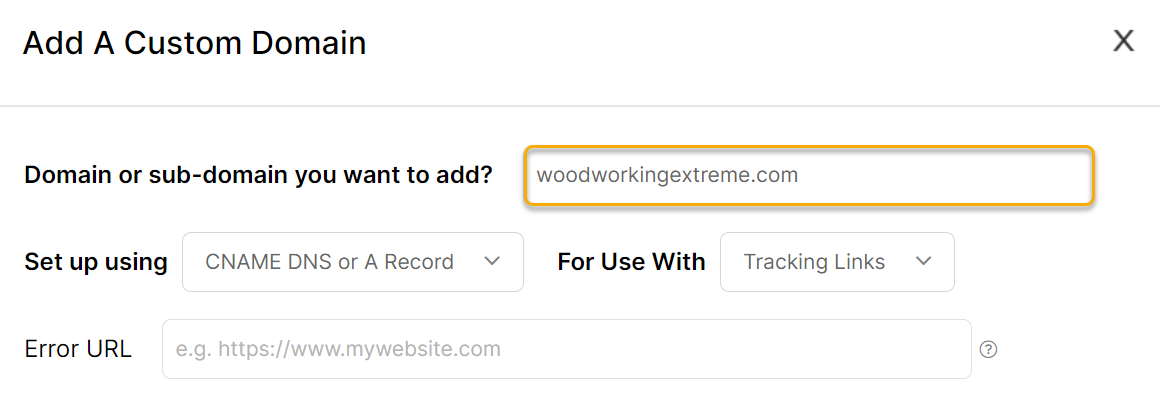
Click on Domain Manager in the Tools menu inside Smart Links and click on the New Domain button.
Enter your root domain (without any subdomain or the https):
Just use the default options for now and save your changes.
You can always change your domain settings using the Domain Manager.
Note: You might be unable to add your domain to ClickMagick immediately. This is because it can take anywhere from 1 to 24 hours for the DNS records to propagate. If you are having problems adding your new custom domain, give it some time and return later to try again.
How to Add Your New Domain to Your Links or Rotators
To learn how to set up Smart Links or Rotators in the first place, review the articles linked below.
To add a new domain to a Smart Link (whether you are creating one or editing one), click on the dropdown menu next to “Smart Link” and choose the new domain:
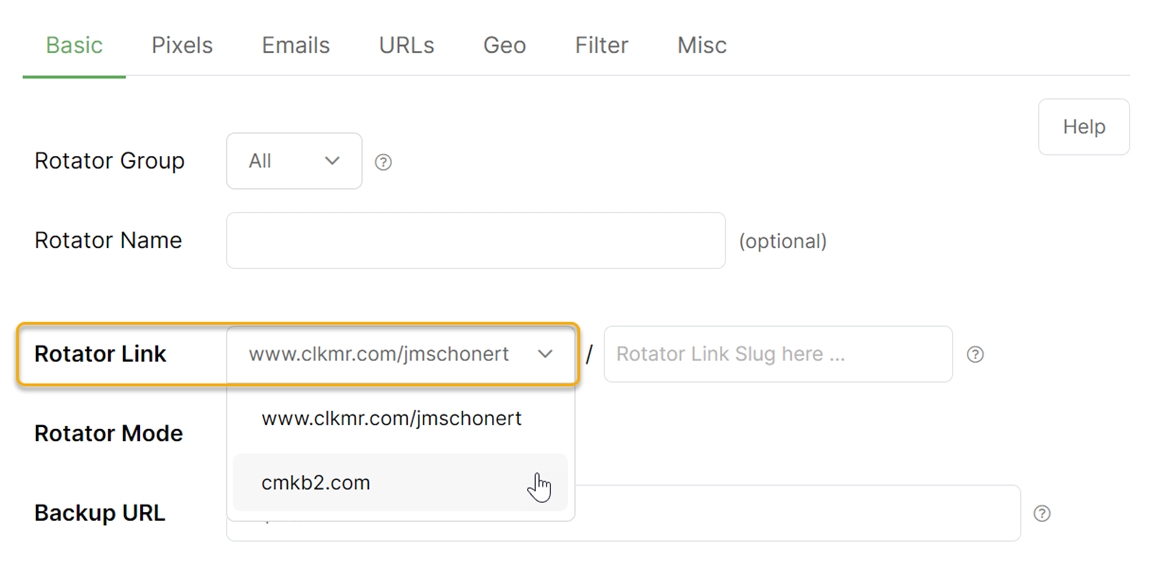
To add a new custom domain to your rotator (whether you are creating one or editing one), click on the dropdown menu next to “Rotator Link" and choose the new domain:
And that’s it! You now have a custom domain ready to use with your Smart Links or Rotators with ClickMagick!
Article 1058 Last updated: 11/13/2025 1:15:06 AM https://www.clickmagick.com/kb/?article=1058