|
What is Audience Optimization and how do I use it?
Audience Optimization sends your accurate, first-party conversion data back to the ad networks you advertise on in real-time. Without it, they’re optimizing with bad data — so Audience Optimization helps their algorithms work smarter, bringing you more high-quality customers at the lowest possible cost.
This is what's often called a "Conversions API" or "CAPI" integration — but on steroids. Unlike a basic CAPI setup, Audience Optimization gives you unmatched flexibility to feed and manage unlimited datasets or pixels, with advanced rules that let you do things no other system can.
Before setting this up, please read the short article below to understand the general strategy:
Unlock Better Ad Optimization with Audience Optimization
To set up Audience Optimization, just follow the step-by-step guides below:
How do I set up Audience Optimization for Facebook Ads?
How do I set up Audience Optimization for Google Ads?
How do I set up Audience Optimization for LinkedIn Ads?
How do I set up Audience Optimization for Microsoft Ads?
How do I set up Audience Optimization for TikTok Ads?
Once you’ve verified that conversions are being sent successfully to your ad network, you’ll want to “season” your new pixel or dataset before using it for ad optimization ...
“Season” Your New Pixel or Dataset
Making the switch to a new pixel that has only accurate data is a very smart move, but it does require “starting over” for optimization purposes. So for the best performance you’ll want to “season” this new pixel a bit before using it.
To be clear – we recommend that you do NOT start using this new pixel or dataset for ad optimization right away. If you do, you’ll almost certainly see a temporary drop in ad performance due to a lack of data.
Instead, simply allow ClickMagick to send your accurate conversion data to your new pixel or dataset for awhile. This will “season” your pixel and allow your ad network’s AI to figure out what your ideal customer looks like.
We can’t tell you exactly how long to season your new pixel as it really depends on the number of conversions you get per day, your audience and many other factors …
The short answer is “the longer the better,” but we suggest waiting at least a week or two and then you can go ahead and test your new pixel’s performance by using it to optimize a single campaign, a single ad set, or even one specific ad.
If things don’t go great that generally means you need to send your ad network more data to work with, so stop using the new pixel or dataset for a bit, let ClickMagick send more data, and then try it again in a week or so.
Once you’re happy with the performance of your new pixel you can go ahead and apply it to your other campaigns.
Use Your New Pixel or Dataset for Ad Optimization
Once you’ve seasoned your new pixel you’ll be ready to optimize your ads like you’ve never been able to do before.
If you're not sure how to start using the new pixel to optimize your ads, follow the article below:
How do I optimize my ads using my new ClickMagick pixel?
In addition to the configuration within Audience Optimization itself, there are a few additional settings you should be aware of which can be found by clicking the Settings button next to your Project name …
Send Conversions With No Click ID
ClickMagick automatically sends your conversions back to your ad networks based on the ad network Click ID associated with the initial click that led to a particular sale.
If you enable this setting, ClickMagick will instead attempt to send all of your non-organic conversions back to all of the ad networks you’ve integrated with.
*** See below for requirements to trigger sending a conversion to each ad networkSend Organic Conversions
You can turn this on if you want ClickMagick to also send “organic” sales to your ad networks.
While these sales generally aren’t associated with a specific ad, some marketers believe that the more sales you send back to your ad network, the better the ad network can find you more new customers like them.
If you enable this setting, ClickMagick will attempt to send all of your organic conversions back to all of the ad networks you’ve integrated with.
*** See below for requirements to trigger sending a conversion to each ad networkMinimum Sale Amount
If you specify an optional Minimum Sale Amount, sales below this amount won’t be sent to your ad networks.
Note that this will apply to all of your Projects, and all of your ad networks, and the amount will be treated as being in the currency of the Project where the sale occurred.
If you need more control e.g. you want to set different Minimum Sale Amounts for different Projects, you should not use this feature. Instead you should set up Audience Optimization Advanced Rules on a per-project basis to send sales below any particular amount to a “dead” pixel you don’t use.
Send by Sale Type
By default Audience Optimization will send all types of sales to your ad network. But if you don’t want to send certain types of sales you can simply disable the toggle next to the type of sale you don’t want to send.
Requirements to Trigger Sending Conversions
Facebook – For a conversion to be sent to Facebook, one of these values must be present for the visitor in ClickMagick:
fbclid, email, first name, last name, phone, mobile, date of birth, gender, city, state/province, postal code, countryGoogle – By default, for a conversion to be sent to Google the originating click must have a
gclid or wbraid. If Enhanced Conversions are enabled in Google, email, phone or mobile can be used in place of a Google Click ID.Microsoft – By default, for a conversion to be sent to Microsoft Ads the originating click must have a
mscklid. If Enhanced Conversions are enabled in Microsoft Ads, email, phone or mobile can be used in place of a Microsoft Click ID.TikTok – For a conversion to be sent to TikTok, at least one of the following values must be present for the visitor in ClickMagick:
ttclid, email, phoneYou’ll almost always see fewer conversions reported in your ads manager than the total number of events ClickMagick sends via Audience Optimization. This is normal and expected. Here’s why:
1. Your ads manager reporting only shows the events it can match back to a specific ad click or view within your attribution window (for example, 7-day click or 1-day view). This requires the ad network Click ID, which not all clicks have, and any unmatched or out-of-window events are simply not shown in your ads manager stats.
2. Some events are deduplicated or filtered. If the same person triggers the same event more than once in a short period, or if Meta thinks a match is low-quality or incomplete, it may merge or discard those extra events in reporting.
But even though your ads manager only reports attributed events, they still receive every valid event ClickMagick sends. And all of these events are included in the overall signal they use to improve audience targeting and optimization.
So seeing fewer conversions in your ads manager stats does not mean data is missing – it just reflects the difference between event ingestion and event attribution.
To be clear, you really shouldn’t even be looking at the stats you see in your ads manager.
Read this to learn why:
The Important Difference Between Attribution and Optimization
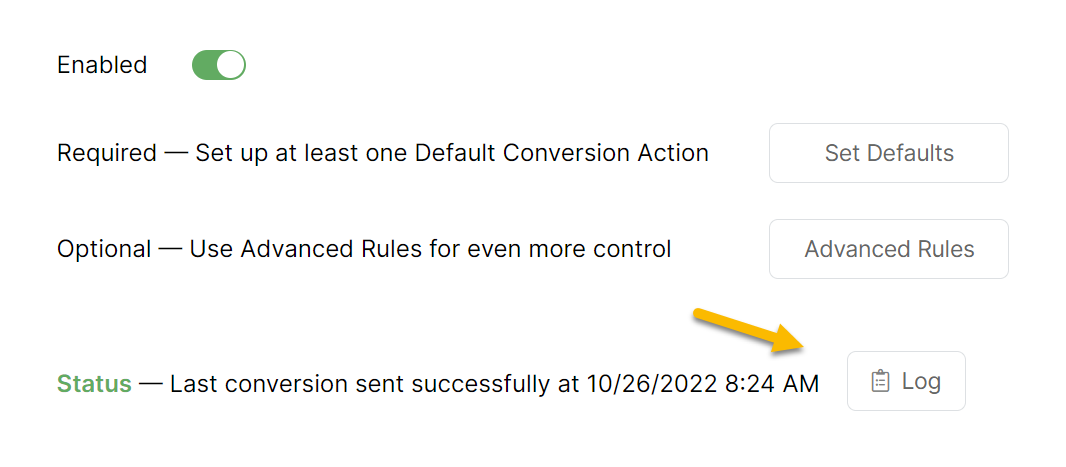
ClickMagick Audience Optimization sends your conversions to your ad networks in real-time, as they happen.
There are no delays on our end, and you can see the results of every conversion we’ve sent by clicking on the Log button:

Your ad networks will normally process uploaded conversions within 2-8 hours. However, it often takes longer than this – and in some cases it can take days for a particular conversion to show up in your ad account.
For example, with Google Ads, they say they will process your uploaded conversions within 3 hours if you’re using the “last click” attribution model with your Conversion Action. But if you’re using any other attribution model for your Conversion Action, it can take a bunch longer.
But please note that ClickMagick has no control over any of this whatsoever.
In fact, due to the “black box” nature of the ad networks, we can’t tell you anything other than whether the uploaded conversion was accepted or rejected by your ad network, as described above.
The value in the Response column of the ClickMagick log comes straight from your ad network. So if the Response is a “Success,” that means your ad network accepted the conversion and there’s nothing for you to worry about.
What is the most important thing that most people don’t realize?
When uploaded conversions are processed by your ad network, they post the conversion based on the date and time of the original click, not the date and time of the conversion itself.
So for example if a conversion is uploaded today, you won’t see it reflected in today’s stats in your ad network – you’d see it for whatever day the original click occurred.
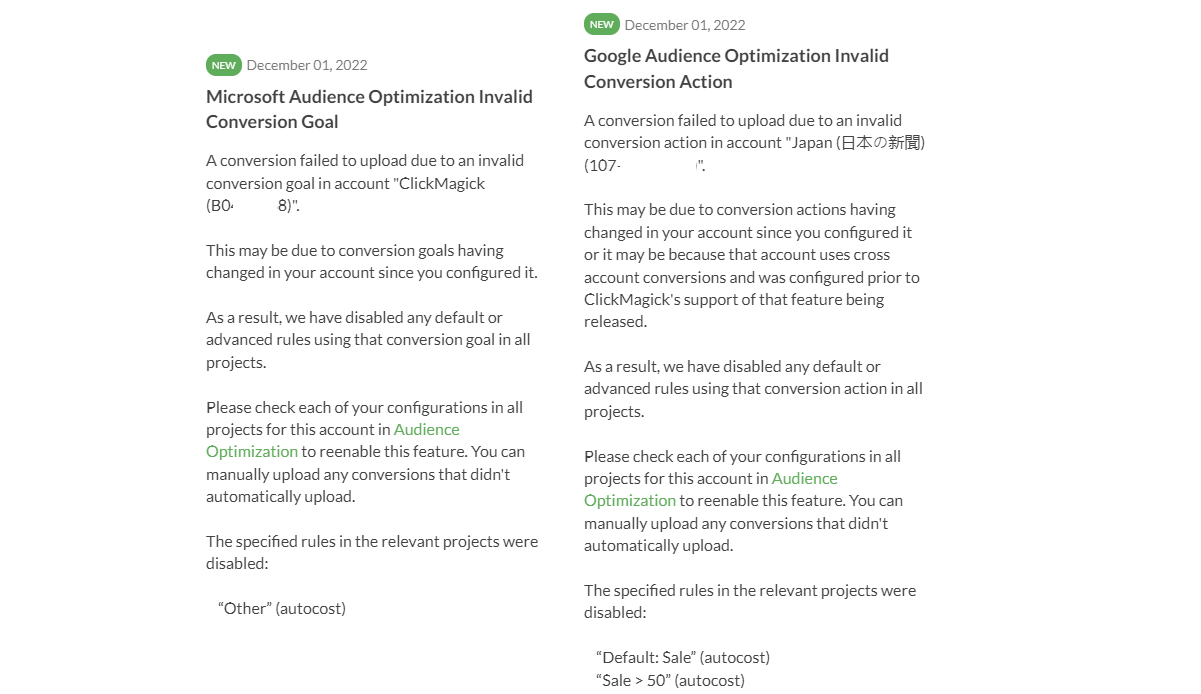
Audience Optimization provides a log for each ad network you’ve integrated with ClickMagick, showing all of the conversions we’ve uploaded on your behalf and the status of each.
If you see any errors, remember that this has nothing to do with ClickMagick – an error indicates that the ad network rejected our attempt to upload the conversion.
When viewing the log you can see why your ad network rejected it, and most are pretty self-explanatory.
Below we’ll cover a few examples of errors you may see, what they mean, and what you can do about them.
Facebook Ads – Expired fbclid Value
Google Ads – EXPIRED_EVENT
Google Ads – Action Not Permitted With Braid
Google Ads / Microsoft Ads – Invalid Conversion Action or Invalid Offline Conversion Name
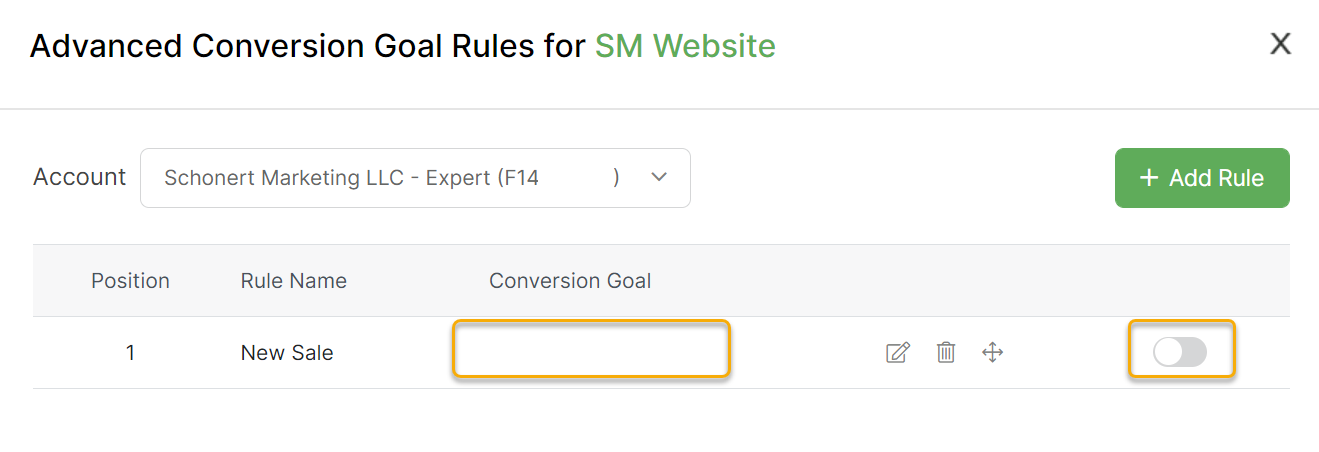
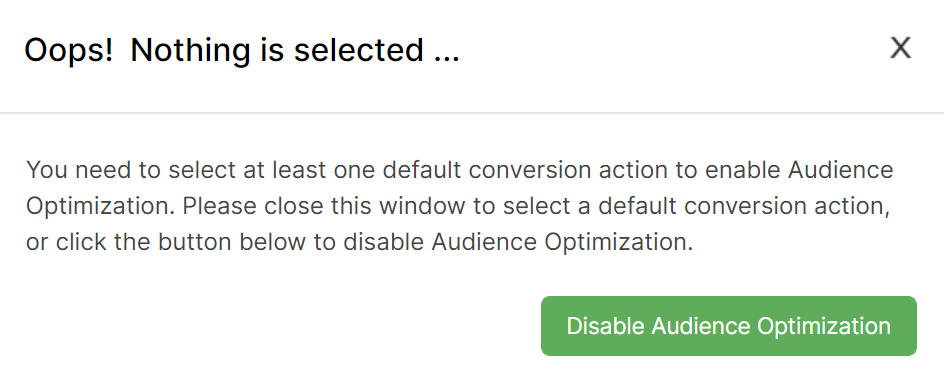
Google Ads / Microsoft Ads – Nothing Selected For Default Action / Default Goal
Article 686 Last updated: 11/26/2025 11:47:13 AM
https://www.clickmagick.com/kb/?article=686