|
How do I track sales with my affiliate network?
ClickMagick works with all affiliate networks that support Sub-IDs or server-to-server Postback URLs, with Postback URLs being the industry standard. Aside from a few special cases highlighted in the tabs below, the process of integrating ClickMagick with your affiliate network using Postback URLs is the same for all other networks.
How do I track affiliate sales using Postback URLs?
Select an option below to continue …
Unfortunately, Amazon doesn't make it easy or efficient to track affiliate sales, but it is possible.
Because you can't use Tracking Pixels or Postback URLs in Amazon, the only conversion tracking you can do with Amazon is with sub-IDs, or what they call "Tracking IDs."
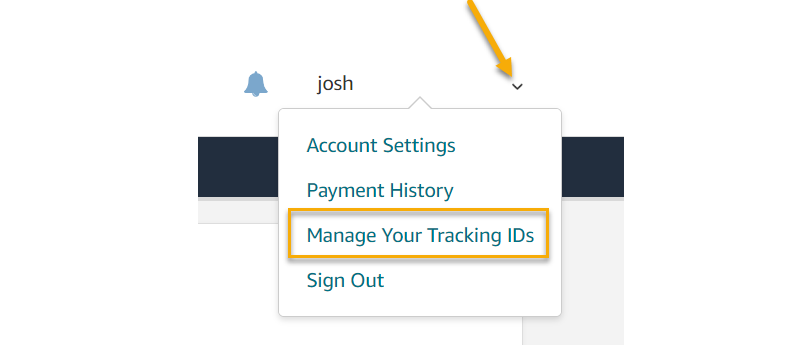
To create a Tracking ID in Amazon, log in to your Amazon Associates account, and just under your email address, click on "Manage Your Tracking IDs"
Next, click on the "Add Tracking ID" button to create your ID:
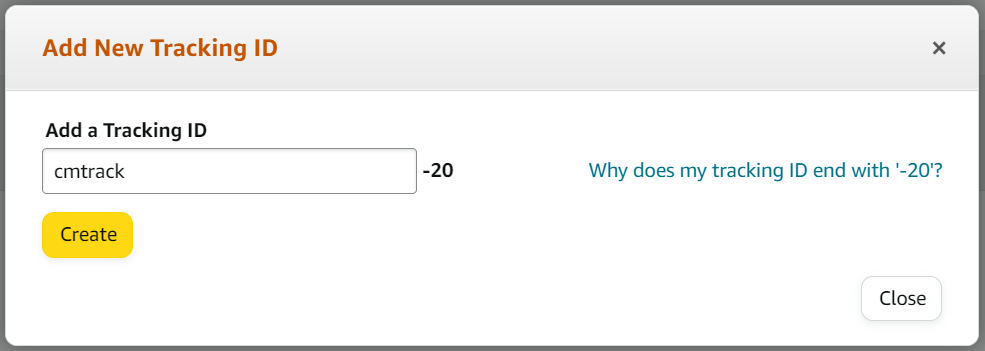
Note: Tracking IDs must be unique, so you may see an error message stating an ID is unavailable when creating your Tracking ID. Check one of the options they give you to use as the Tracking ID.
To learn more about Amazon Tracking IDs, check out their documentation here.
Once your Tracking ID is created, you can use it in your Amazon affiliate links.
On the ClickMagick side, you'll need to use the Tracking ID you created as a UTM parameter using the URL Builder:
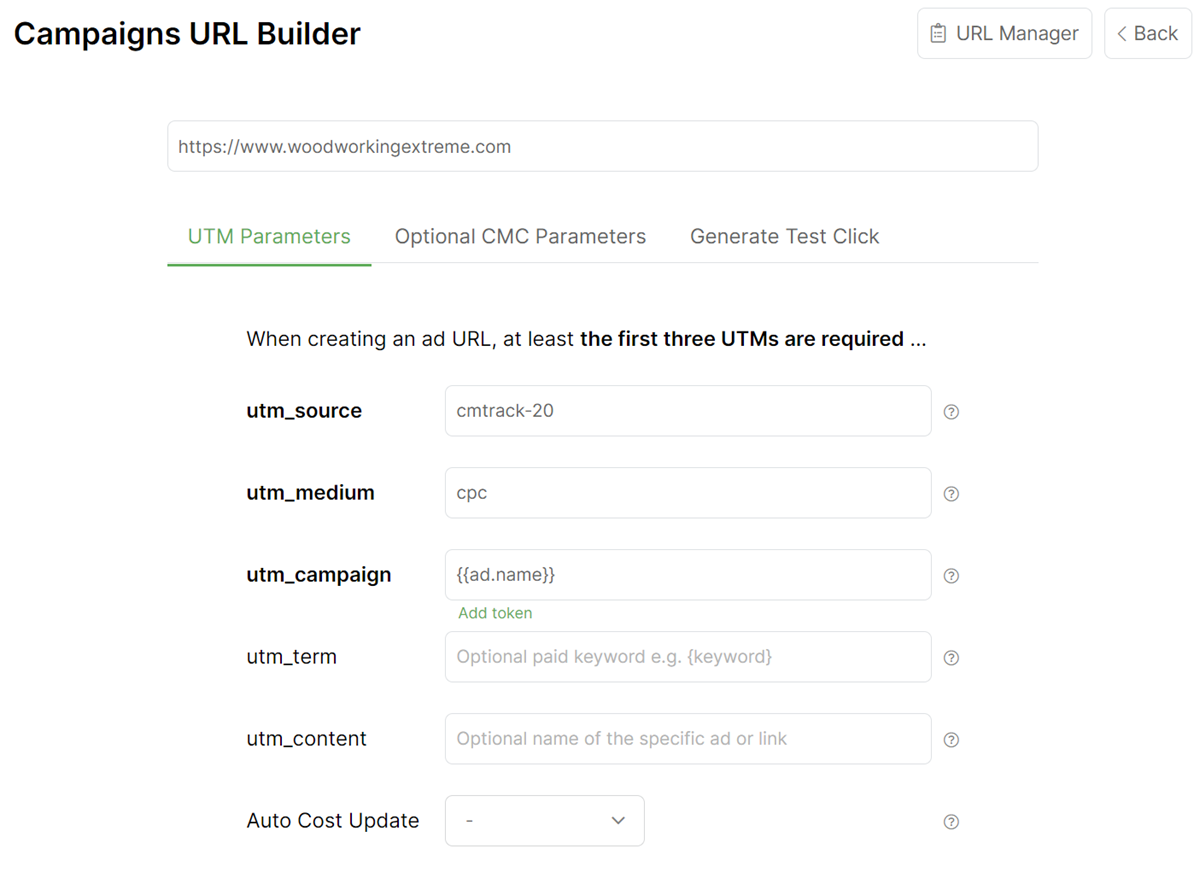
That’s it. When you make sales, you’ll know which Tracking ID was responsible for the sale.
Tracking BuyGoods sales only takes a few steps, follow the article below to get set up in just a few minutes. Optionally, if you want to track BuyGoods checkout hits, click the Checkout tab below and follow the steps there too.
Step 1 – Add your postback URL to BuyGoods
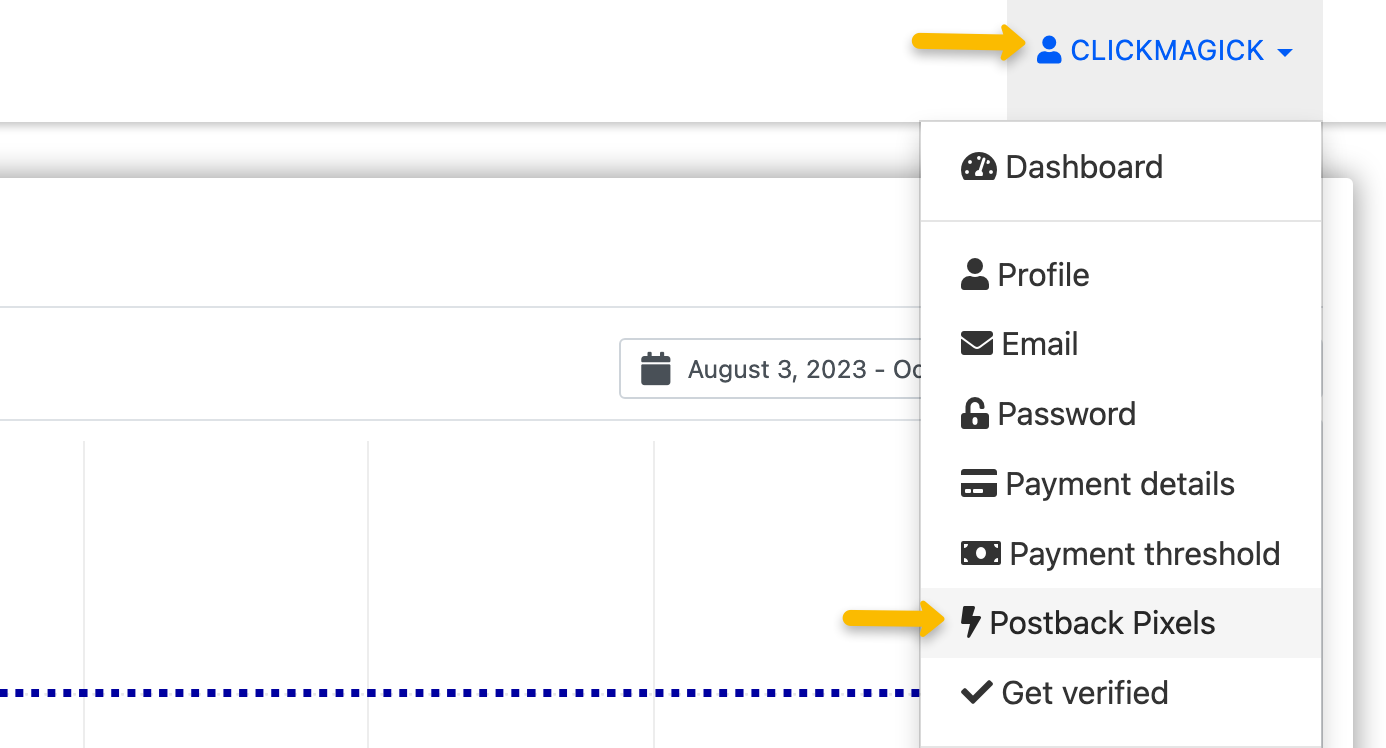
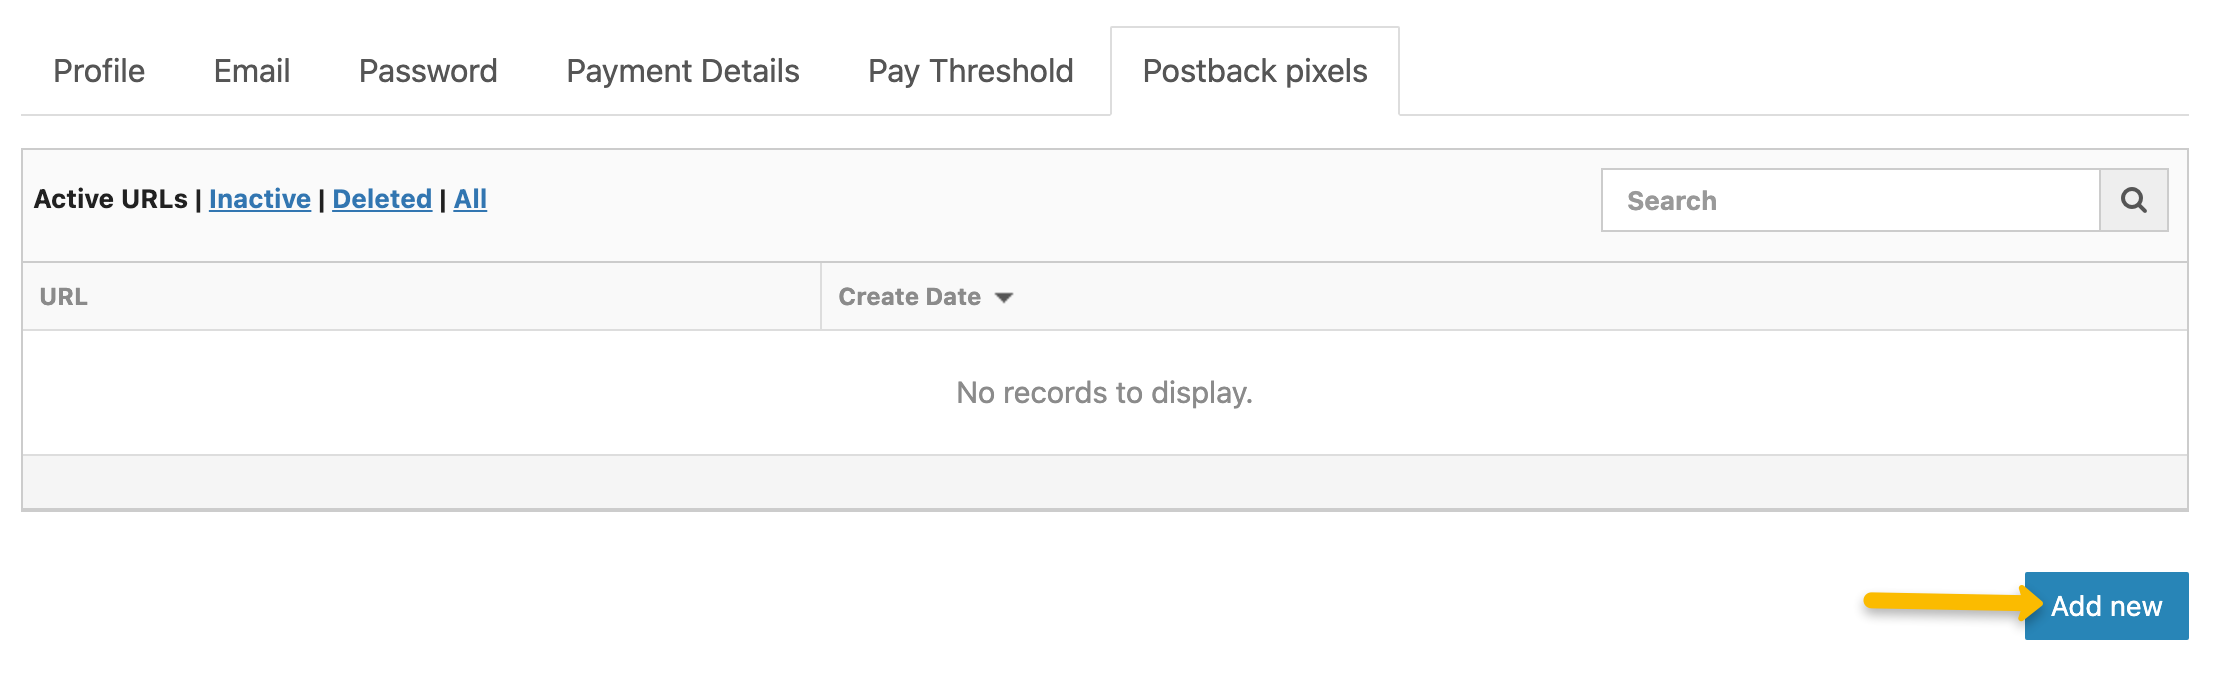
1. In your BuyGoods account, head to the menu in the top right hand corner, then click on “Postback Pixels”.
2. Click on “Add New”.
3. Copy the custom postback URL below and paste it into the “URL” section:
https://www.clkmg.com/api/s/post/?uid=[USERID]&s1={SUBID}&amt={COMMISSION_AMOUNT}&ref={CONV_TYPE}&email_hash={EMAILHASH}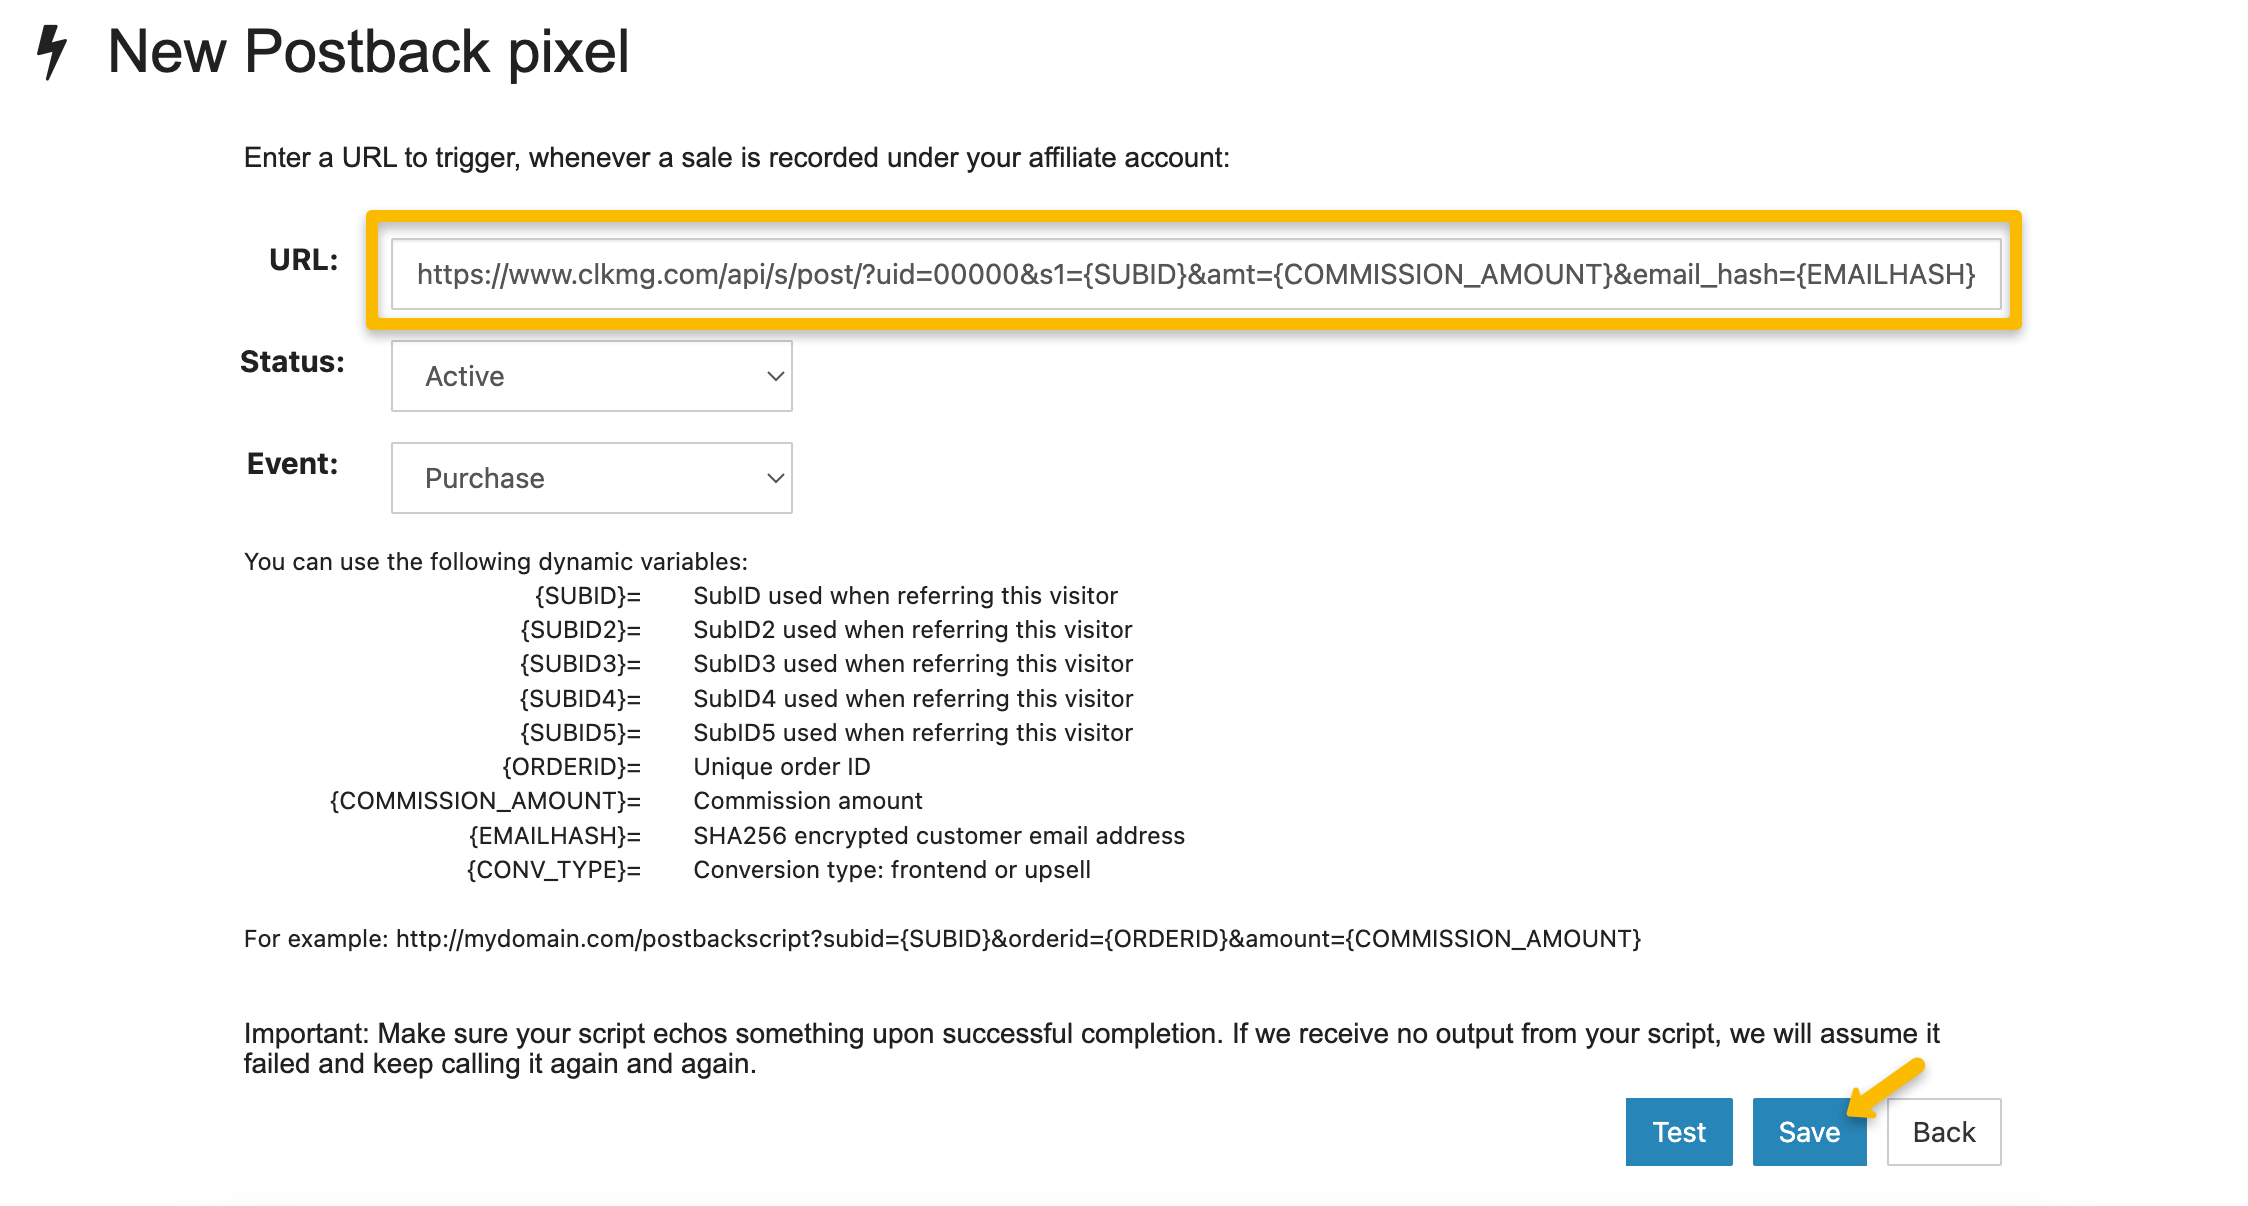
4. Just hit “Save” afterwards, the test function isn’t needed in this case.
Note: This will add your postback URL globally for every single offer, so you only need to add this once.
Step 2 – Add a visitor ID to your affiliate link
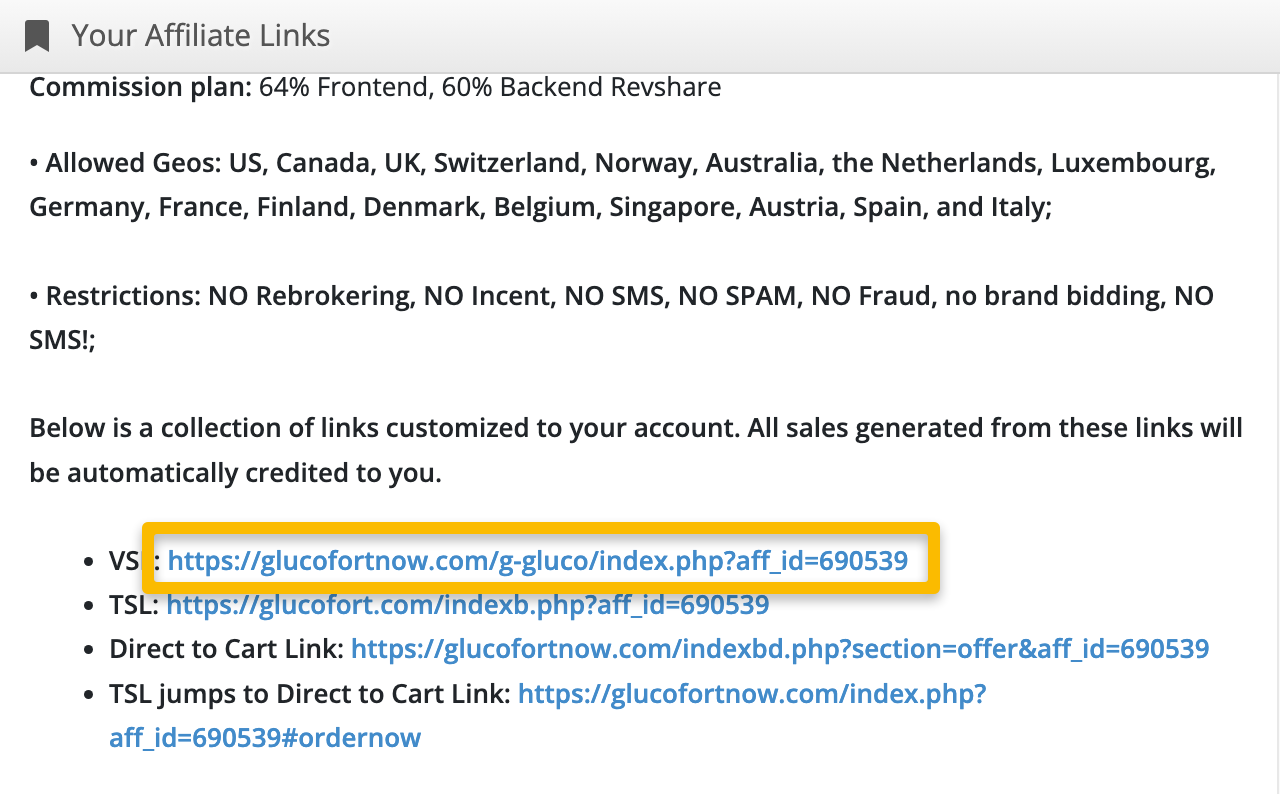
1. Select the product you’d like to promote and copy your affiliate link from BuyGoods.
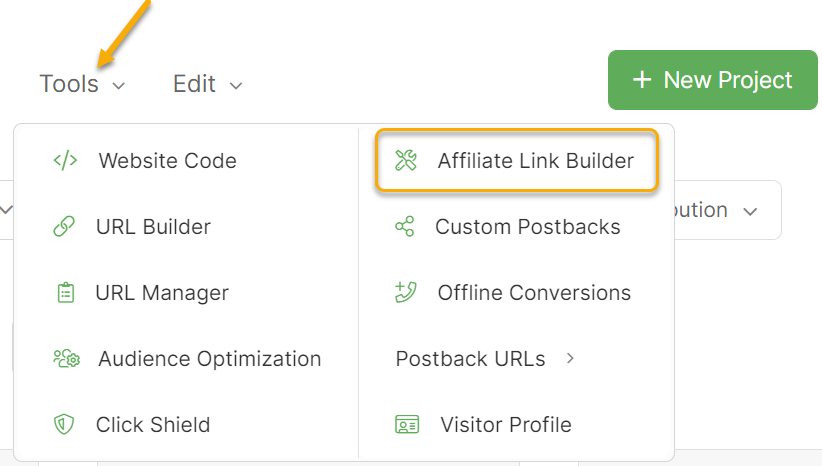
2. In ClickMagick, go to your Project Dashboard, select Tools, Affiliate Tools, then Affiliate Link Builder.
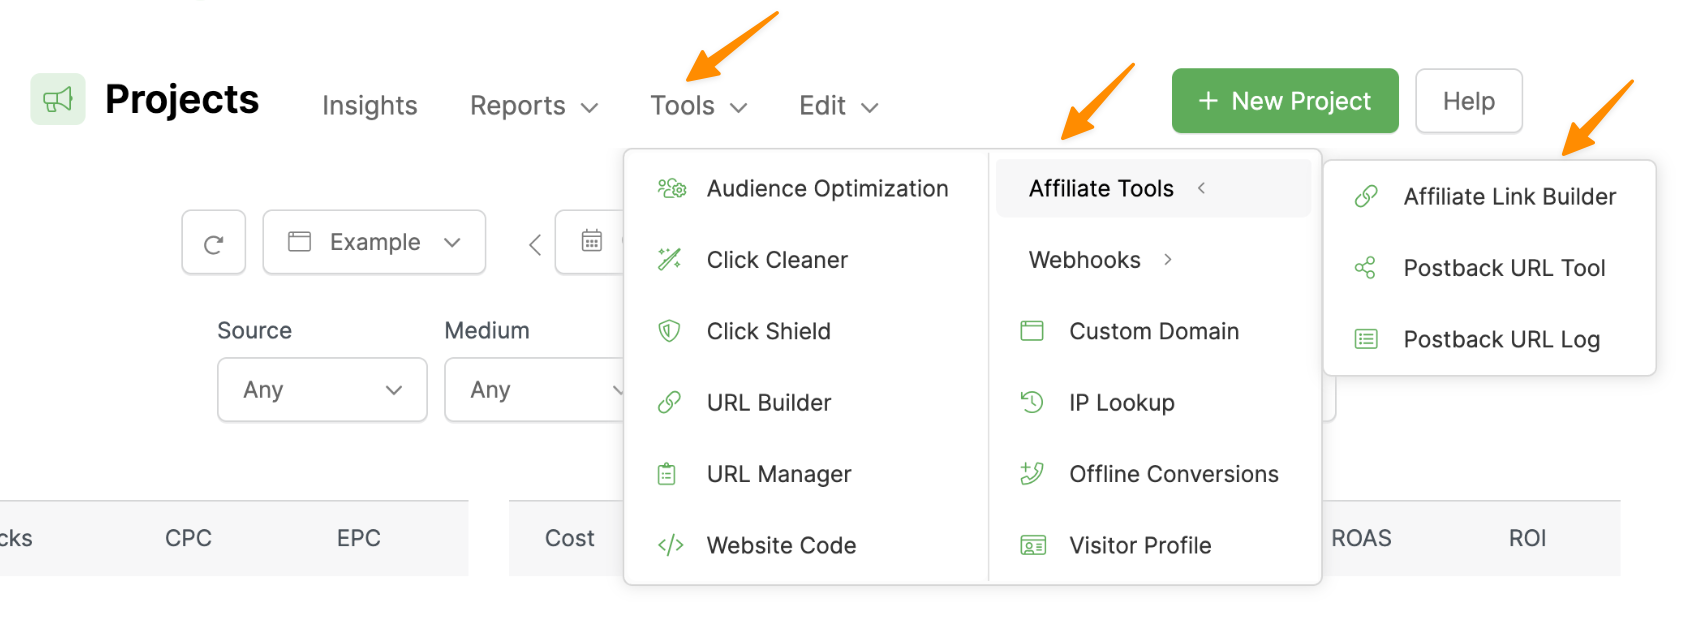
3. Select BuyGoods as your affiliate network. You can scroll down the list or use the search bar (as shown below)
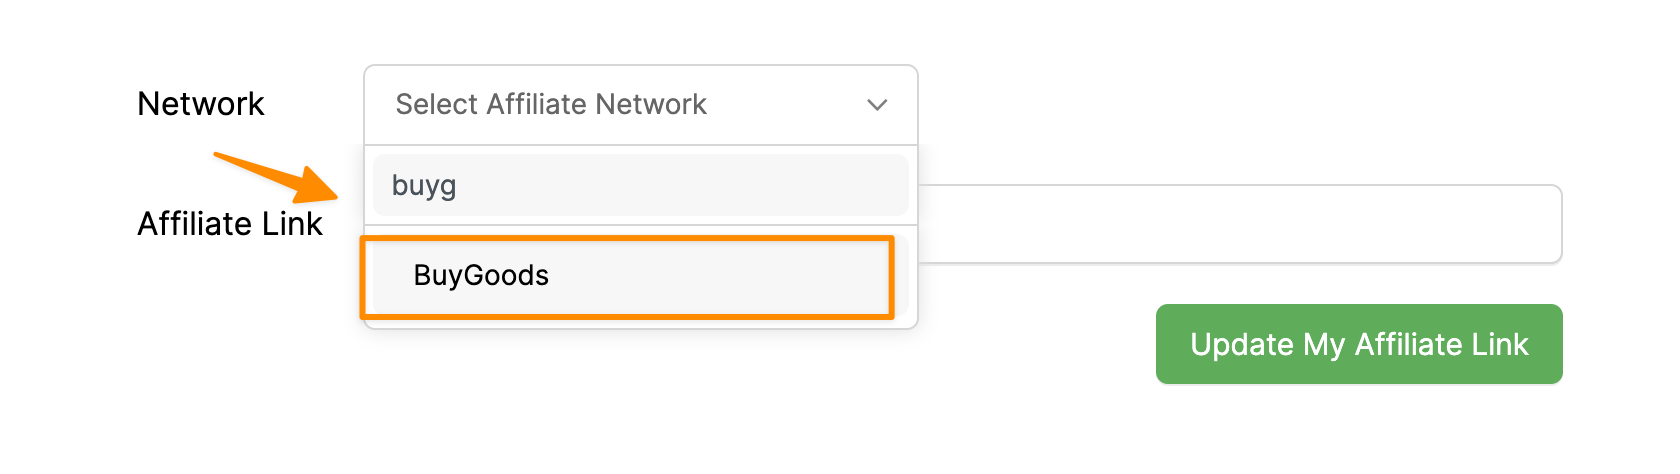
4. Next paste in your affiliate link. Hit “Update My Affiliate Link” and you’ll be given an updated affiliate link below.
5. Copy this updated affiliate link to your landing page and you’re all set!
You can track checkout hits as “Engagements” in ClickMagick. You’ll just need to add a pixel for each product you’re promoting in BuyGoods.
Step 1 – Add your engagement pixel to BuyGoods
1. Select the product you’d like to track checkout hits with.
2. Click on “Settings” then select the “Funnel pixels” tab.
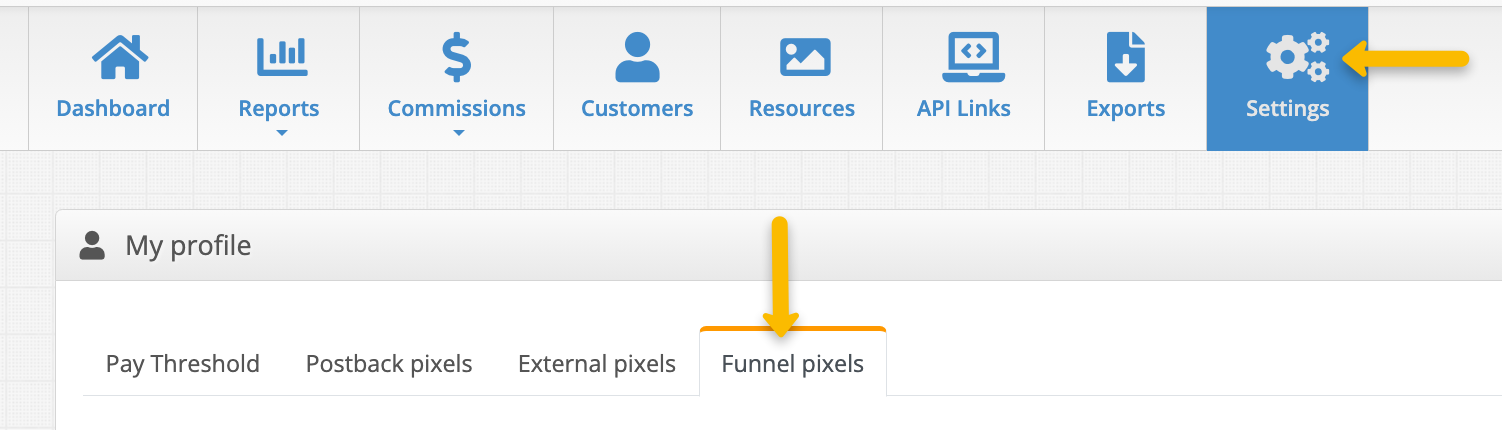
3. Copy the custom engagement pixel below and paste it into the “Checkout” box.
<img src="//www.clkmc.com/api/e/pixel/?uid=[USERID]&vid={SUBID}&ref=checkout" height="1" width="1" />
4. Make sure to hit save, and that’s it!
Note: BuyGoods offers funnel pixels on a product level. This means you will have to repeat this process for each product you promote in BuyGoods.
Tracking ClickBank sales only takes a few steps, follow the article below to get set up in just a few minutes. Optionally, if you want to track ClickBank order form impressions click the Checkout Hits tab below and follow the steps there too.
Step 1 – Create a ClickBank “Secret Key”
The first thing you’ll need to do to set up the Instant Notification Service is to create a “Secret Key” in ClickBank that it uses to communicate with other tools like ClickMagick.
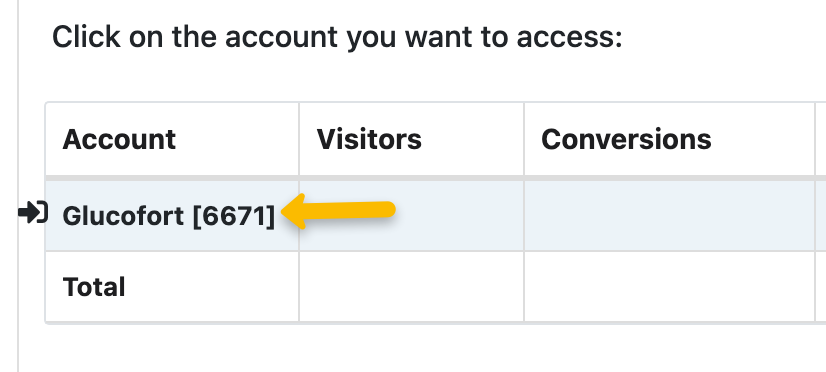
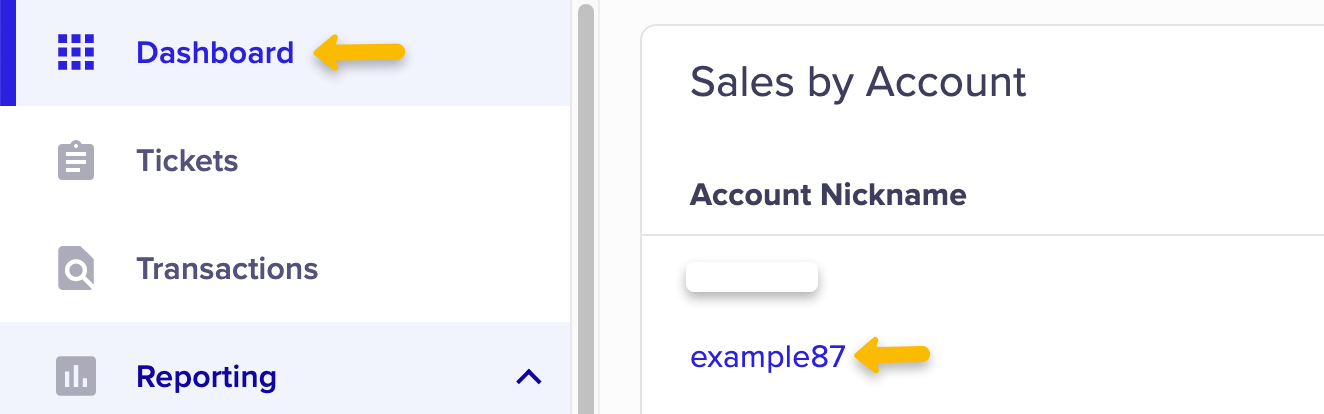
| 1. | Log in to your ClickBank master account. Click on “Dashboard”, then click on the account nickname you’re currently using to access it. |
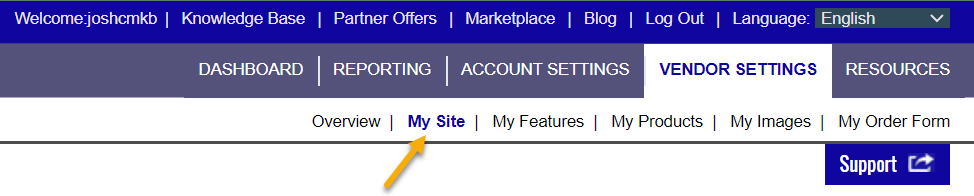
| 2. | Click the “Vendor Settings” tab near the upper-right corner of the page. |

Note: Making the following changes in the “Vendor Settings” tab will allow you to track Vendor and Affiliate sales. If you’re only an affiliate, it may seem weird to have to edit “Vendor Settings,” and we agree, but this is what you need to do in ClickBank.
| 3. | Click “My Site” in the sub-navigation menu bar. |
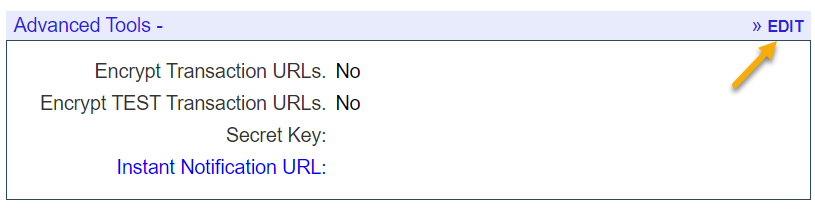
| 4. | Scroll down to the “Advanced Tools” section and click on the edit icon. |
| 6. | If the Secret Key is empty, you’ll need to create one. Simply enter any combination of UPPER CASE LETTERS or numbers, up to 16 characters. You will get an error if you use lowercase letters, spaces, or symbols. |
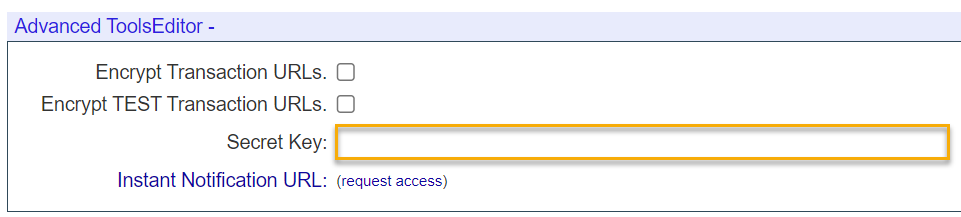
| 7. | If the “Instant Notification URL” section shows a link that says “(request access)” (as shown in the screenshot above), click on that link to show a form. Select “Yes” for all the questions, click on the checkbox that says you agree to the Terms of Service and click on “Save Changes & Request API Access”. |
| 8. | Finally, scroll back down to the same section and copy your Secret Key. We’ll be pasting that into ClickMagick in the next section. |
Step 2 – Add the Secret Key to ClickMagick
Now that your Secret Key is set up in ClickBank, you need to let ClickMagick know about it.
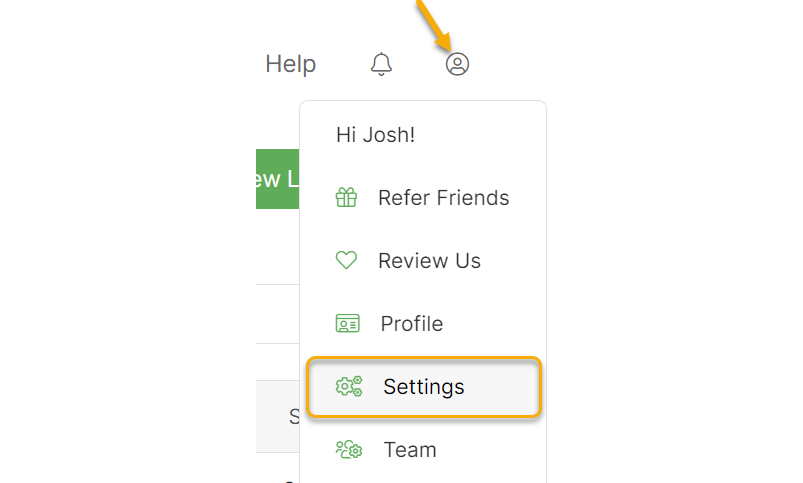
Go to your Account Settings page:
Then, enter your “Secret Key” on the ClickBank tab.
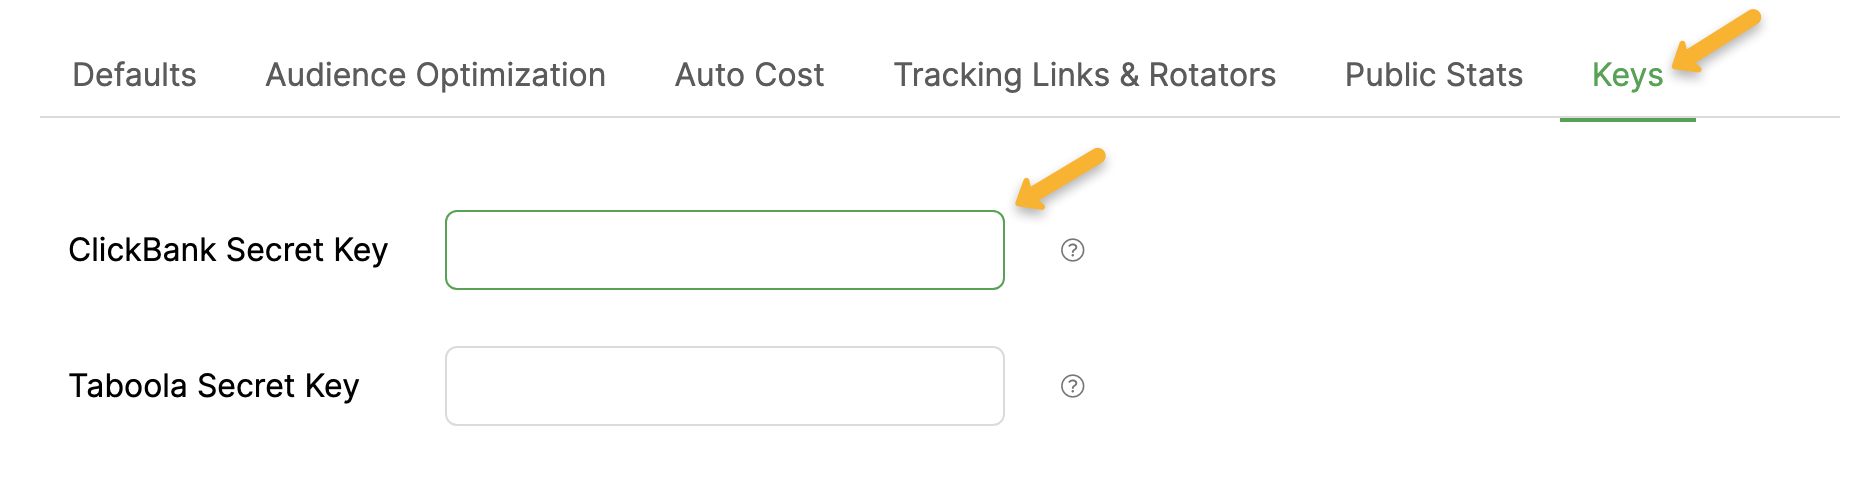
If you’re following the steps outlined here, your Secret Key should be on the clipboard, so paste it into your settings and save your changes by clicking on the “Update Settings” button.
Remember to save your changes or the Instant Notification Service will not work.
Note: If you have multiple ClickBank accounts that you want to set up with ClickMagick, use the same secret key with each account. ClickMagick will work great with every ClickBank account you set up that uses the secret key you’ve entered in your Account Settings.
Are you a ClickBank vendor?
If you’re a ClickBank vendor and want to track your sales, simply enable vendor tracking and list all ClickBank vendor nicknames that you want to track.
If you’ll also be selling your own products as an affiliate, enter your ClickBank affiliate nicknames as well.
ClickMagick uses your ClickBank nicknames to determine the amount of the sale to record when a vendor's sale is made. If an affiliate sells your product, the sale will reflect the vendor payout. But, if you’re both the vendor and the affiliate, ClickMagick will record the sale as the sum of the vendor payout and the affiliate commission.
Just enter all of your ClickBank nicknames, separated by commas:

Note: For vendor tracking to work, you need to add the Instant Notification URL to your vendor account and add a Visitor ID to your vendor payment links. This is shown in steps 3 and 4 below. If you only set things up as an affiliate, vendor tracking won’t work correctly.
Step 3 – Add Your ClickMagick Instant Notification URL to ClickBank
| 1. | You must copy your unique ClickMagick Instant Notification URL and paste it into your ClickBank settings. First, copy this link exactly as you see it: |
Note: The unique URL above is used only to link your ClickBank account with ClickMagick. It is not meant to be accessed directly in your browser, and if you do so, you’ll see an error message. This is normal.
| 2. | In ClickBank, go to the Advanced Tools section where you created your Secret Key. You’ll find it in the “Vendor Settings” tab under the “My Site” sub-menu. Scroll down to “Advanced Tools” and click “Edit”. |
| 3. | In the first empty slot that says “Instant Notification URL:”, paste in the ClickMagick Instant Notification URL you copied above. |
| 4. | Make sure that version 7.0 is selected in the drop-down. Only select version 8.0 if you have a specific reason. |

| 5. | Save your changes. |
| 6. | Scroll down to the Advanced Tools section again and click “Edit”. |
| 7. | Click the “TEST IPN” link next to your URL to activate it in ClickBank’s system. If you followed the previous steps correctly, you should see “Verified” next to the version number. |

Once you’ve tested your URL without error, you’re done with integrating your ClickMagick and ClickBank accounts.
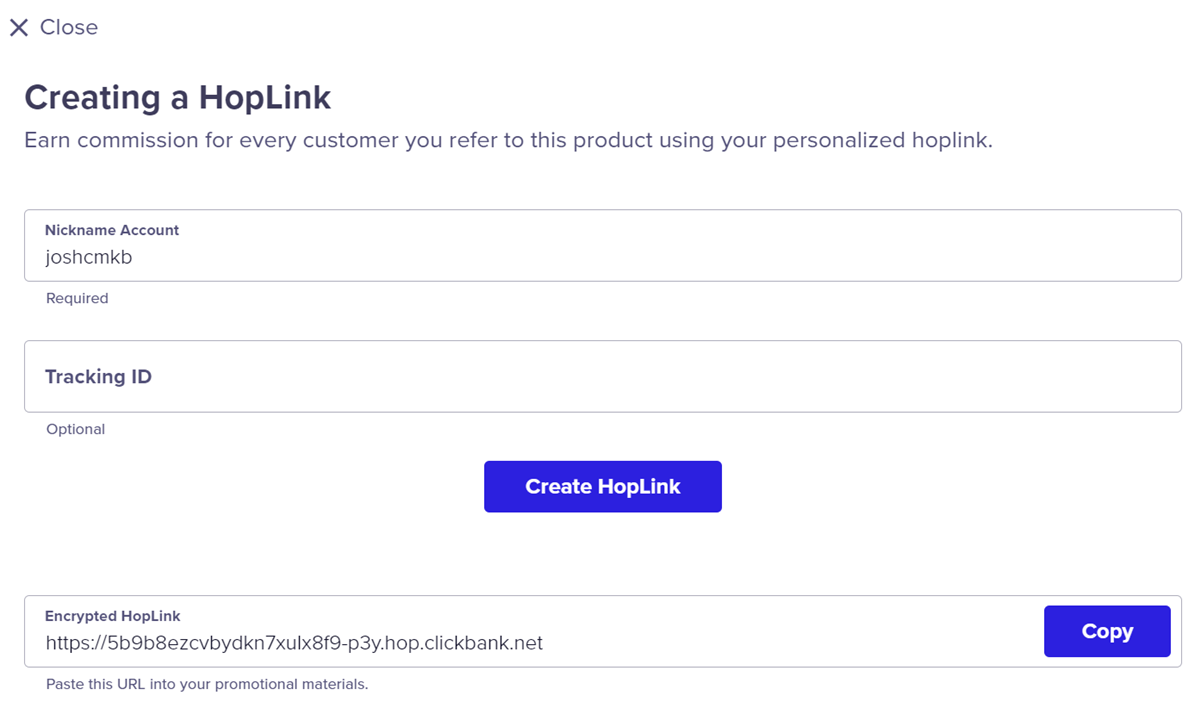
Step 4 – Add a Unique ID to Your ClickBank Hoplinks
If you selected version 7.0
If you selected version 8.0
You can now track Clickbank order form impressions as Engagements using a postback URL in ClickBank. This is a highly accurate method of tracking that you can rely on. Follow the steps below to get this set up …
Note: If you already have a checkout pixel added to the “Integrated Sales Reporting” section of any of your ClickBank nickname accounts, you’ll need to remove that before using the method below.
Step 1 - Go to the Postback/Pixels section in ClickBank
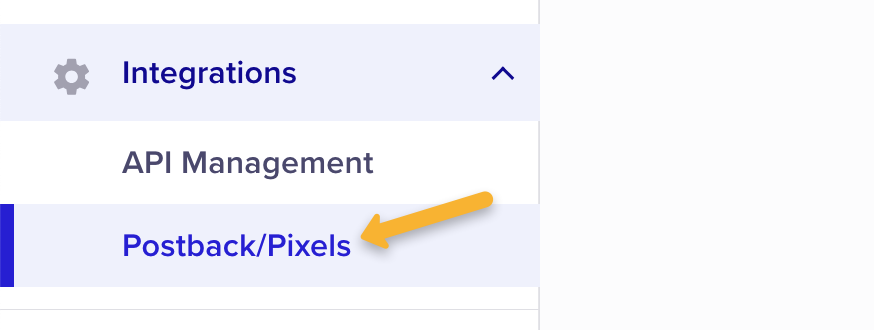
Log in to your ClickBank master account, click on “Integrations”, then “Postback/Pixels”.
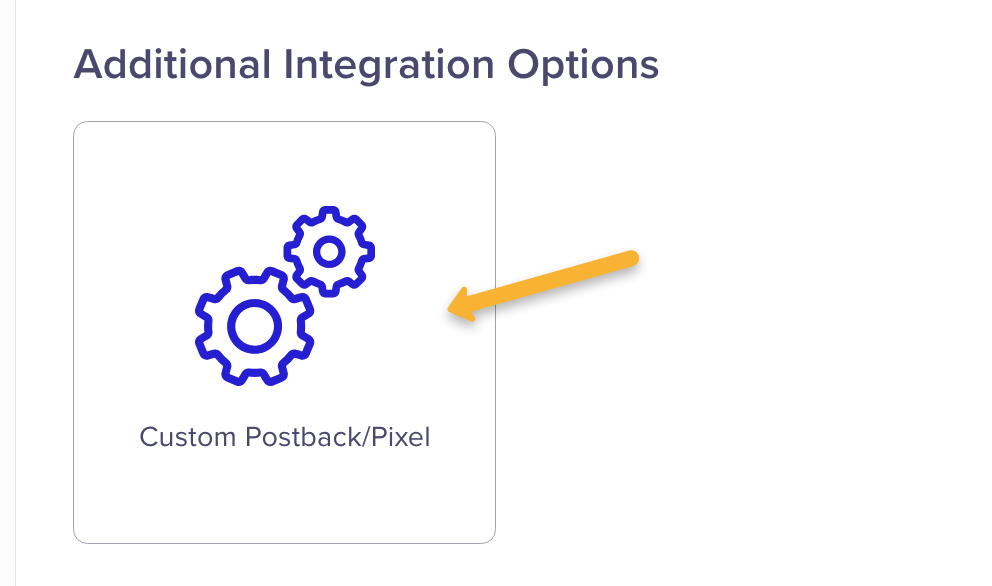
Next, click on “Add Integration”.

Click on “Custom Postback/Pixel”.
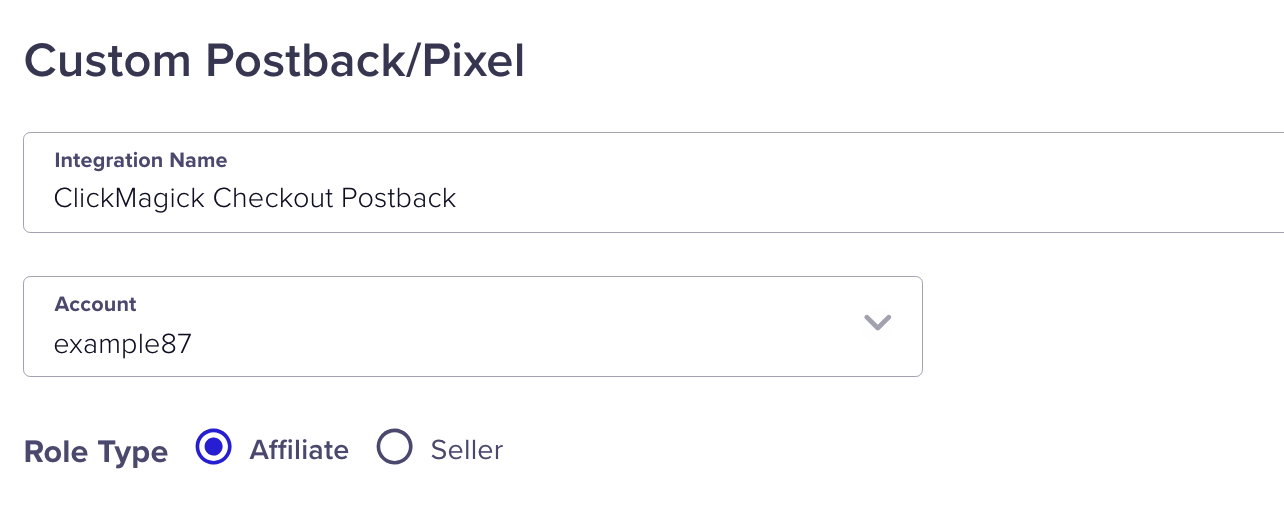
Step 2 - Add Your Engagement Pixel
Give this integration a name, such as “ClickMagick Checkout Postback”. Then select the account you’re using and choose “Affiliate” as the Role Type.
Next, make sure “S2S Postback” is selected as the Tracking Type. Then choose “Global” as the Integration Level and select “Initial Order Form Impression” as the Event Type.

Paste the following URL into the “URL” box:
https://www.clkmg.com/api/e/post/?uid=[USERID]&s1={tid}&ref=checkout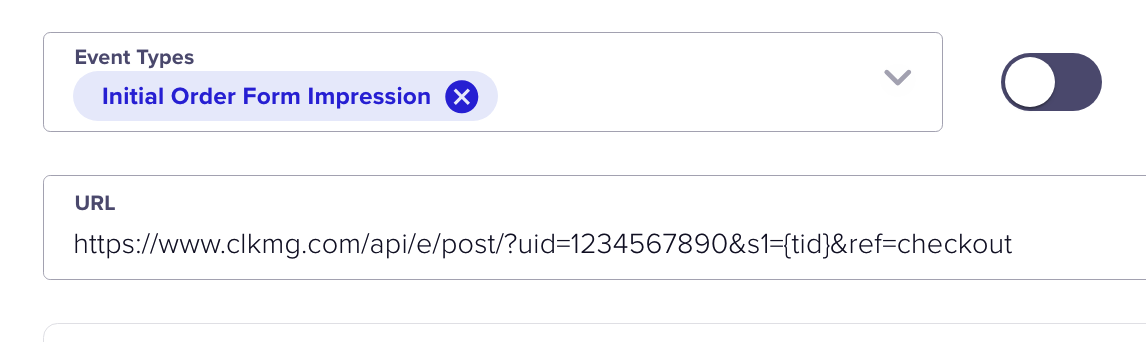
Finally, make sure to set the status to “Active” in the top right hand corner. Then hit “Submit” at the bottom of the page.

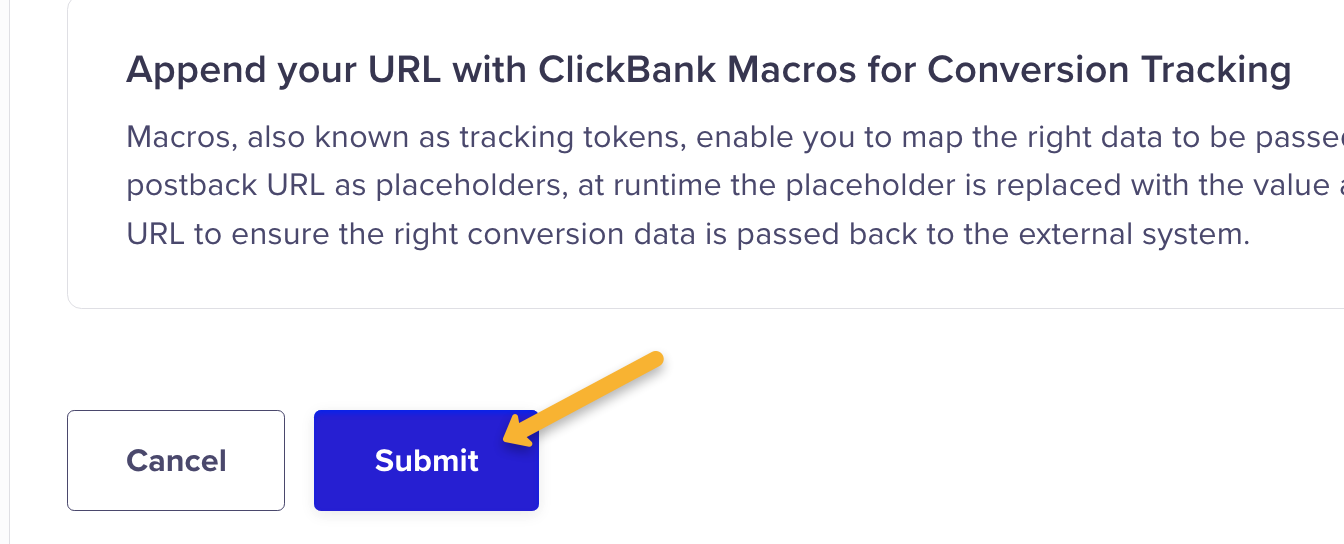
Once you've submitted and activated your postback, you’re done!
Note: We support all ClickBank transaction types, including standard sales, re-bills, JV sales, JV re-bills, refunds, and chargebacks.
Tracking Digistore24 sales only takes a few steps, follow the article below to get set up in just a few minutes. Optionally, if you want to track Digistore24 checkout hits, click the Checkout tab below and follow the steps there too.
Step 1 – Add your postback URL to Digistore24
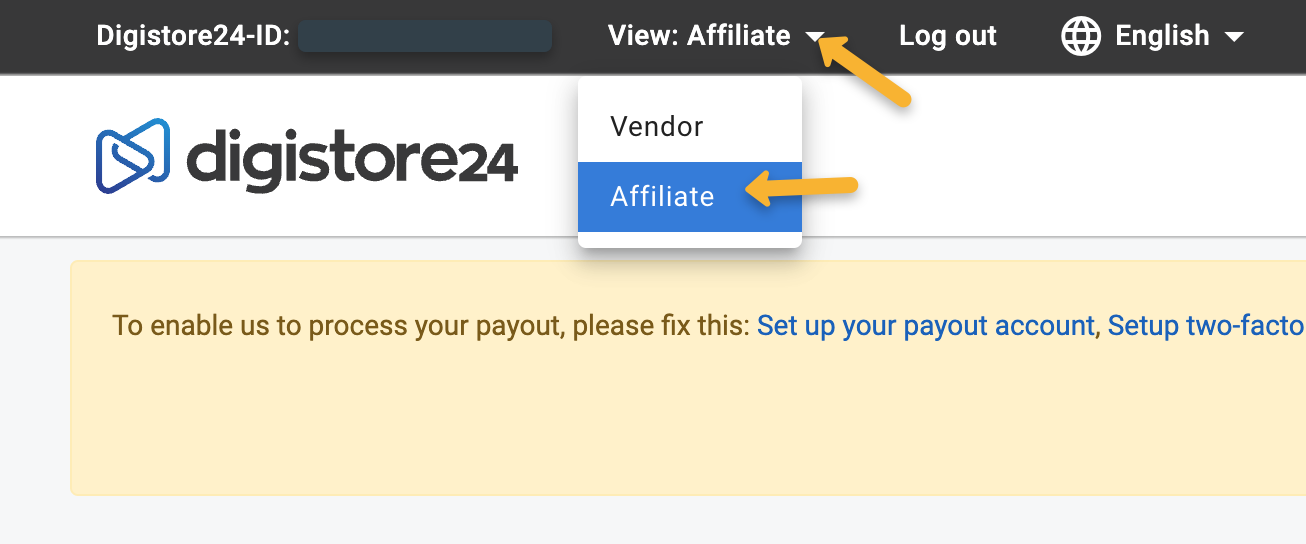
In your Digistore24 account, make sure you have the “Affiliate” view selected in the top left hand corner.

Click on “Account”, then “S2S postback” in the top right hand corner.
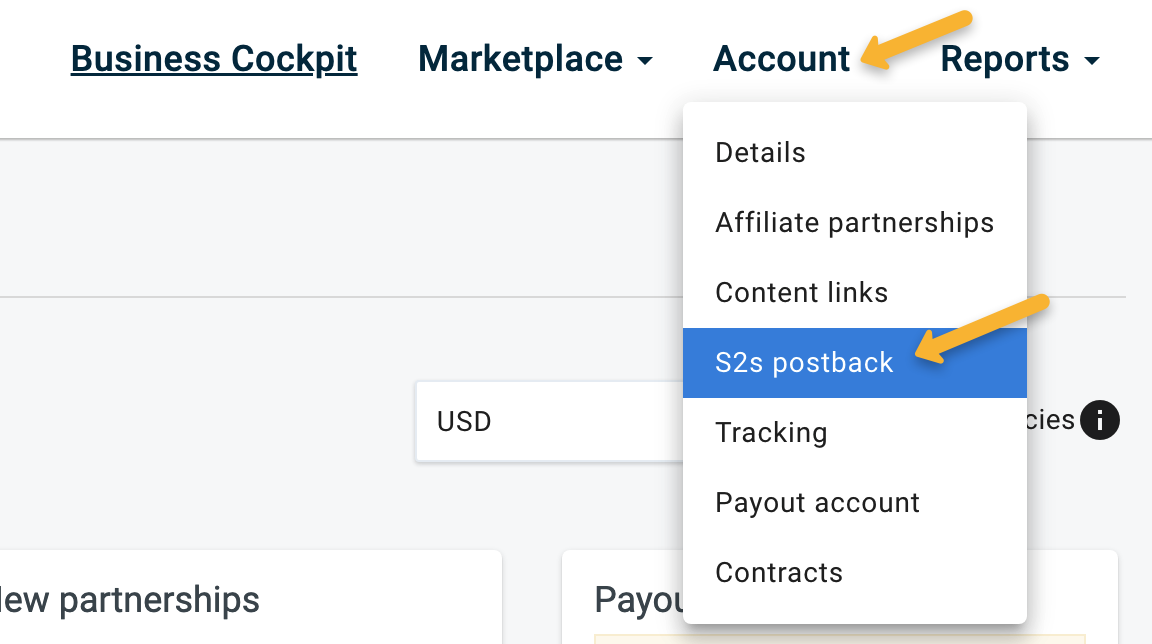
Click on “Add s2s postback integration”.
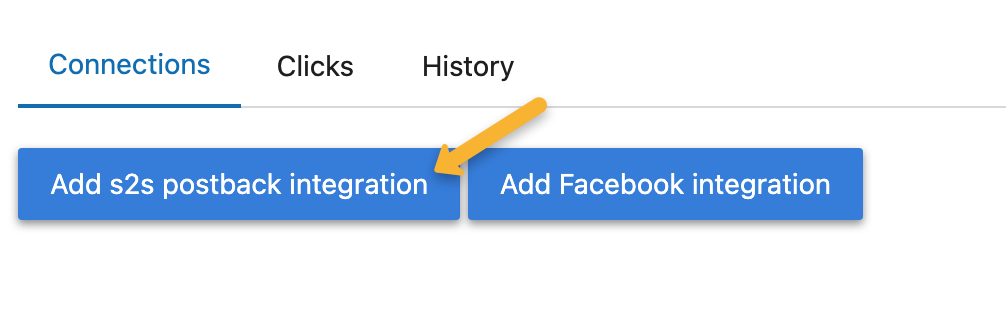
Give it a name such as “ClickMagick Sales Postback”, select all affiliate partnerships, all languages and all order events.
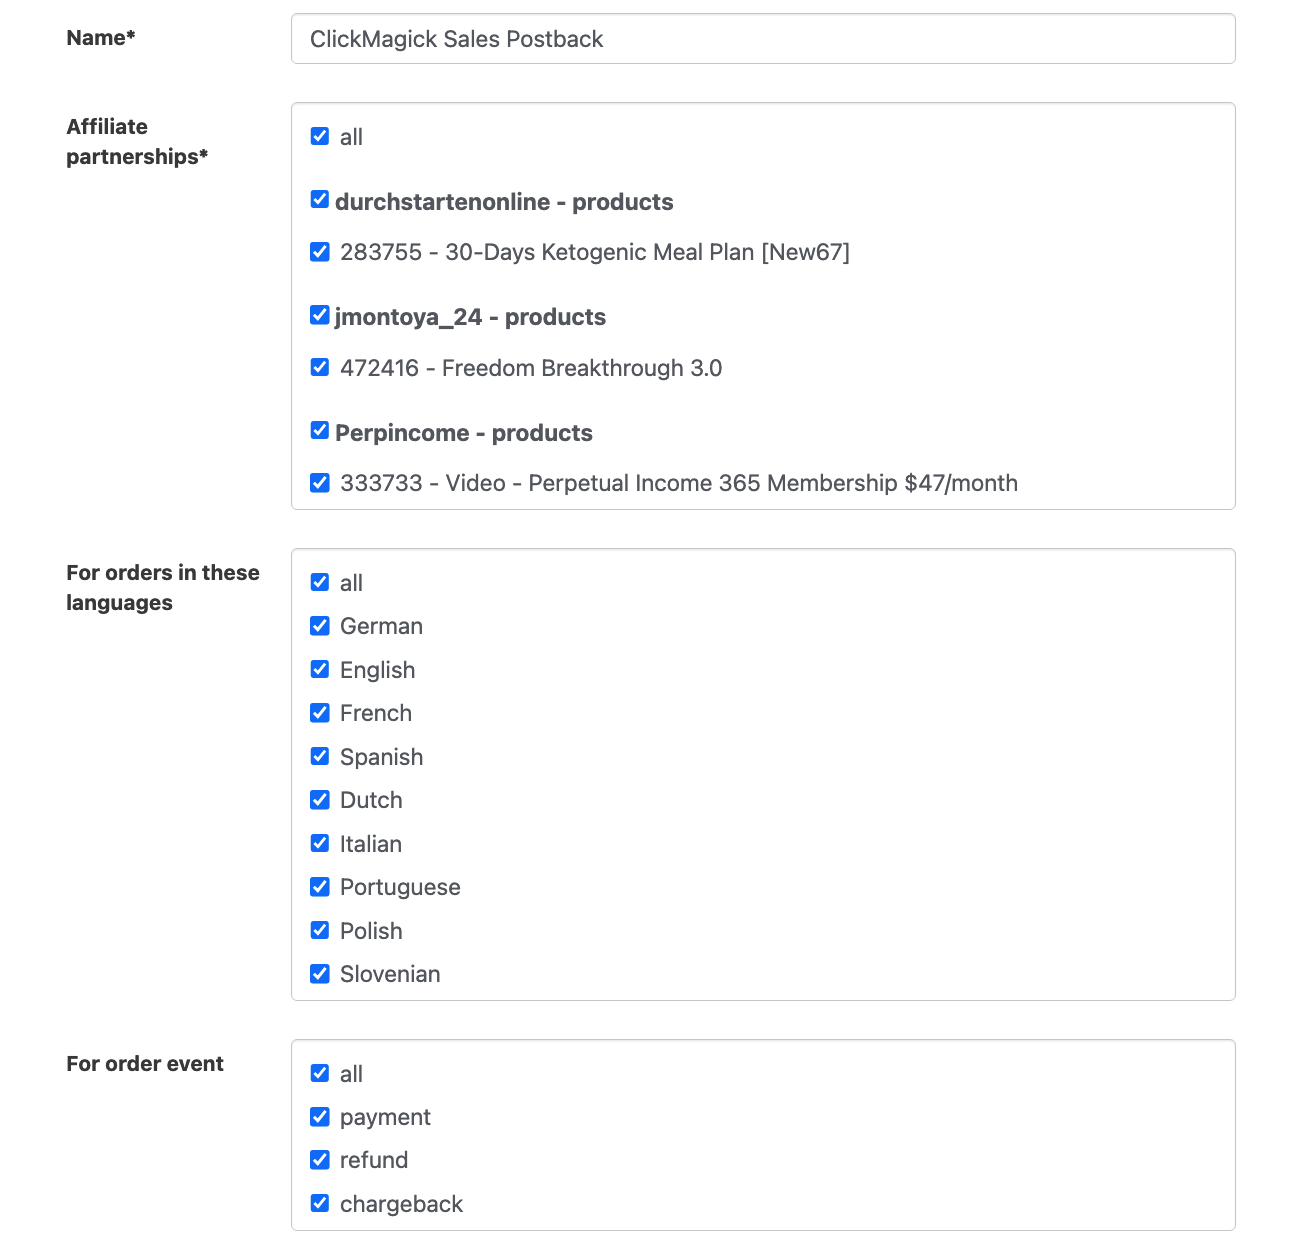
Next, copy the custom postback URL below and paste it into the “Postback URL” section:
https://www.clkmg.com/api/s/post/?uid=[USERID]&s1={cid}&amt={amount_affiliate}&ref={order_type}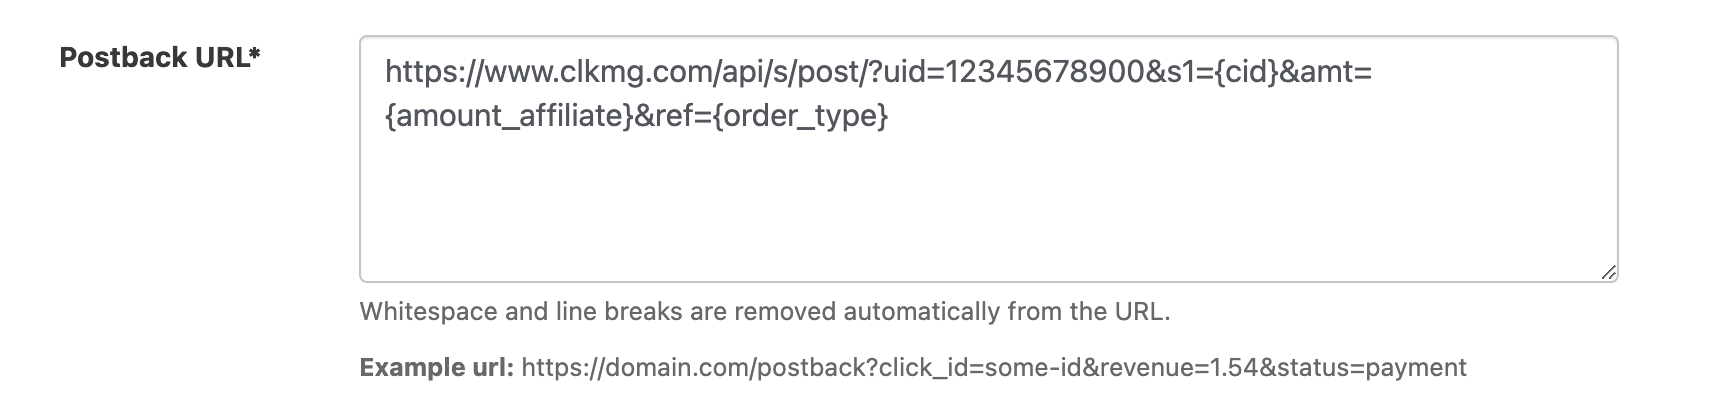
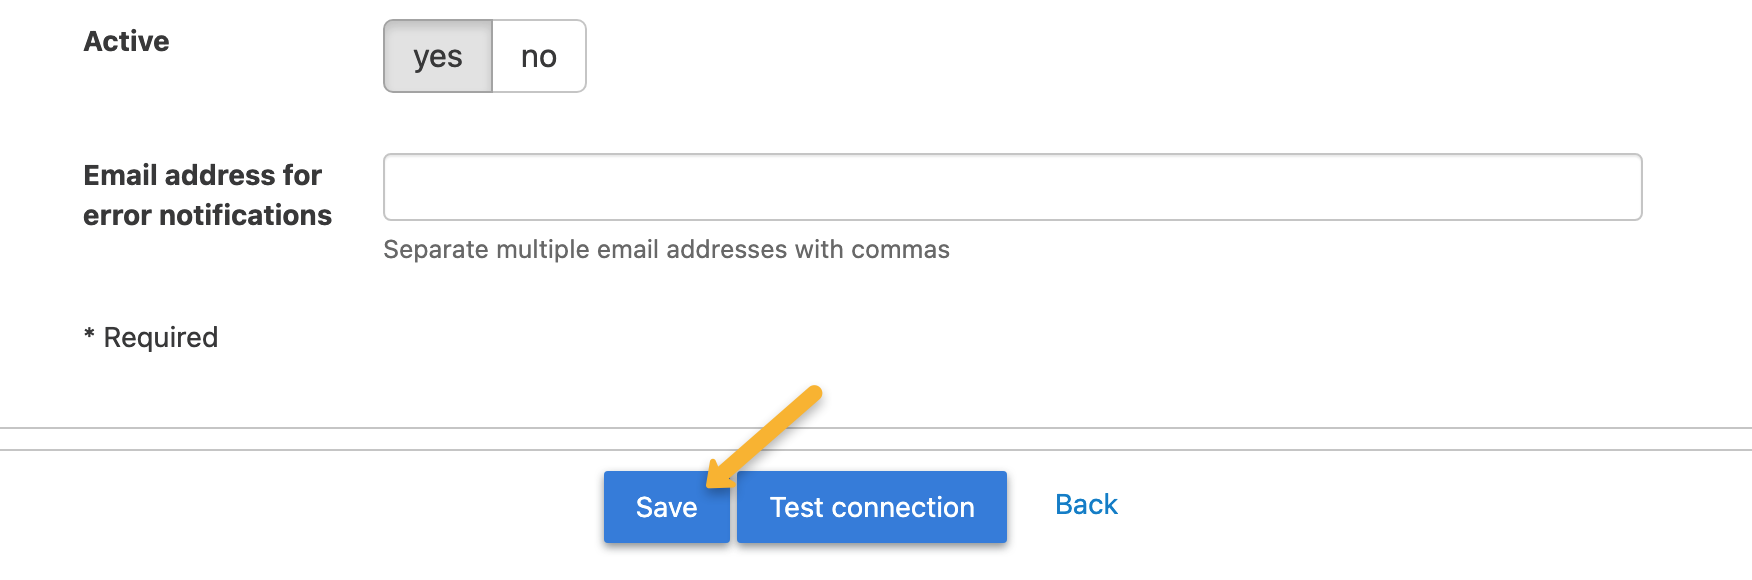
Just hit “Save” afterwards, the “Test” function isn’t needed in this case.
Step 2 – Add a visitor ID to your affiliate link
Select the product you’d like to promote and copy your promolink from Digistore24.

In ClickMagick, go to your Project Dashboard, select Tools, Affiliate Tools, then Affiliate Link Builder.

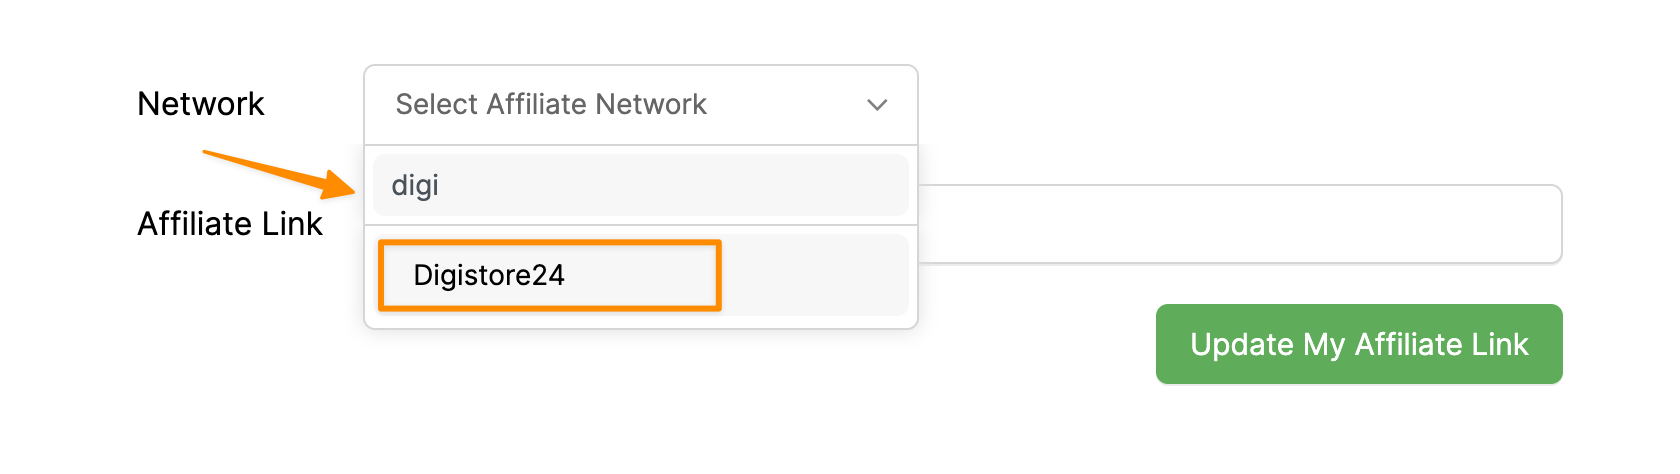
Select Digistore24 as your affiliate network. You can scroll down the list or use the search bar (as shown below).
Next paste in your affiliate link, then click “Update My Affiliate Link” and you’ll be given an updated affiliate link below.
Copy this updated affiliate link to your landing page and you’re all set!
You can track checkout hits as “Engagements” in ClickMagick. You’ll just need to add a pixel to your Digistore24 account. Follow the steps learn how.
Step 1 - Access The Tracking Section
In your Digistore24 account, make sure you have the “Affiliate” view selected in the top left hand corner.
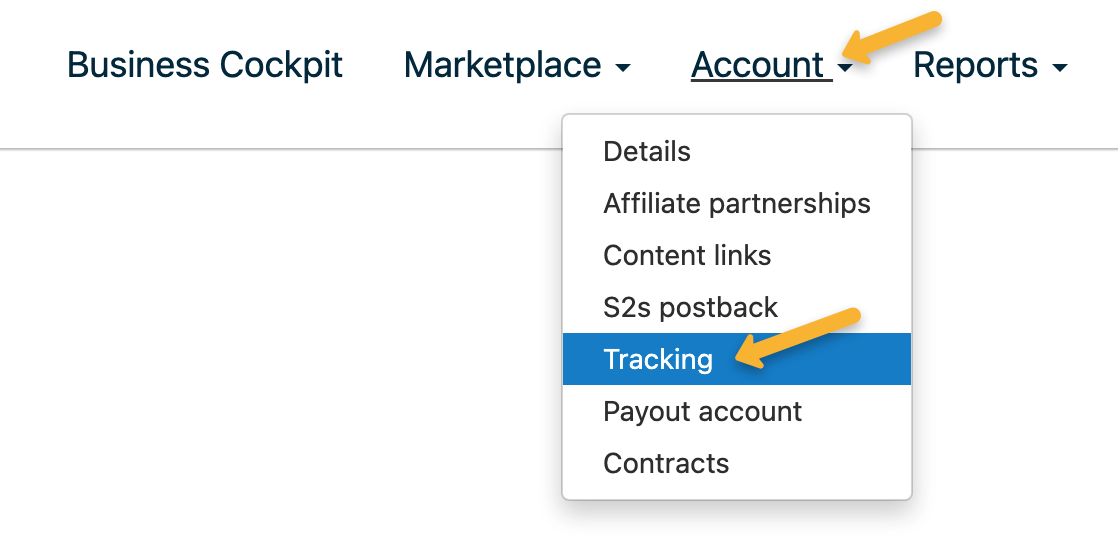
Click on "Account" then "Tracking" in the drop-down.
Step 2 - Add Your Engagement Pixel
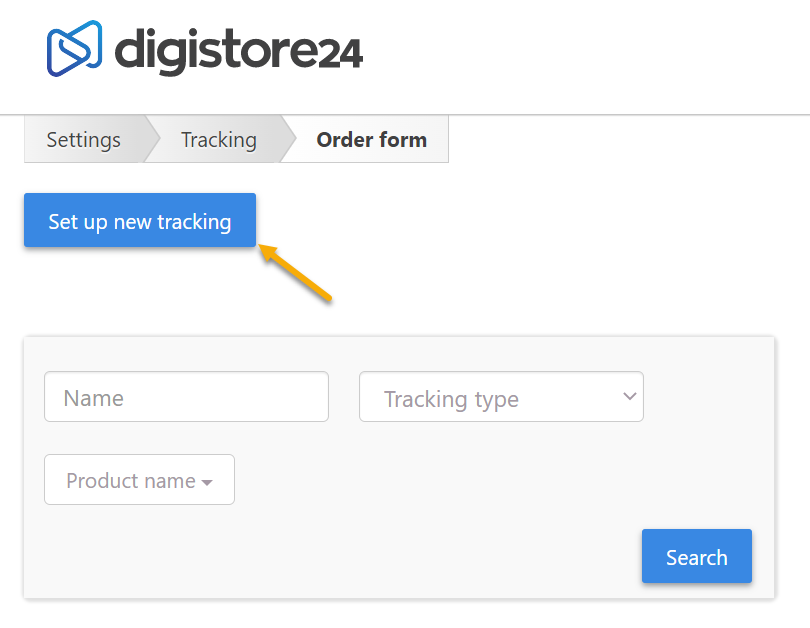
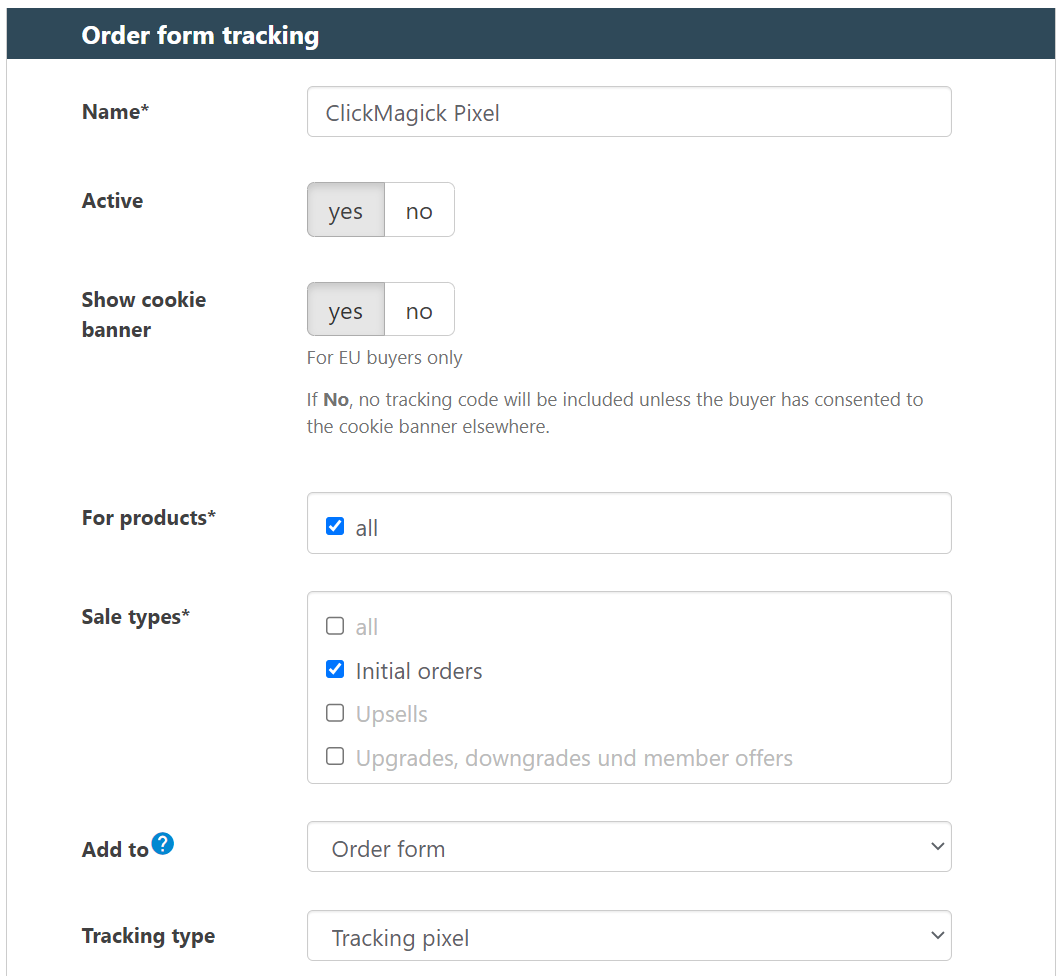
Click on the “Set up new tracking” button in the top left corner:
Give your pixel a name like ClickMagick Pixel, set "Active" to yes, in the "For products" section select All.
For Sales types, make sure "Initial orders" is the only option checked, Add to is set to “Order form”, and Tracking Type is set to "Tracking Pixel".
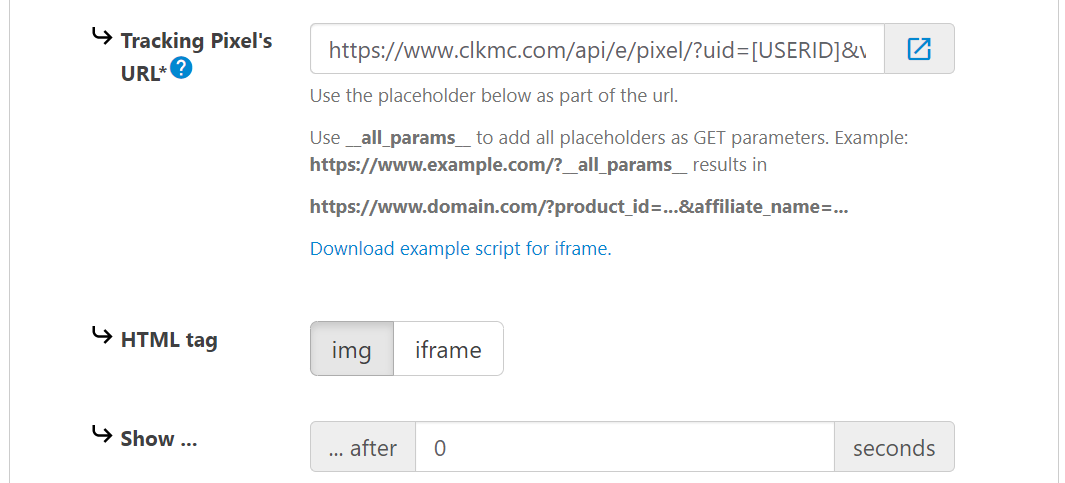
Add your Engagement Tracking Pixel URL below into the box:
https://www.clkmc.com/api/e/pixel/?uid=[USERID]&vid=__cid__&ref=checkoutSet HTML tag to img and Show after 0 seconds and then Save the page.
That's it!
You will now be able to track DigiStore24 Order Form Impressions as Engagements inside of ClickMagick.
Unfortunately, JVZoo only provides a vendor-controlled “all or nothing” IPN webhook that’s not really suited for affiliate tracking. Vendors must agree to share all of their sales data with affiliates – customers’ names, emails, etc – in order for it to work, but we’ve found that most vendors don’t want to do this so affiliates are mostly out of luck.
JVZoo doesn’t support adding any type of tracking pixels either, so the only real option is to track your affiliate sales in JVzoo using Sub-IDs. And this walkthrough will show you exactly how to do that.
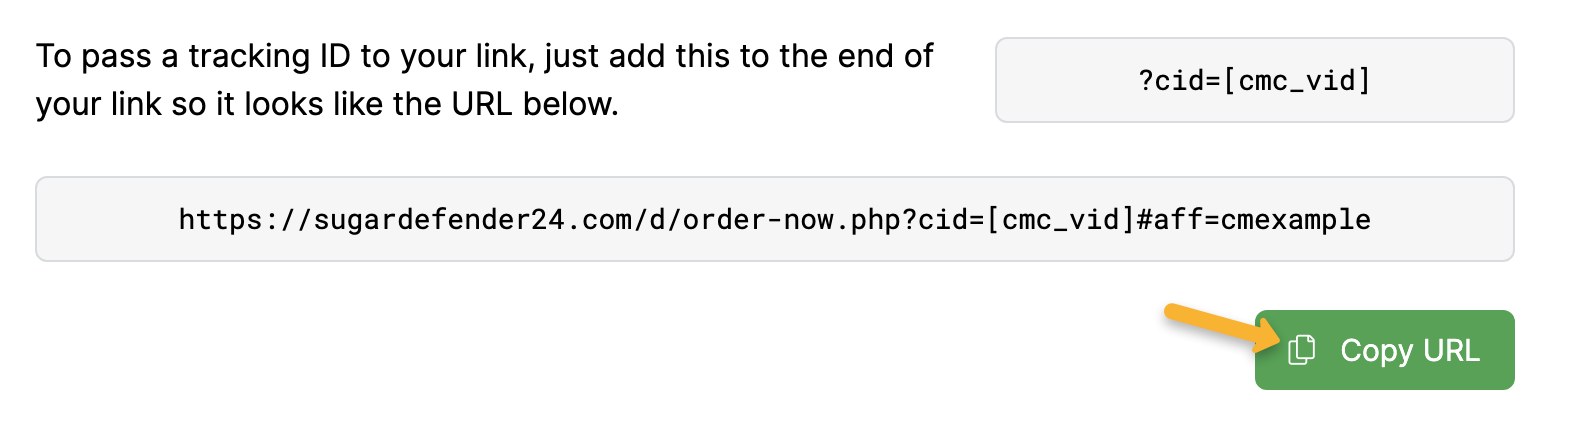
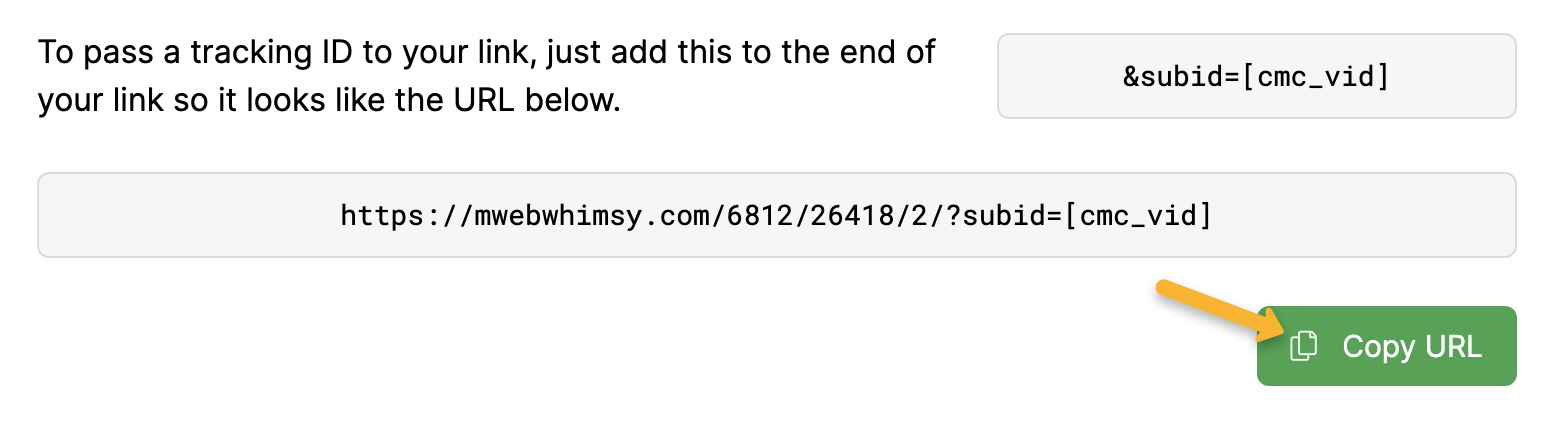
For example, let’s assume that you’re promoting an offer through JVZoo and your link looks like this:
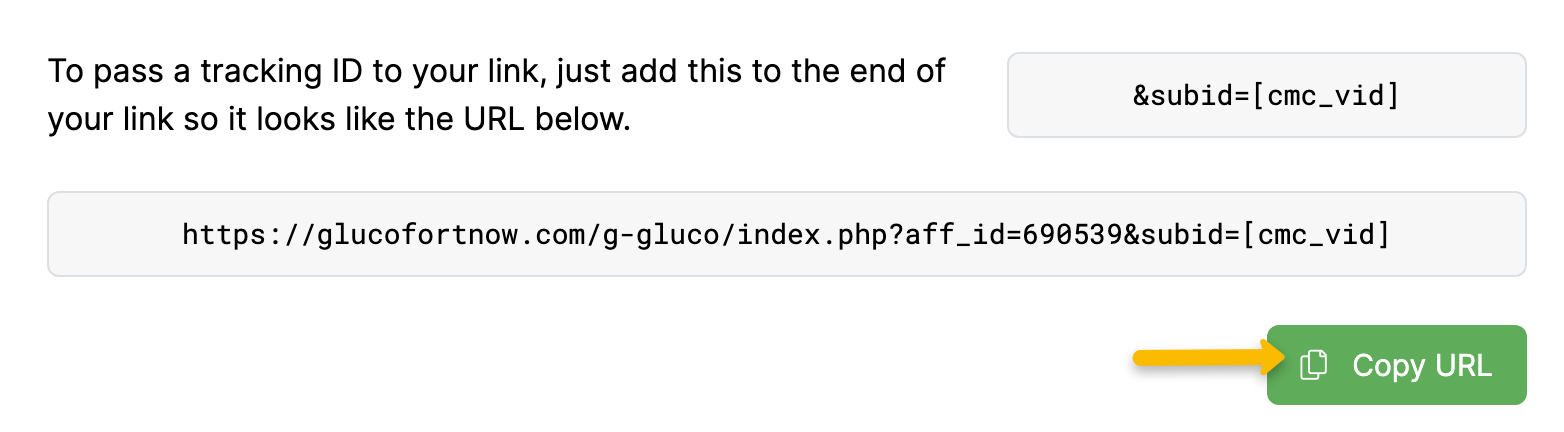
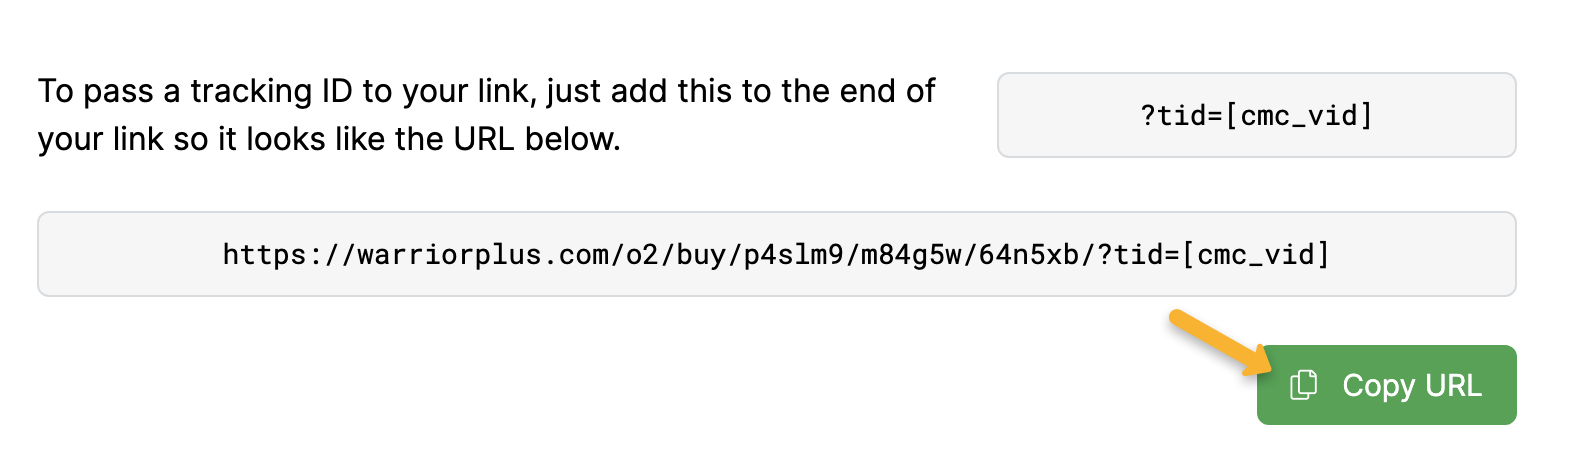
https://www.jvzoo.com/c/3522/3665/To track conversions, you need to pass a unique Sub-ID to your JVZoo affiliate link by adding ClickMagick’s
[cmc_vid] token to the end of the URL like this:https://www.jvzoo.com/c/3522/3665/?tid=[cmc_vid]You would use this modified JVZoo link on your landing page.
Once you’ve added
?tid=[cmc_vid] to the end of your affiliate link, ClickMagick will replace the [cmc_vid] token with a unique number every time someone clicks on your Smart Link. When JVZoo gets the click, it will record the value of the Visitor ID in the tid column of your JVZoo stats along with your clicks and sales.Syncing ClickMagick with JVZoo
To sync ClickMagick with JVZoo, you’ll need to manually download your conversion report from JVZoo occasionally and import it into your ClickMagick account.
Just follow these steps:
| 1. | The first thing you’ll need to do is export your transaction information from JVZoo. To do that, go to the Affiliates menu at the top of the screen and select Transactions. From there, click on the Export button shown here on the lower right side of this screenshot: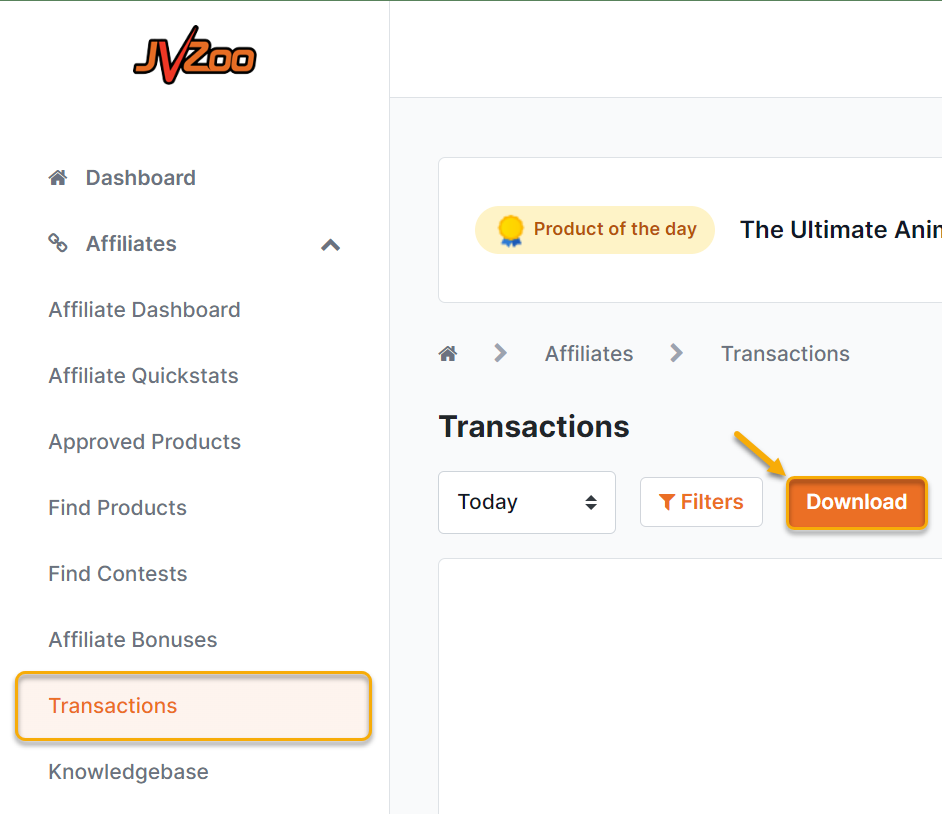
Save the file where you can easily find it. |
| 2. | Before importing the data file into ClickMagick, you’ll need to edit the file slightly using a spreadsheet program like Microsoft Excel, Google Sheets, or Apple Numbers. Specifically, you’ll need to rearrange the columns so that the first three columns are in this order: tid, payout, and completed (which holds date/time values). Delete all other columns, and save the file in CSV format. If you save the file in Excel, Sheets, or Numbers format, it will NOT import into ClickMagick.Tip: If you have trouble rearranging the columns in your spreadsheet program, search the help documents for your spreadsheet—it’s usually quite simple to rearrange columns once you know how. If you still have trouble, contact us at our Help Desk, which you can find in the Help menu at the top of every page. Be sure to attach the file you exported from JVZoo so we can edit it.
Note: The JVZoo export feature sometimes leaves the
tid value empty for sales made even though those same sales show a tid value in your JVZoo transaction report. If you see a blank entry in the tid column for a particular sale, look at your JVZoo transaction report and manually copy the value to the spreadsheet. You might also want to mention the problem to the JVZoo support desk to alert them that this problem still exists. |
| 3. |
|
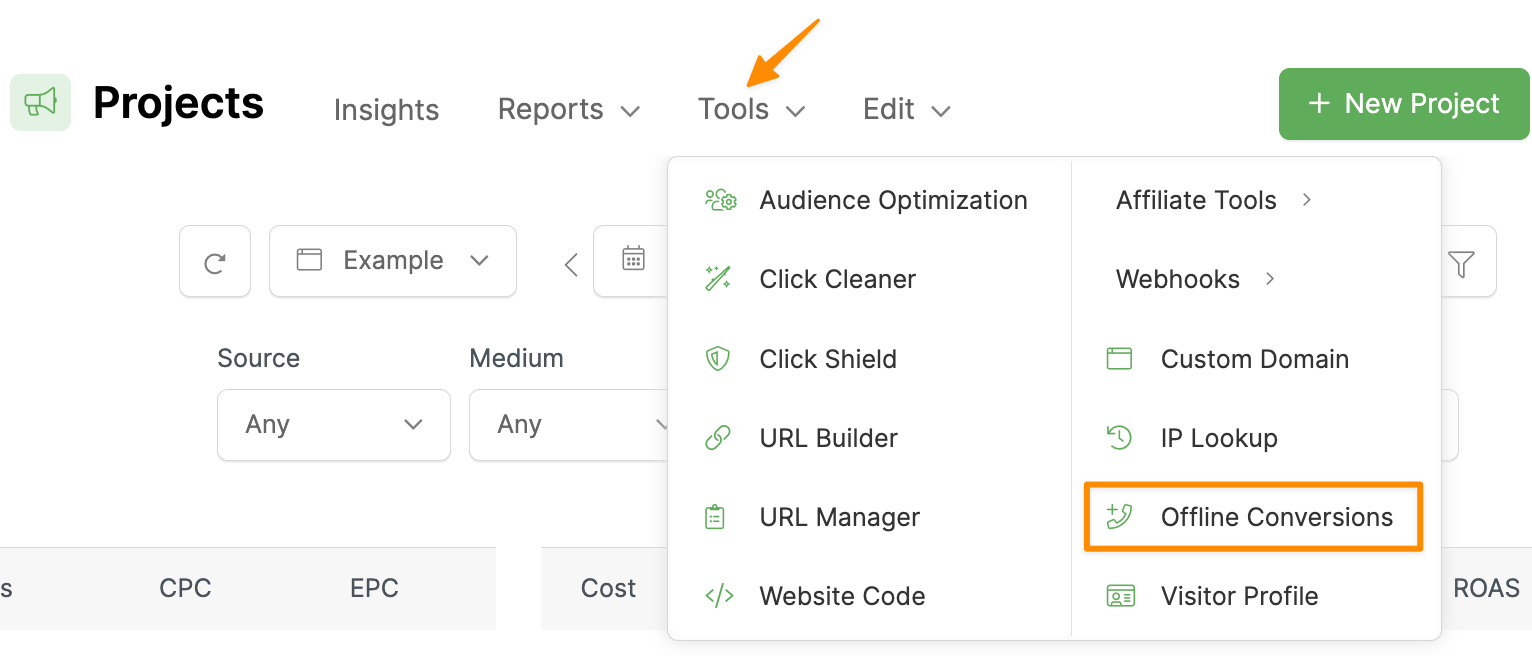
| 4. | Upload a single conversion from the Offline Conversions page or select your “Bulk Upload” to upload a file and click the Record Sale button. If you edited your file correctly and saved it in CSV format, your data should be imported, and your stats should show accurately.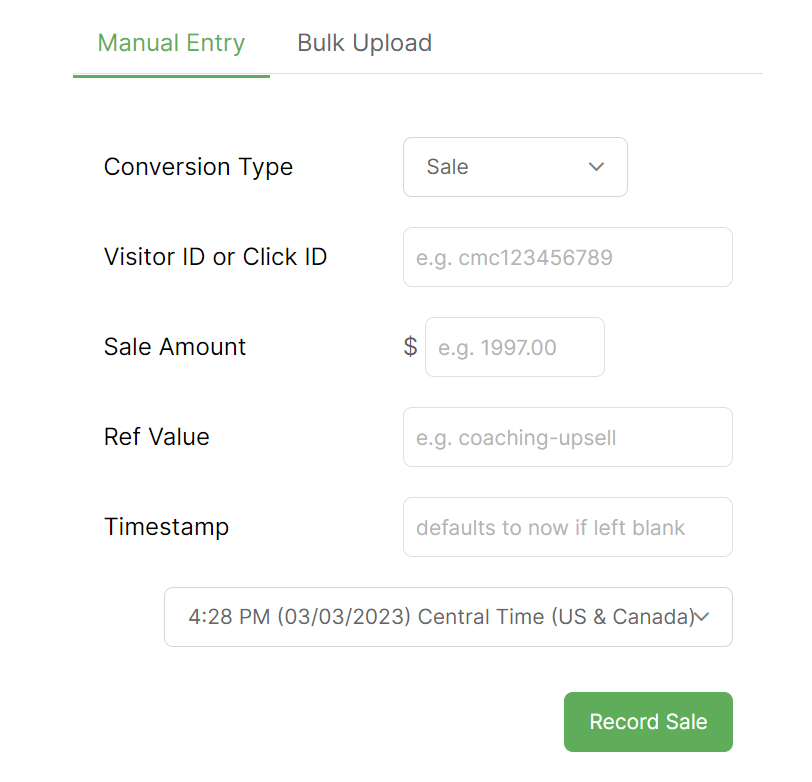
Caution: It’s important to remember that the sales and revenue-related stats you see in ClickMagick will only be accurate when you select a date range that exactly matches the date range of the conversion reports you’ve uploaded.
|
Tracking MaxWeb sales only takes a few steps, follow the article below to get set up in just a few minutes. Optionally, if you want to track MaxWeb checkout hits, click the Checkout tab below and follow the steps there too.
Step 1 – Add your postback URL to MaxWeb
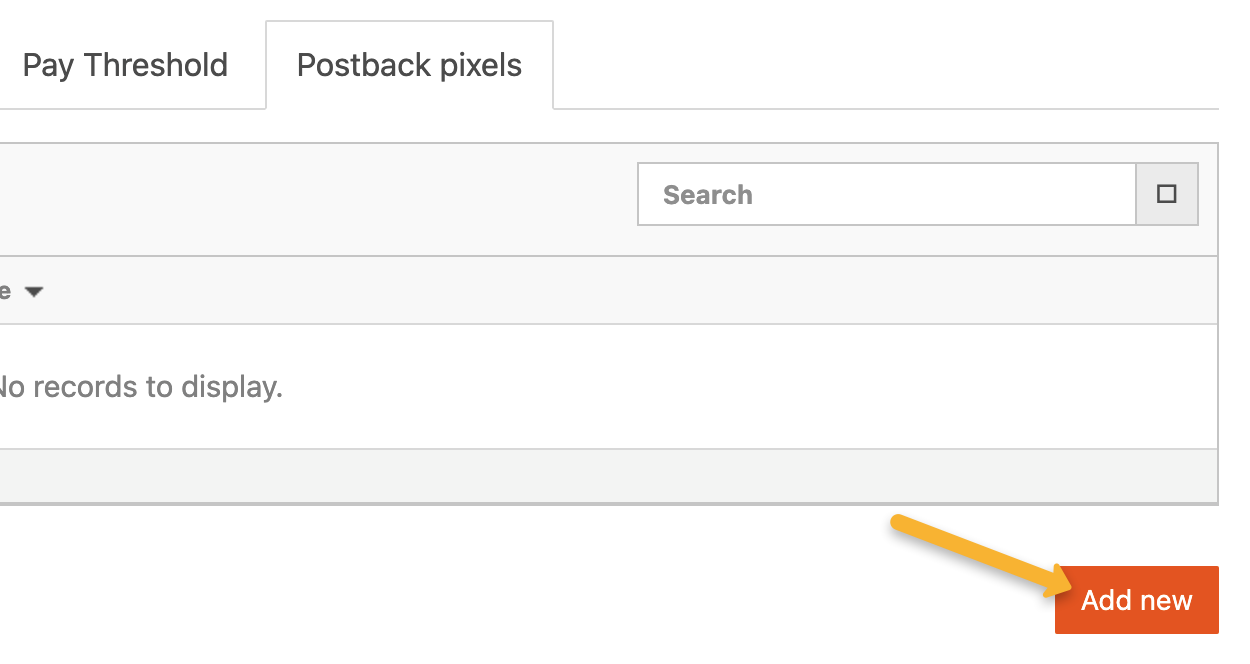
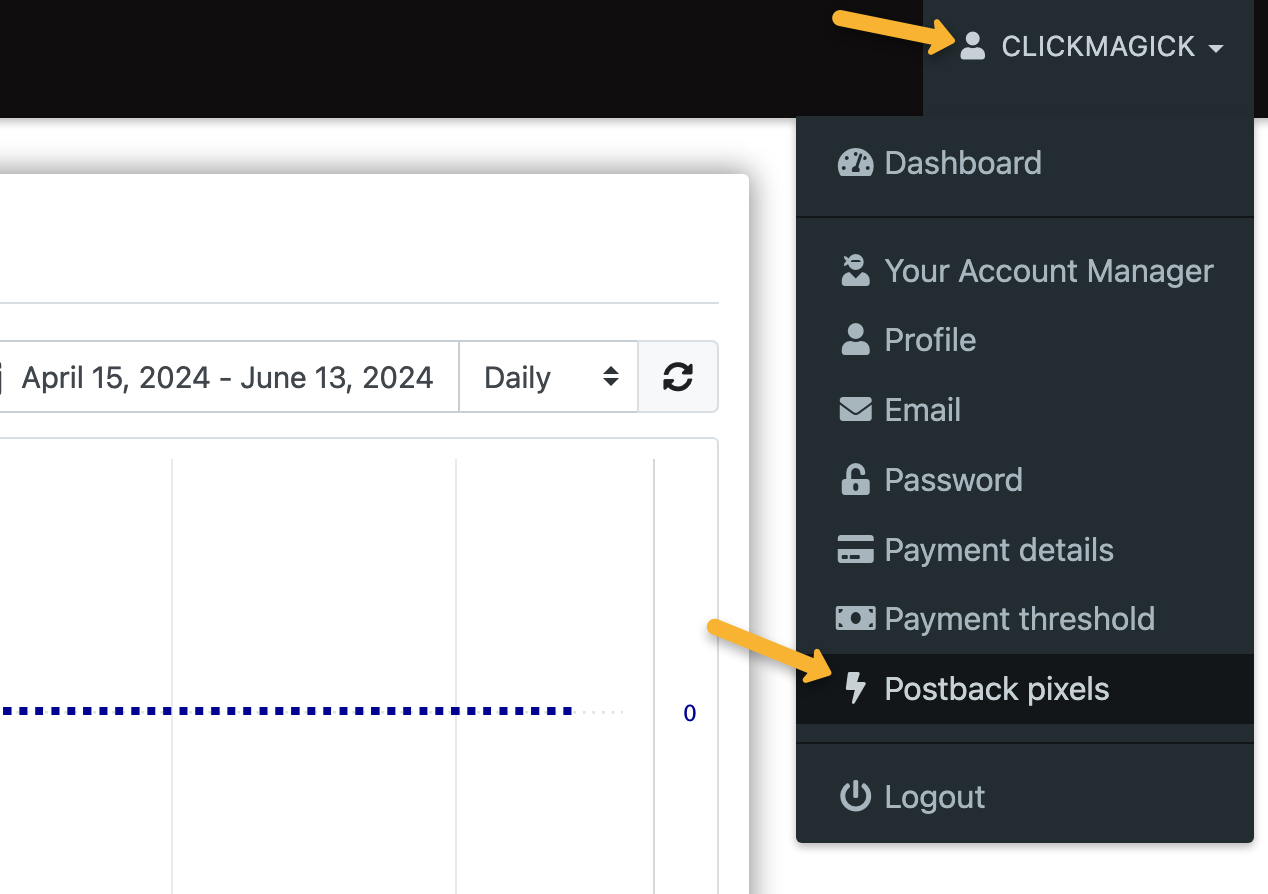
In your MaxWeb account, head to the menu in the top right hand corner, then click on “Postback Pixels”.

Click on “Add new”.
Copy the custom postback URL below and paste it into the “URL” section:
https://www.clkmg.com/api/s/post/?uid=[USERID]&s1={SUBID}&amt={COMMISSION_AMOUNT}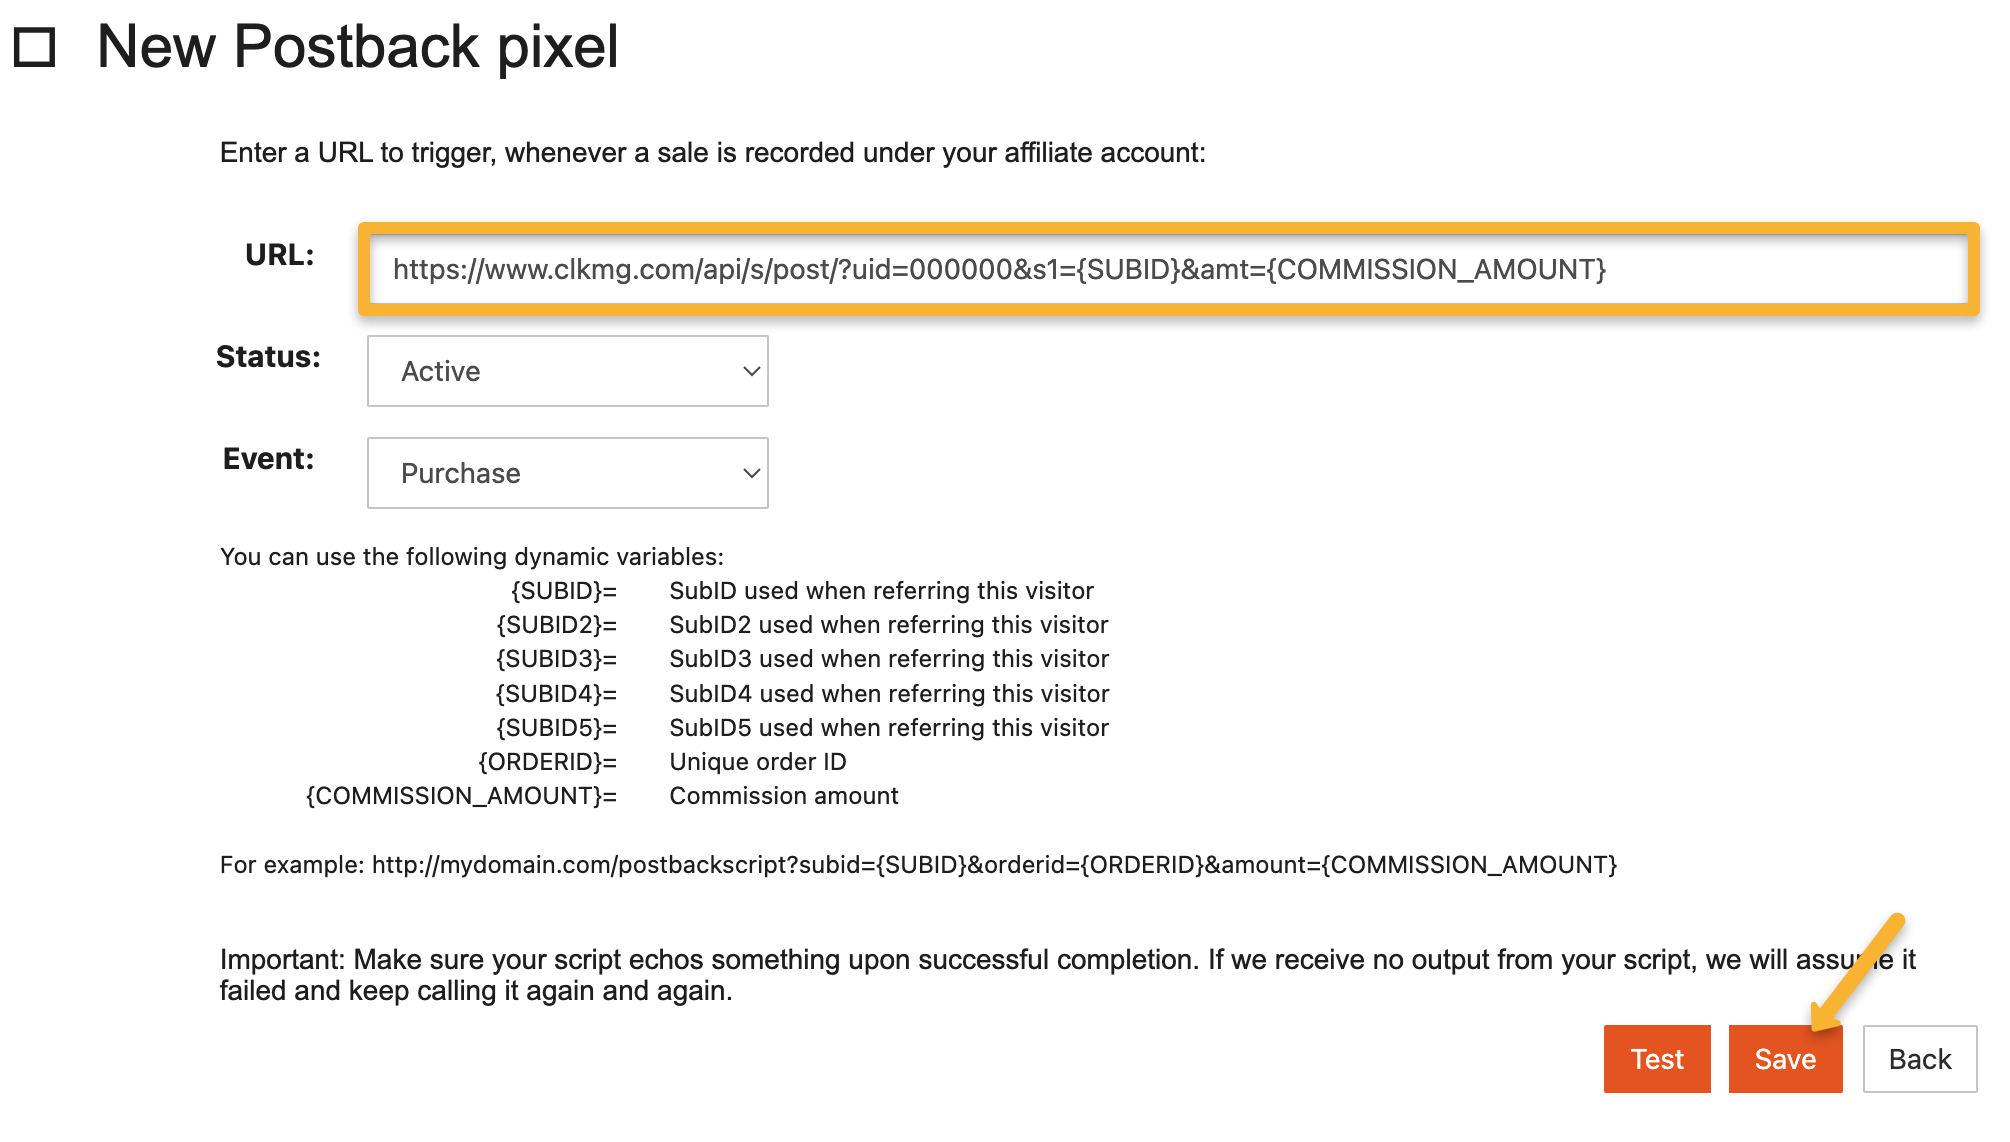
Just hit “Save” afterwards, the test function isn’t needed in this case.
Note: This will add your postback URL globally for every single offer, so you only need to add this once.
Step 2 – Add a visitor ID to your affiliate link
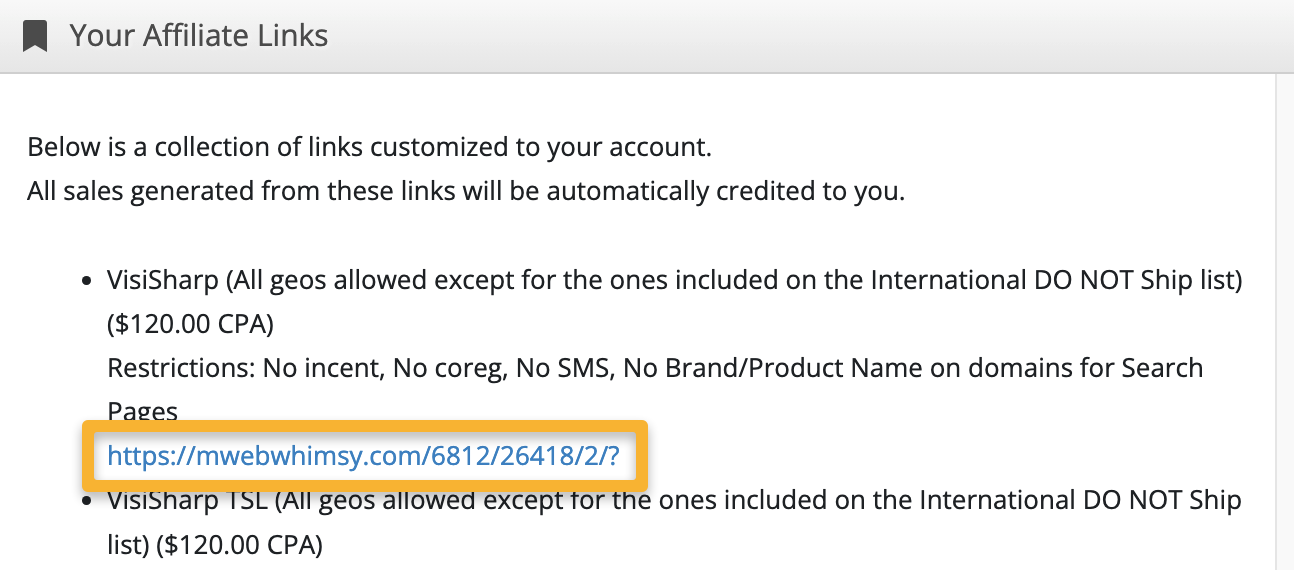
Select the product you’d like to promote and copy your affiliate link from MaxWeb.
In ClickMagick, go to your Project Dashboard, select Tools, Affiliate Tools, then Affiliate Link Builder.

Select MaxWeb as your affiliate network. You can scroll down the list or use the search bar (as shown below).
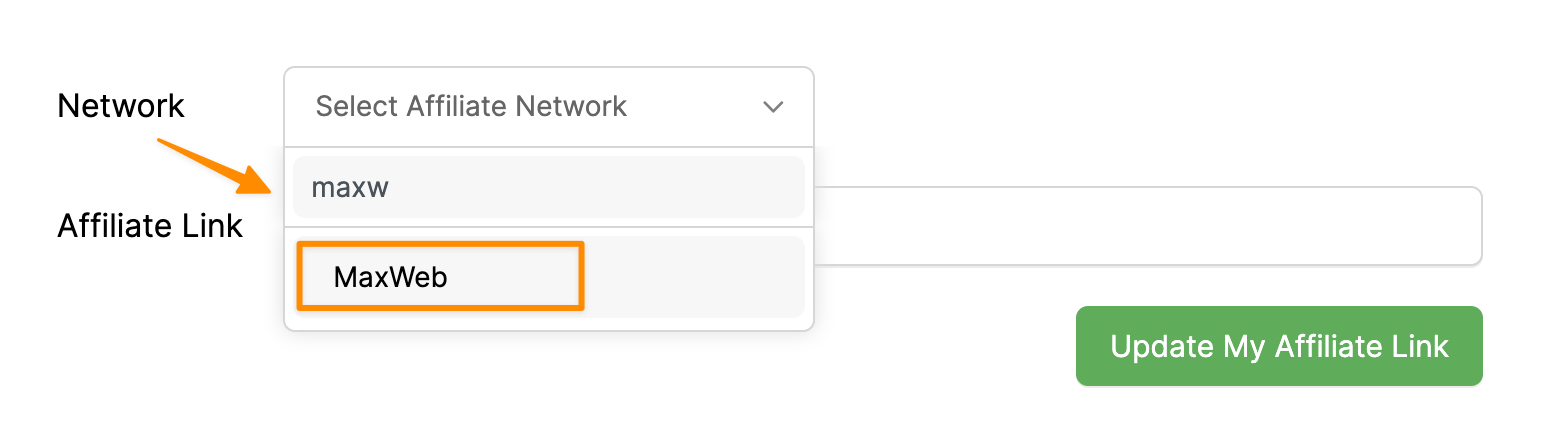
Next paste in your affiliate link. Hit “Update My Affiliate Link” and you’ll be given an updated affiliate link below.
Copy this updated affiliate link to your landing page and you’re all set!
You can track checkout hits as “Engagements” in ClickMagick. You’ll just need to add a separate postback URL to track this in MaxWeb. Follow the steps below to learn how.
Step 1 – Add your engagement pixel to MaxWeb
In your MaxWeb account, head to the menu in the top right hand corner, then click on “Postback Pixels”.
Click on “Add new”.

Copy the custom postback URL below and paste it into the “URL” section:
https://www.clkmg.com/api/e/post/?uid=[USERID]&s1={SUBID}&ref=checkoutSet the “Event” to “Checkout Visit”.
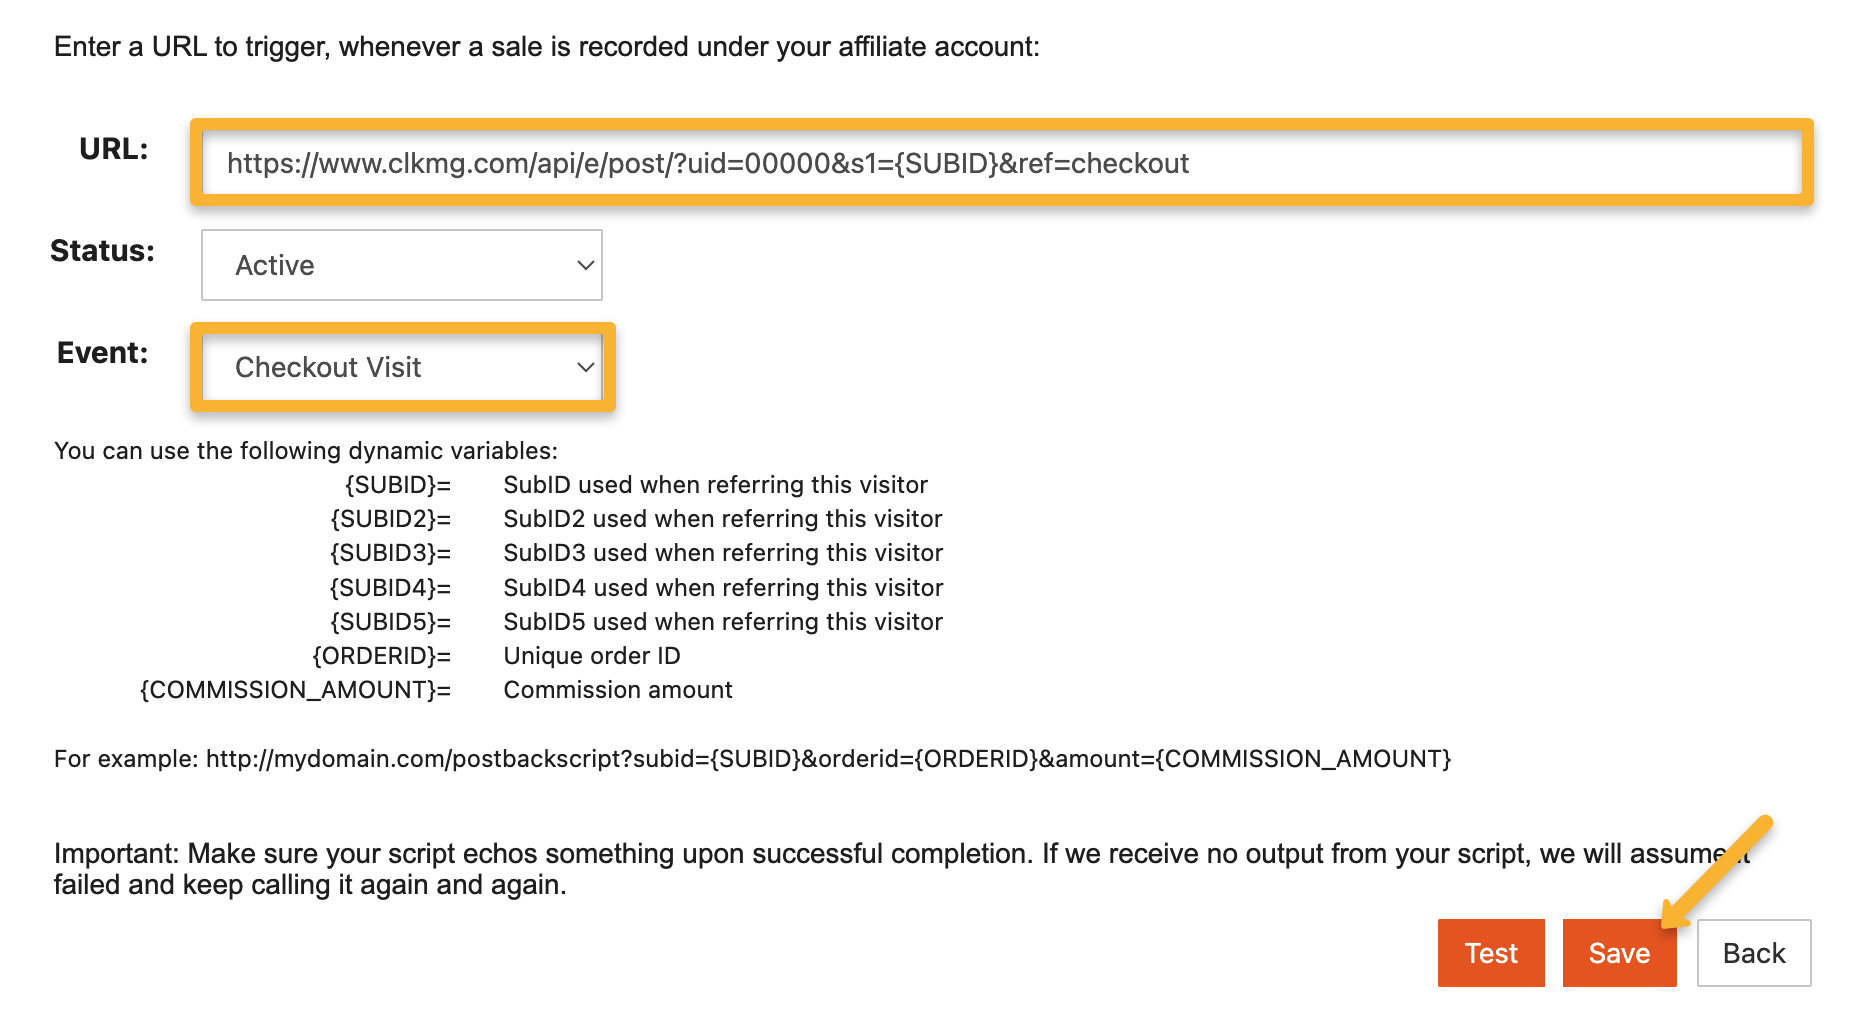
Hit “Save” and that’s it! You’ll now be able to track MaxWeb checkout hits as Engagements in ClickMagick.
Note: This will add your postback URL globally for every single offer, so you only need to add this once.
Tracking your sales with WarriorPlus, either as a vendor or as an affiliate, is a simple two-step process …
Step 1 – Add your ClickMagick WarriorPlus Postback URL to your WarriorPlus account
WarriorPlus uses the term “Notification URL” for vendors or “Webhook (IPN) URL” for affiliates, rather than Postback URL like most other affiliate networks, but just know they all mean the same thing.
Your WarriorPlus Postback URL:
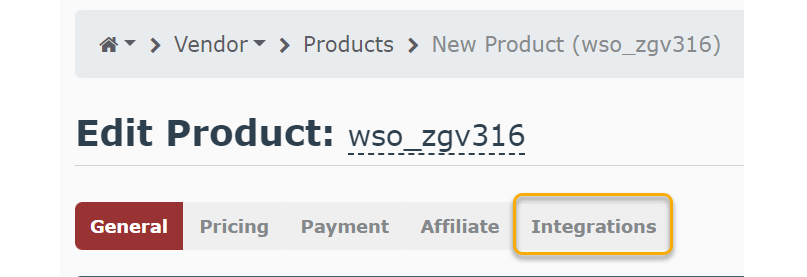
https://www.clkmg.com/api/s/wp/?uid=[USERID]If you’re a vendor, create a new product or edit an existing product to gain access to the product settings.
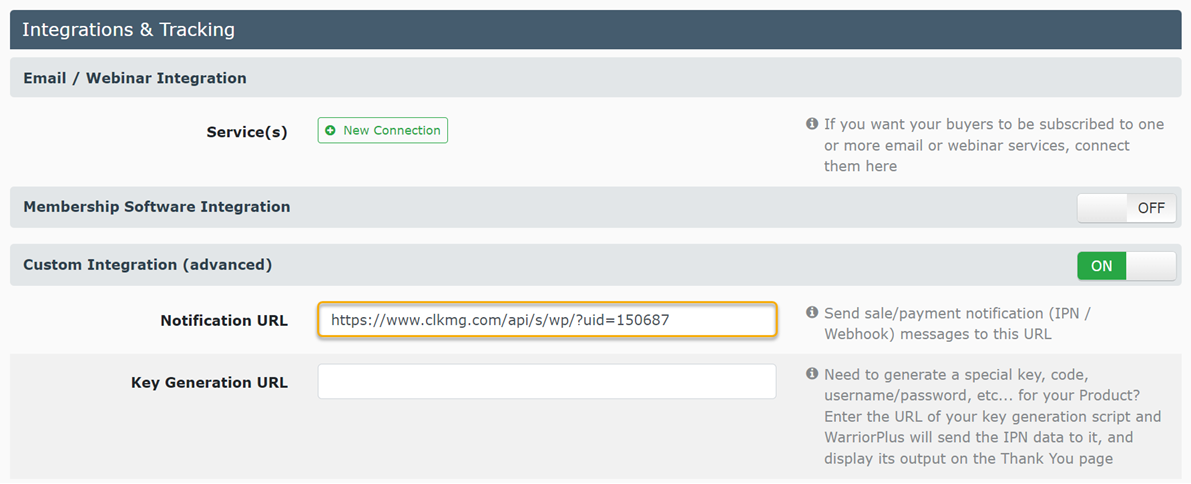
Once there, click on the “Integrations” tab at the top, which will scroll you to the bottom of the page where the “Integrations & Tracking” section exists.
Add the URL you copied above into the “Notification URL” box, as shown below:
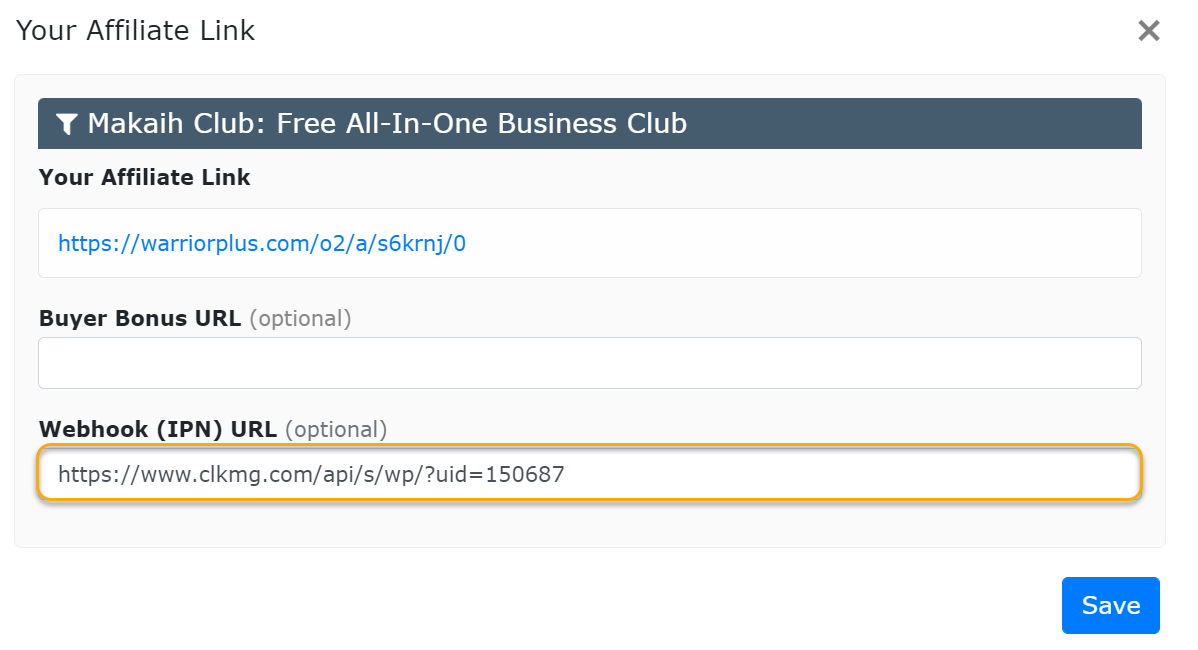
If you’re an affiliate, you need to add your Postback URL to each offer that you’re promoting. Simply pull up the offer and enter your Postback URL above in the field that says “Webhook (IPN) URL (optional)” as shown below:
Step 2 – Add the Visitor ID to the end of your WarriorPlus affiliate or vendor payment link
This is really easy to do with the Affiliate Link Builder
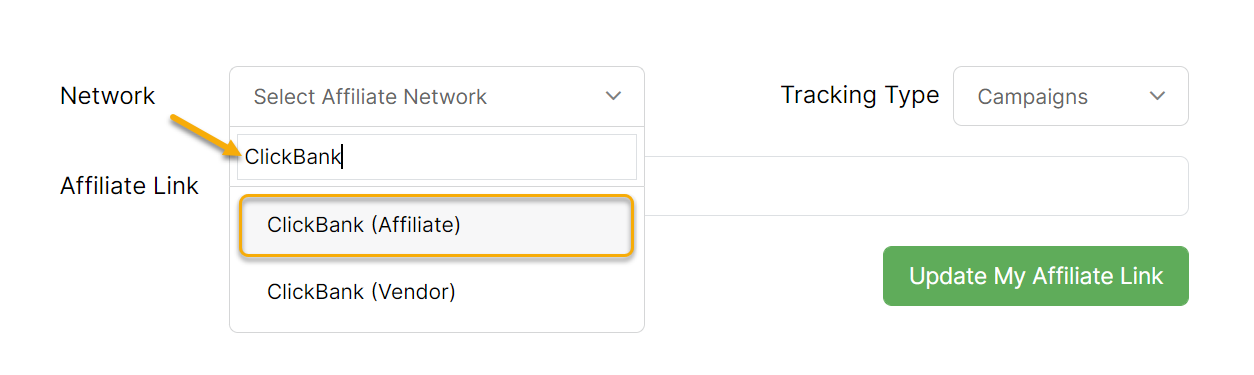
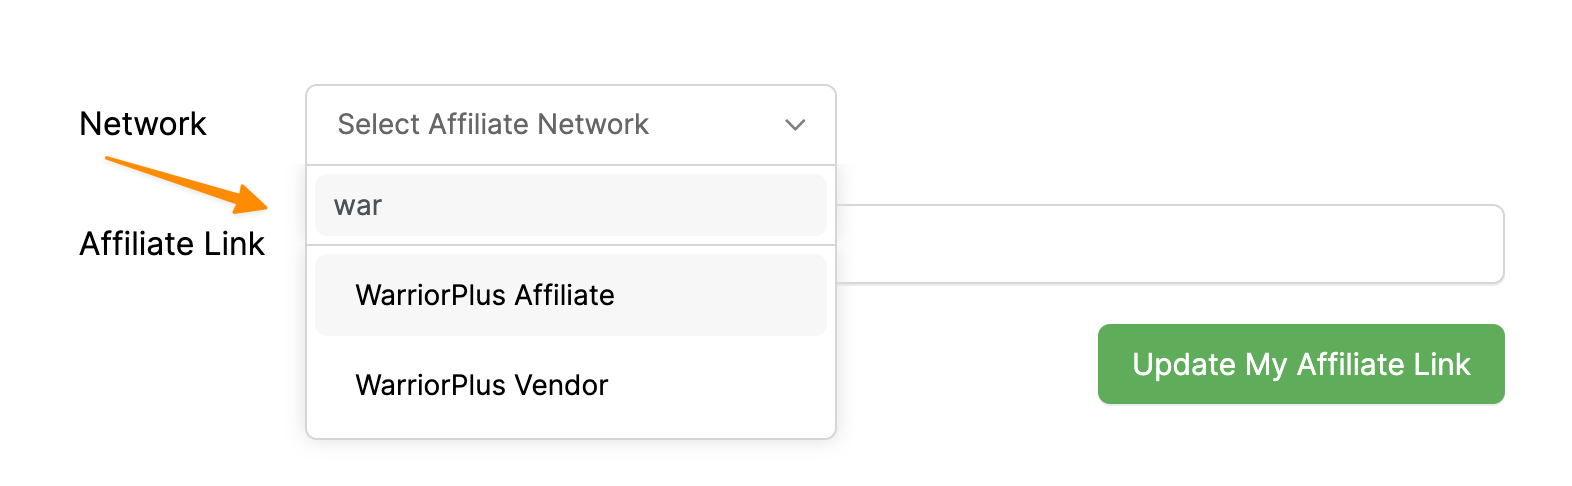
If you’re an affiliate, set the “Network” to WarriorPlus Affiliate, then paste in your affiliate link:
If you're a vendor, set the “Network” to WarriorPlus Vendor, then paste in your vendor payment link:
Click “Update” and then copy the updated affiliate or vendor payment link to use on your landing pages or thank you pages:

That’s it! You are now setup to start tracking your WarriorPlus sales using ClickMagick.
Tracking CartPanda sales only takes a few steps, follow the article below to get set up in just a few minutes. Optionally, if you want to track CartPanda checkout hits, click the Checkout tab below and follow the steps there too.
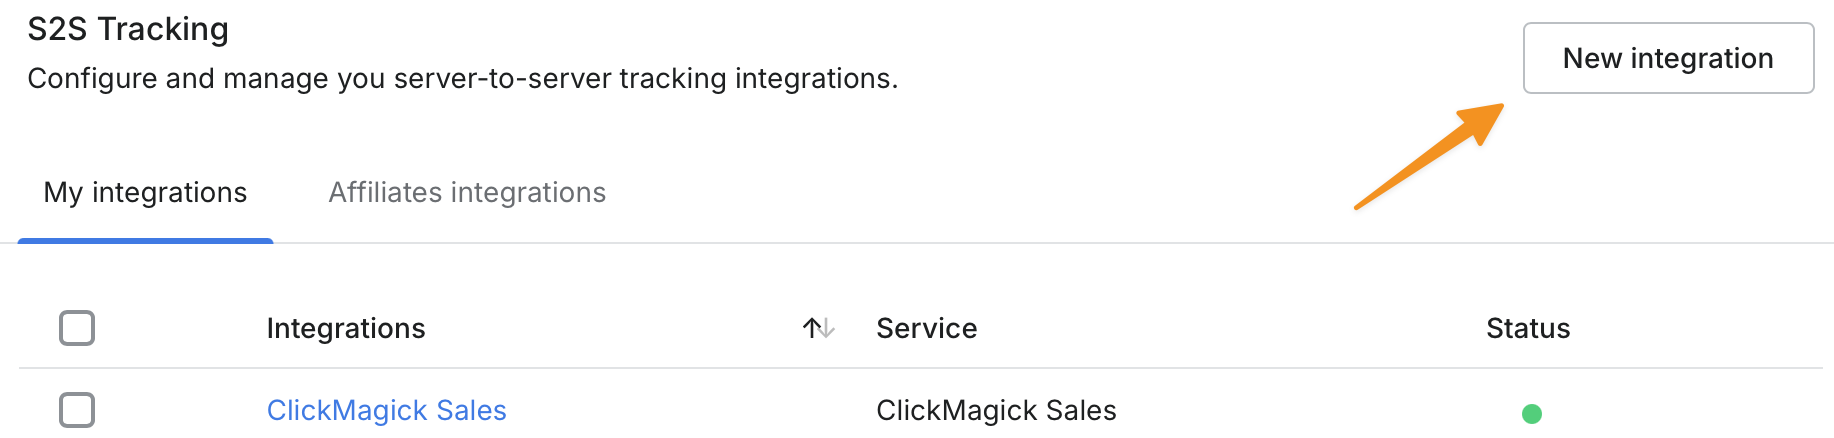
Step 1 – Create a new S2S integration
Click the link below or go to Settings, then Tracking and Scripting, and click New Integration.
Access your CartPanda settings
Step 2 – Set your webhook up
Name the integration ClickMagick Sales and copy and paste the url below in the Postback URL field:
https://www.clkmg.com/api/s/post/?uid=[USERID]&s1={cid}&amt={amount_affiliate}

Step 3 – Activate your integration
Scroll to the bottom of the screen and toggle on Active, Initiate Sale, and Upsell.
Do not enable Initiate Checkout - we’ll set up a separate integration for that.
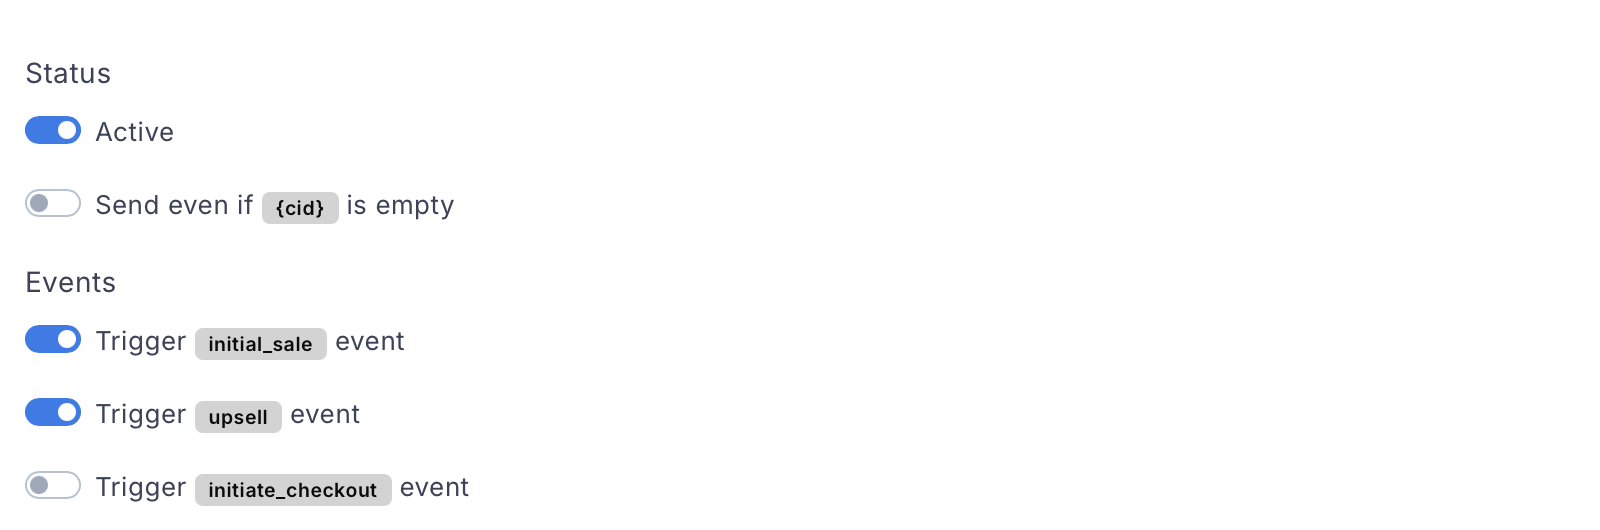
That’s it. Now, you’ll start seeing your sales and upsells in ClickMagick.
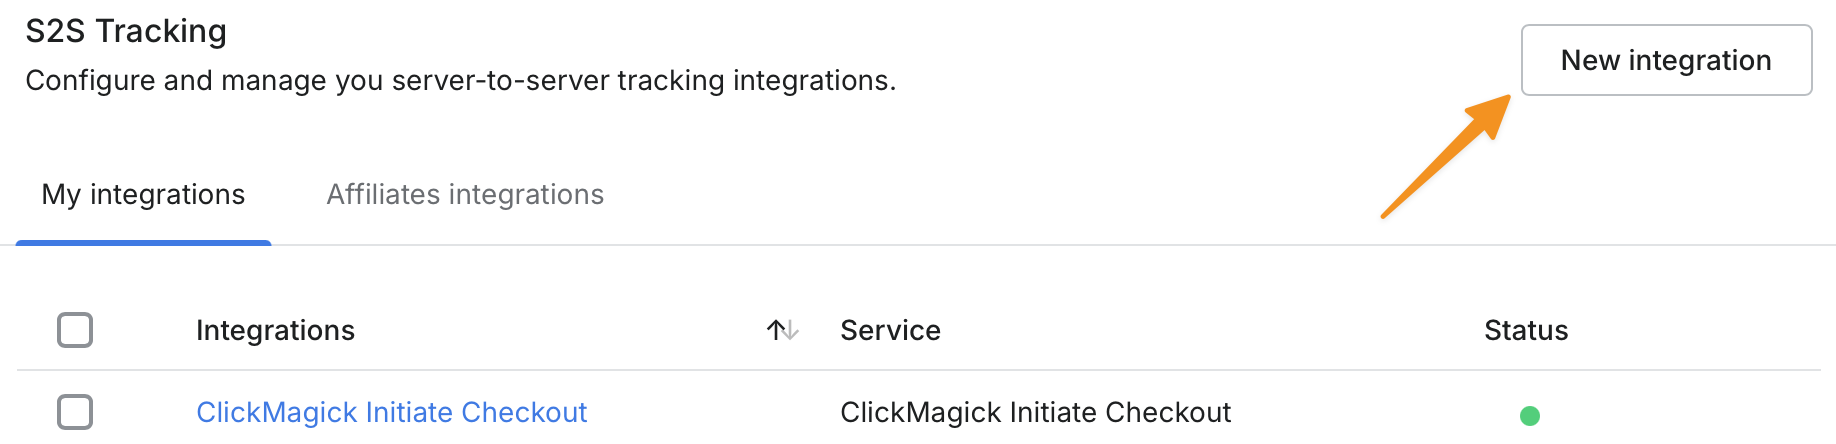
Step 1 – Create a new S2S integration
Click the link below or go to Settings, then Tracking and Scripting, and click New Integration.
Access your CartPanda settings
Step 2 – Set your webhook up
Name the integration ClickMagick Initiate Checkout and copy and paste the url below in the Postback URL field:
https://www.clkmg.com/api/e/post/?uid=[USERID]&s1={cid}
Step 3 – Activate your integration
Scroll to the bottom of the screen and toggle on Active and Initiate Checkout.
Do not enable Initiate Sale or Upsell - we’ll set up a separate integration for that.
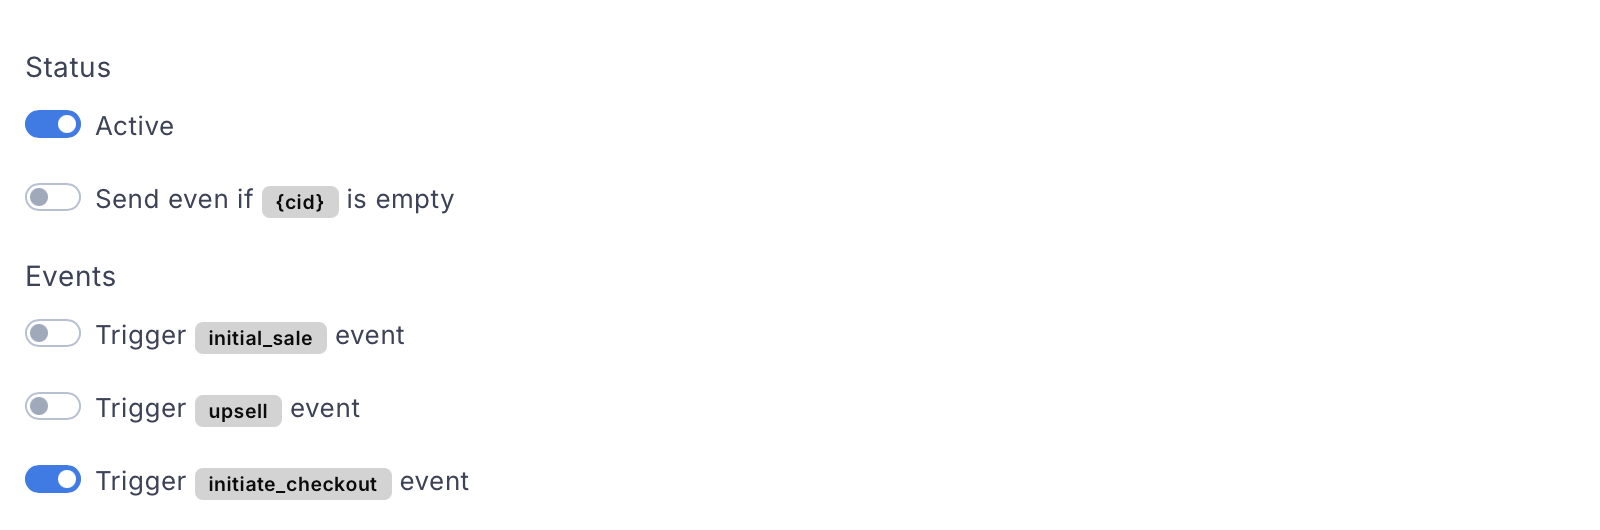
That’s it. Now, you’ll start receiving your initiate checkout events as engagements in ClickMagick.
Article 95 Last updated: 12/01/2025 1:34:29 AM
https://www.clickmagick.com/kb/?article=95