How To Set Up A Secured Custom Domain In Hostgator
1. Log in to CloudFlare (or create a new account if you have not already).
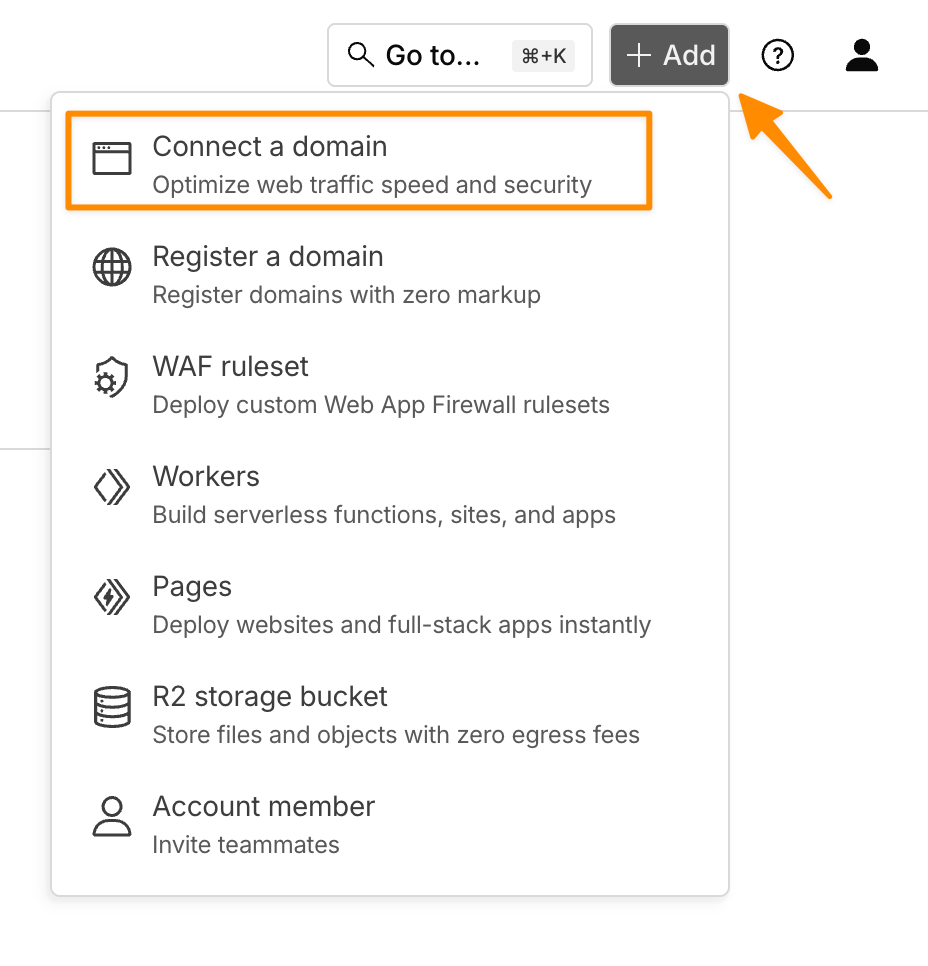
2. Click On "Connect Domain" in the top right of the page.
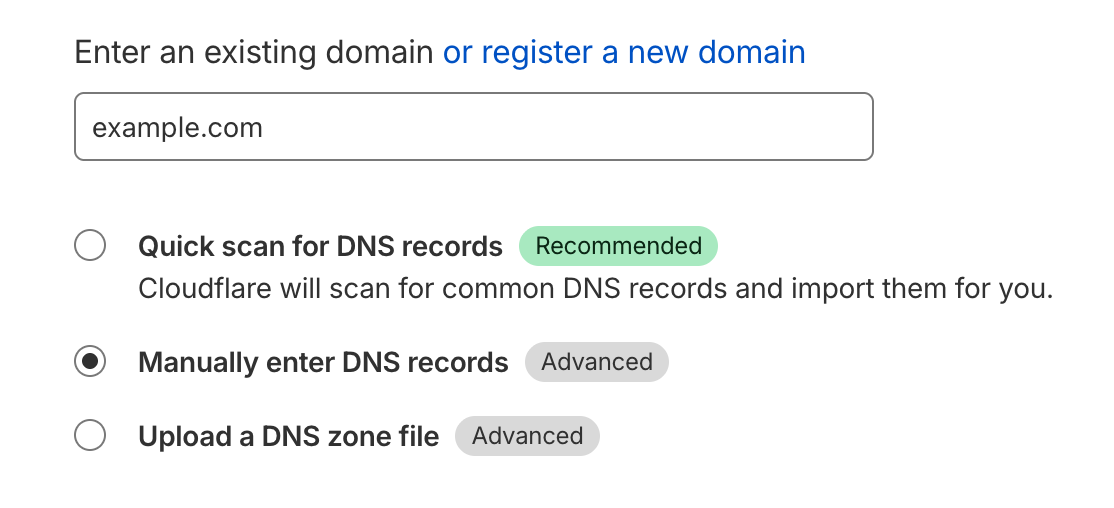
3. Enter the domain name and select “Manually enter DNS records”
For the “Type”, choose CNAME.
For the “Name”, add whatever you want to use for your tracking subdomain.
Then, for the “Target”, use www.clkmg.com for Smart Links, and www.clkmr.com for Rotators.
4. Once you save the record, ensure it appears in the list, and click Continue.
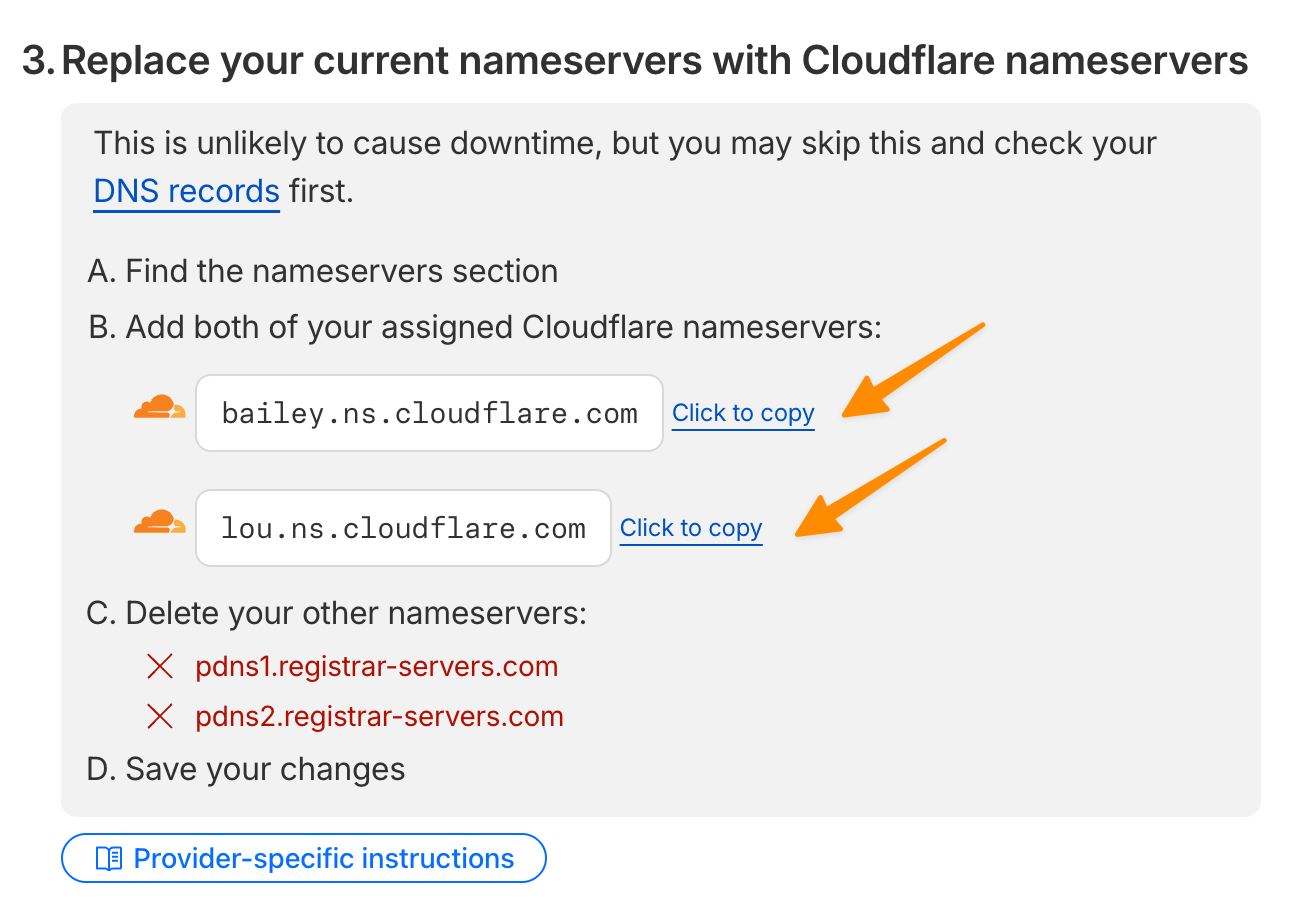
5. Next, you will see a prompt to update your nameservers. Copy the CloudFlare name servers…
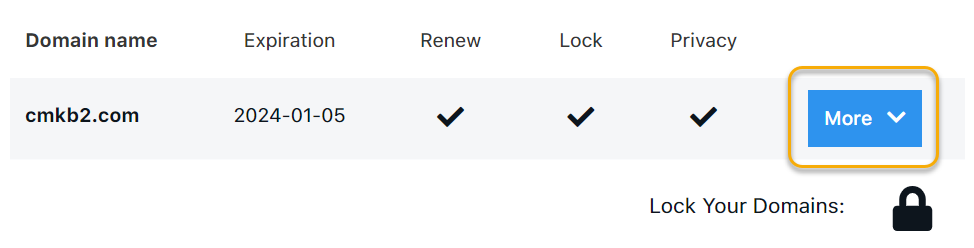
6. Head back to Hostgator and click on the More button next to the domain you are using
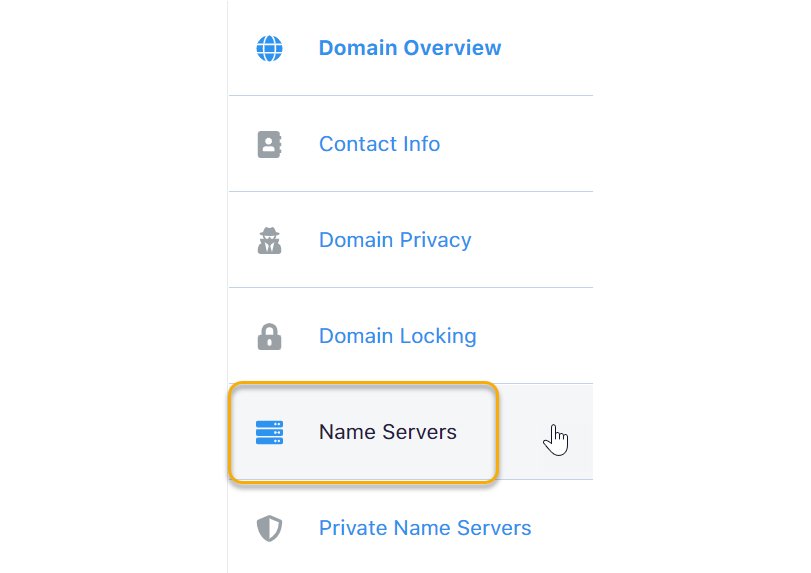
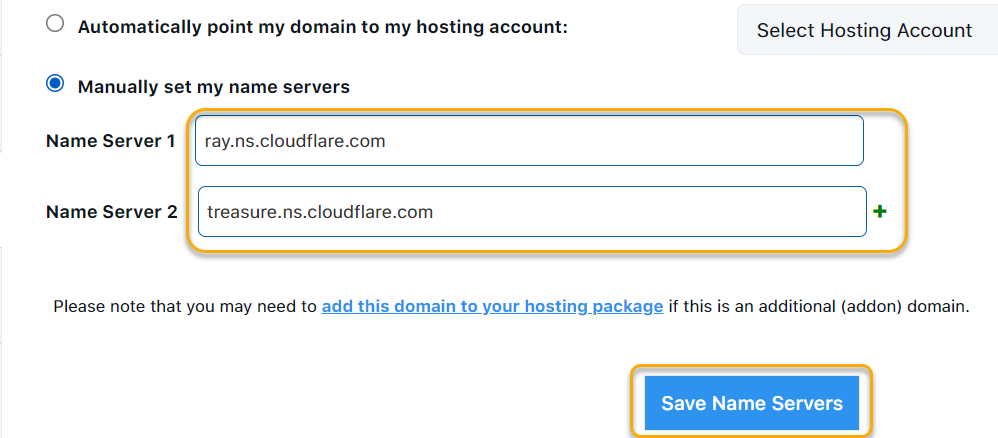
7. Click on the option for “Name Servers” on the left-hand menu (you may have to hover your mouse over the menu to show the names)
8. Make sure the option for “Manually set my name servers” is selected and update the name servers to what you already copied from CloudFlare, then save your changes.
9. Now, go back to CloudFlare and continue the setup process.
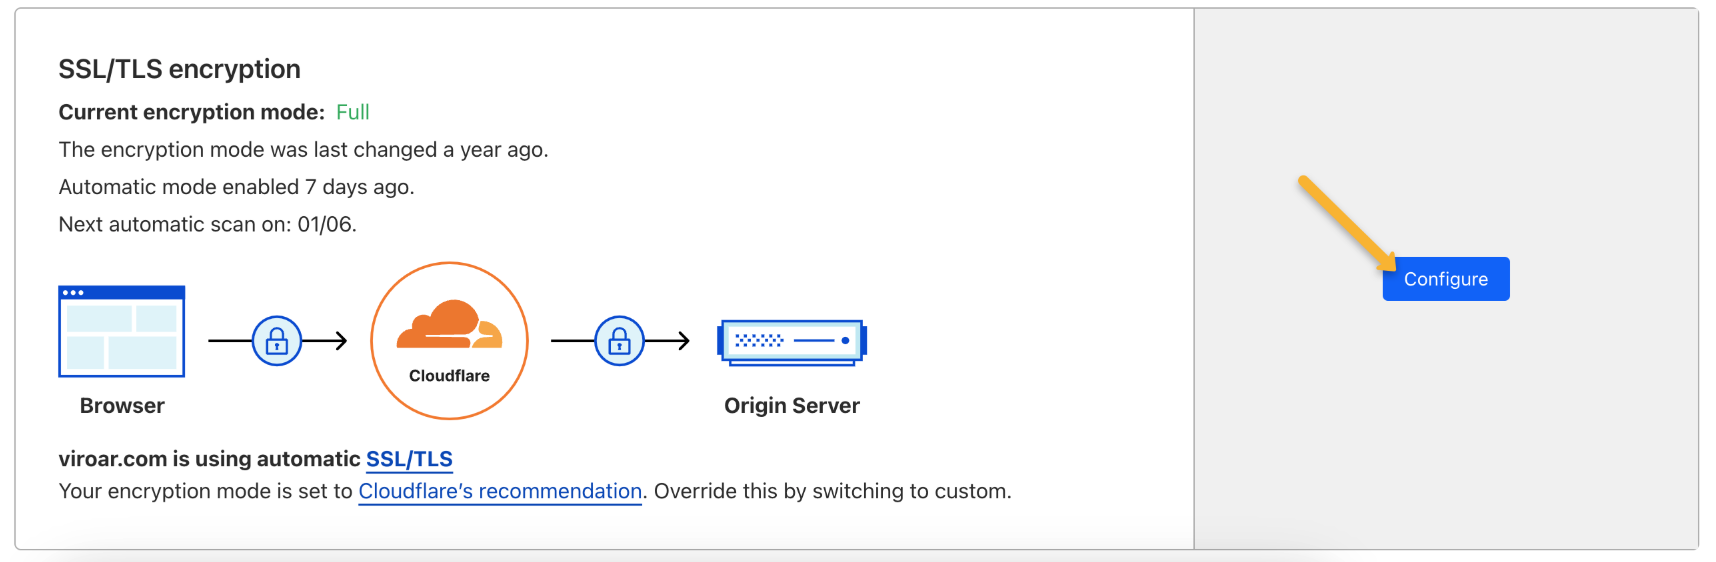
10. Back in Cloudflare, click on “SSL/TLS” and then on “Overview”.
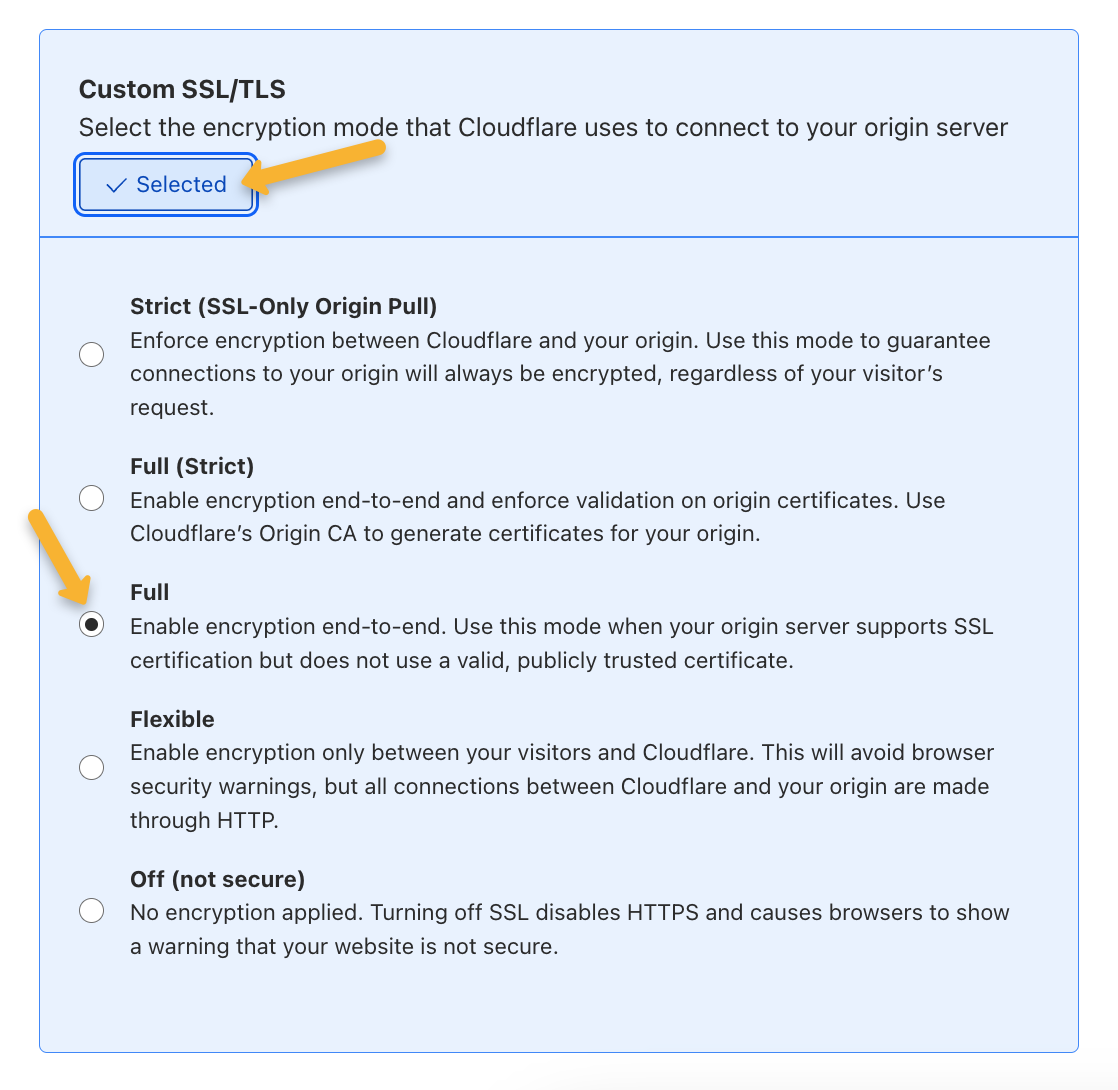
11. Click on “Configure” next to “SSL/TLS encryption”.
Select “Custom SSL/TLS”, then “Full” and save your changes.
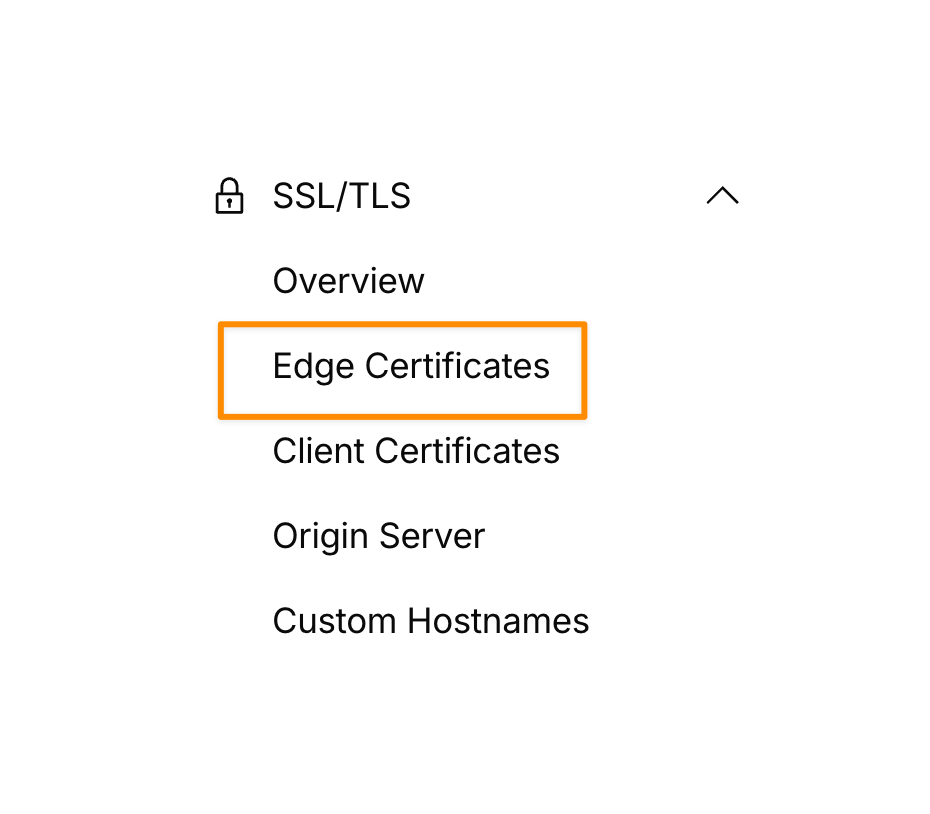
12. Click on the “Edge Certificates" section.
Ensure that “Always Use HTTPS” is on.
13. Once your domain is confirmed to be connected to CloudFlare, go to the Domain Manager in ClickMagick to add your custom domain.
If you are using an existing domain, you first need to figure out what you want your subdomain to be. This is a descriptive word in front of your domain name. Here are some examples:
www.yourdomain.com

			learn.yourdomain.com
blog.yourdomain.com

			offer.yourdomain.com
In the examples above, the subdomains are www, blog, learn, and offer. You can use any combination of letters and numbers for a subdomain.
Once you have figured out what you will be naming your subdomain for tracking, You will use one of the values below:
For Smart Links, use:
Type: CNAME
Name: The subdomain you chose. For this article, we used “track”.
Target: www.clkmg.com
For Rotators, use:
Type: CNAME
Name: The subdomain you chose. For this article, we used “track”.
Target: www.clkmr.com
Note: Do not use the same CNAME reference for Smart Links and Rotators when setting up your custom domain. If you do, you cannot add your custom domain to the tracking or rotator features will not work properly. You need to use separate subdomains for Smart Links and Rotators.
How to Add the Custom Tracking Domain to ClickMagick
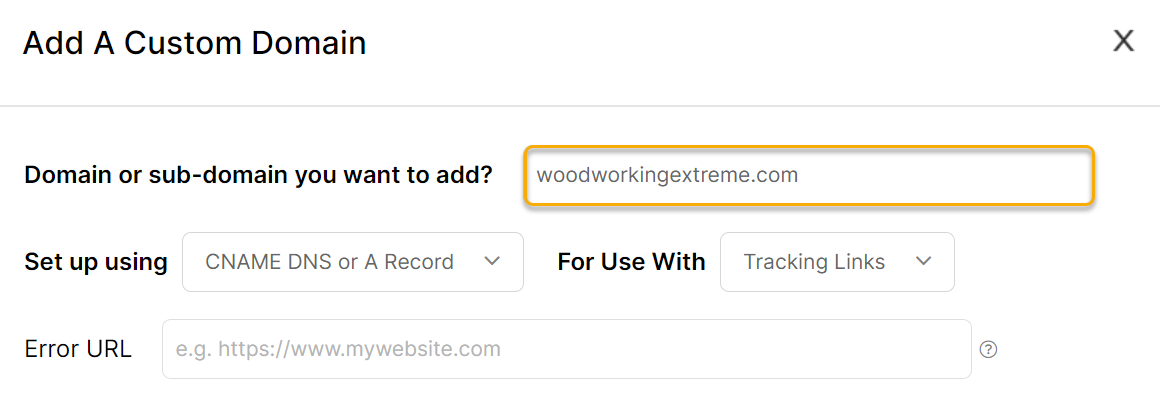
Click on Domain Manager in the Tools menu inside Smart Links and click on the New Domain button.
Enter your root domain (without any subdomain or the https):
Use the default options now and click “Add Custom Domain” to save your changes.
You can always change your domain settings using the Domain Manager.
Note: You might be unable to add your domain to ClickMagick immediately. This is because it can take anywhere from 1 to 24 hours for the DNS records to propagate. If you are having problems adding your new custom domain, give it some time and return later to try again.
How to Add Your New Domain to Your Links or Rotators
To learn how to set up Smart Links or Rotators in the first place, review the articles linked below.
To add a new domain to a Smart Link (whether you’re creating one or editing one), click on the dropdown menu next to “Smart Link” and choose the new domain:
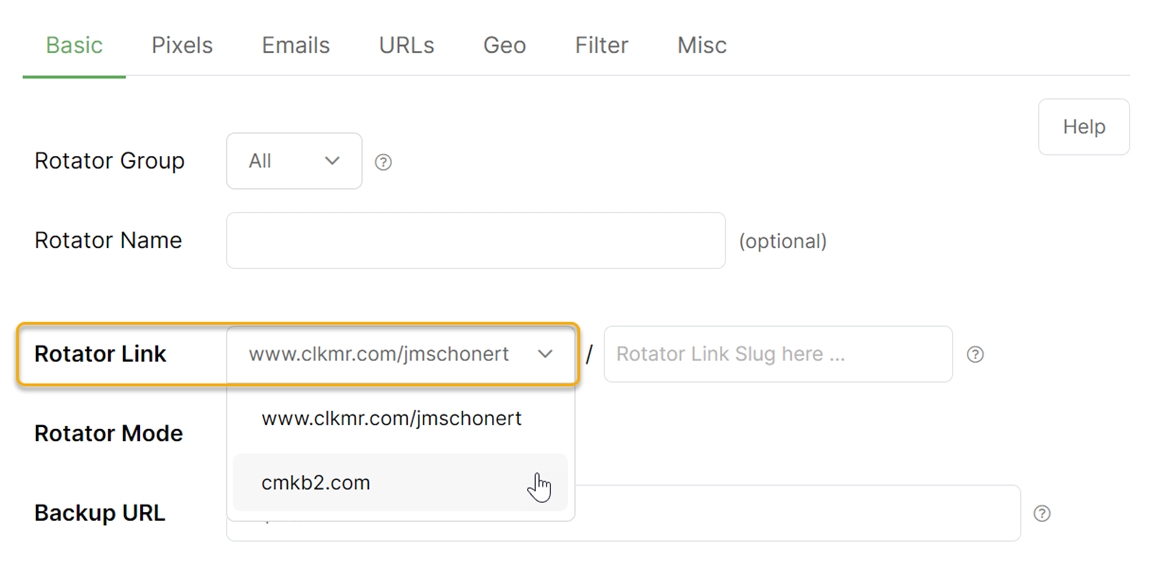
To add a new custom domain to your rotator (whether You’re creating one or editing one), click on the dropdown menu next to “Rotator Link" and choose the new domain:
And that’s it! You now have a custom domain ready to use with your Smart Links or Rotators with ClickMagick!
Article 1059 Last updated: 11/13/2025 1:15:18 AM https://www.clickmagick.com/kb/?article=1059