|
How do I test my tracking?
Testing your tracking set up is a simple process, just select whichever option applies to you below …
You’ll be able to test up until the checkout page, and in some cases you can test sales tracking.
To test your tracking, follow the steps below …
Step 1 – Clear Your Test Data
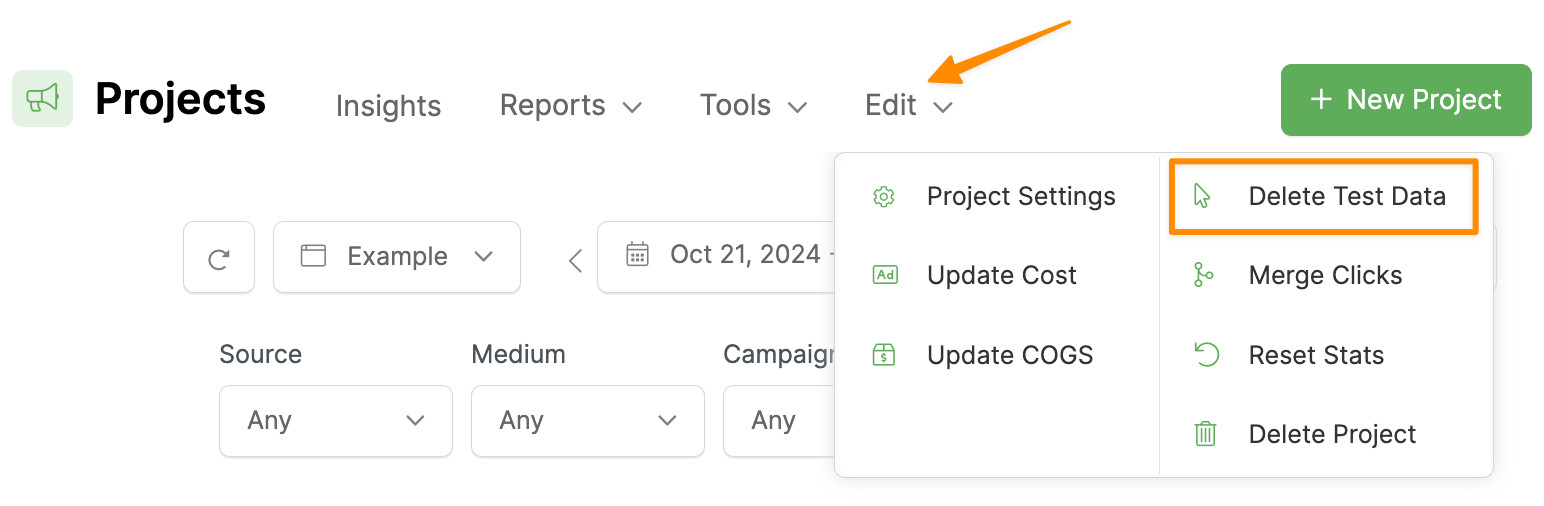
First, we’ll want to clear any testing history so it doesn’t affect this test. To do that, select the “Edit” menu, then click “Delete Test Data”.

This will delete all click and conversion data from your own IP address so you can do a fresh test.
Step 2 – Generate a Test Click
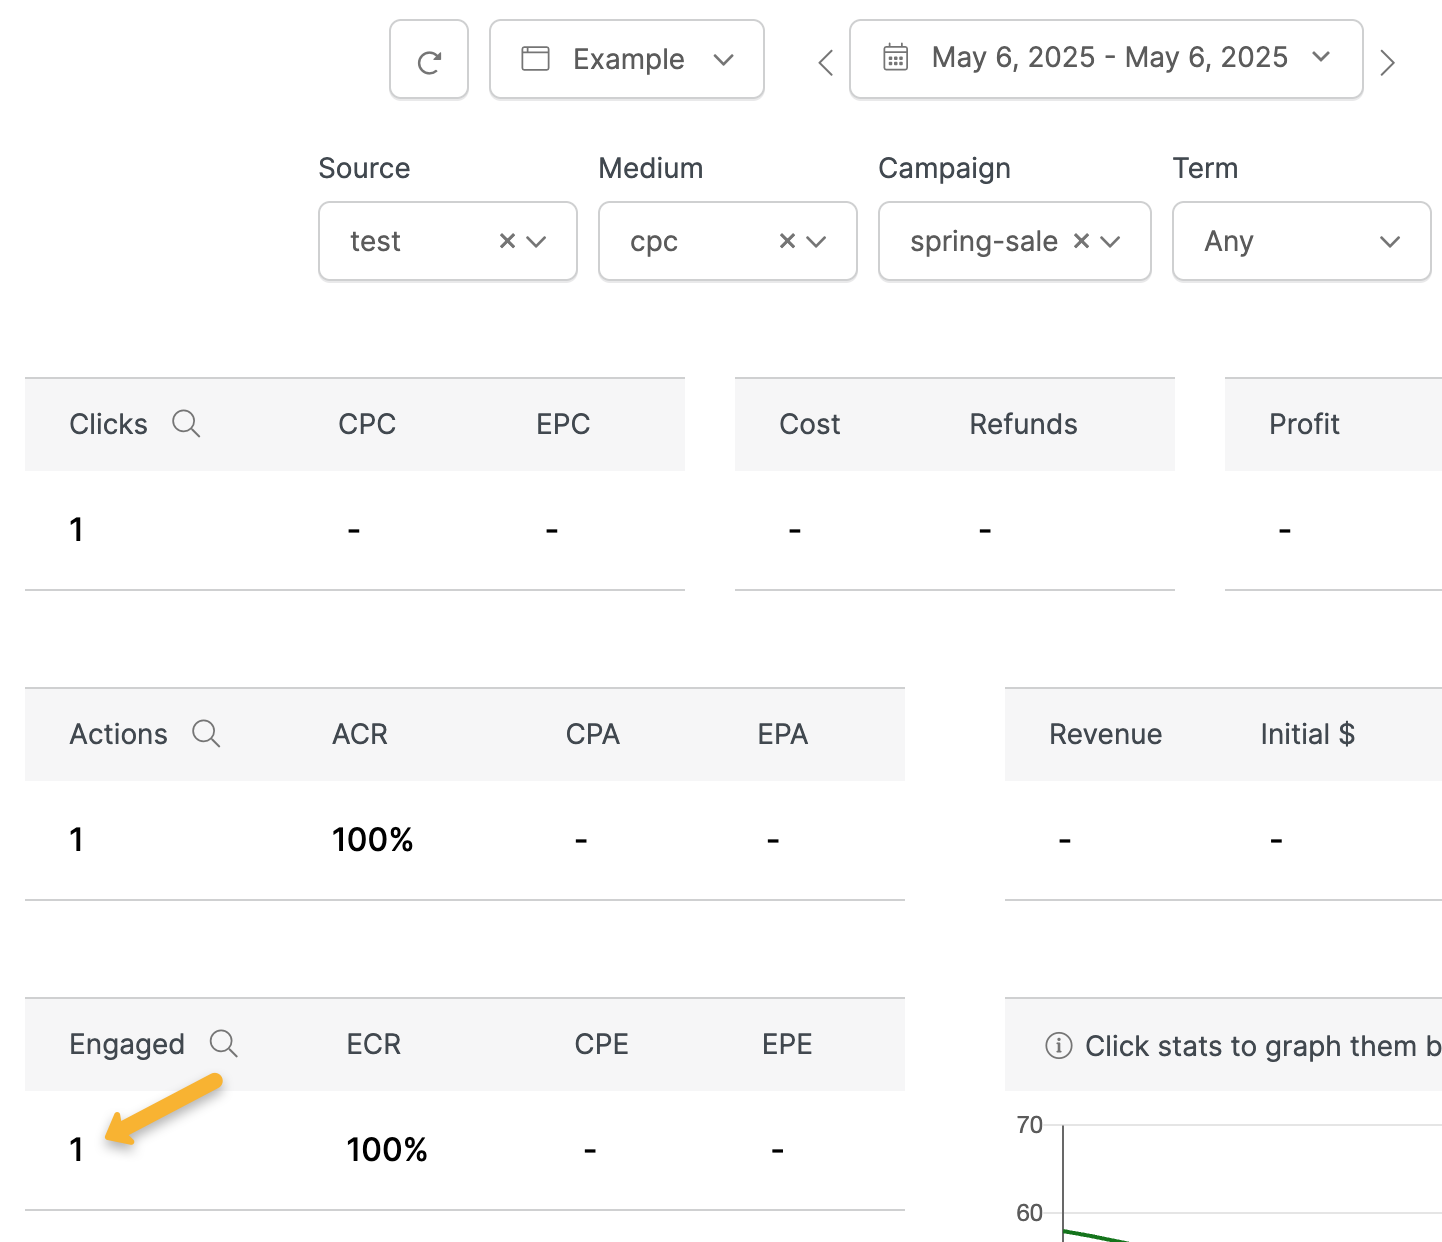
Next, we’ll test generate a test click with the landing page URL you’re going to be sending traffic to.
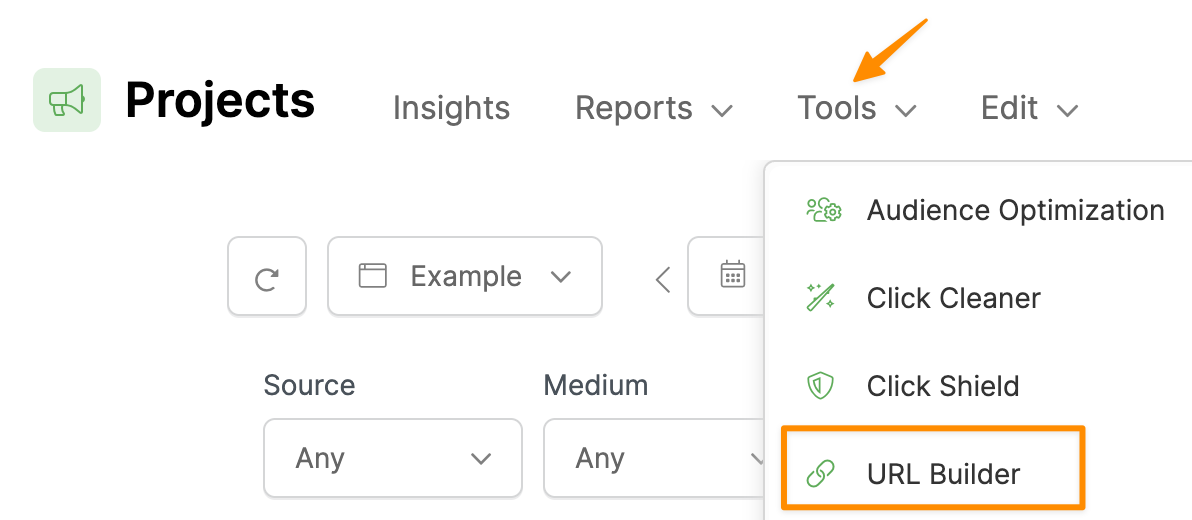
To do that, first go to the “Tools” menu, then select “URL Builder”.
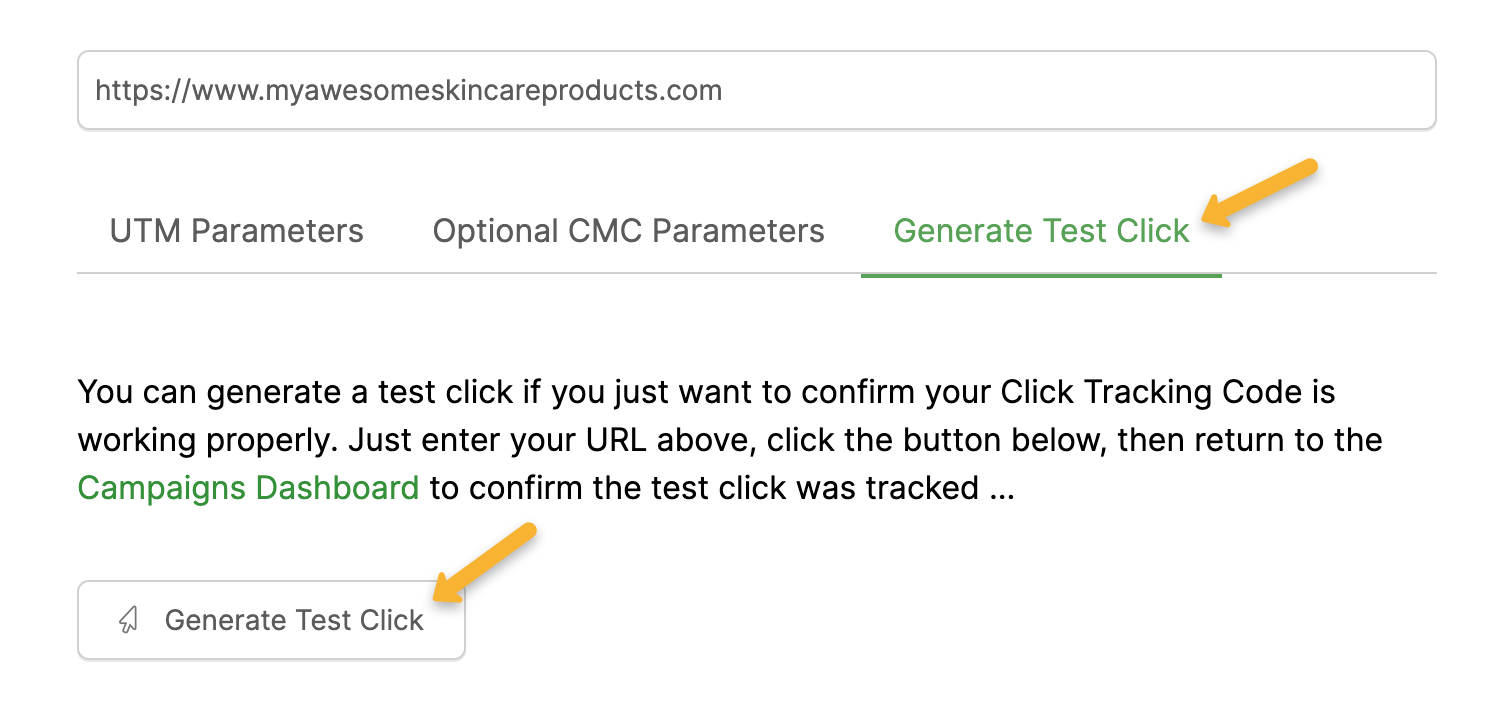
Paste your landing page URL into the box, select the “Generate Test Click” tab, then click the test button.
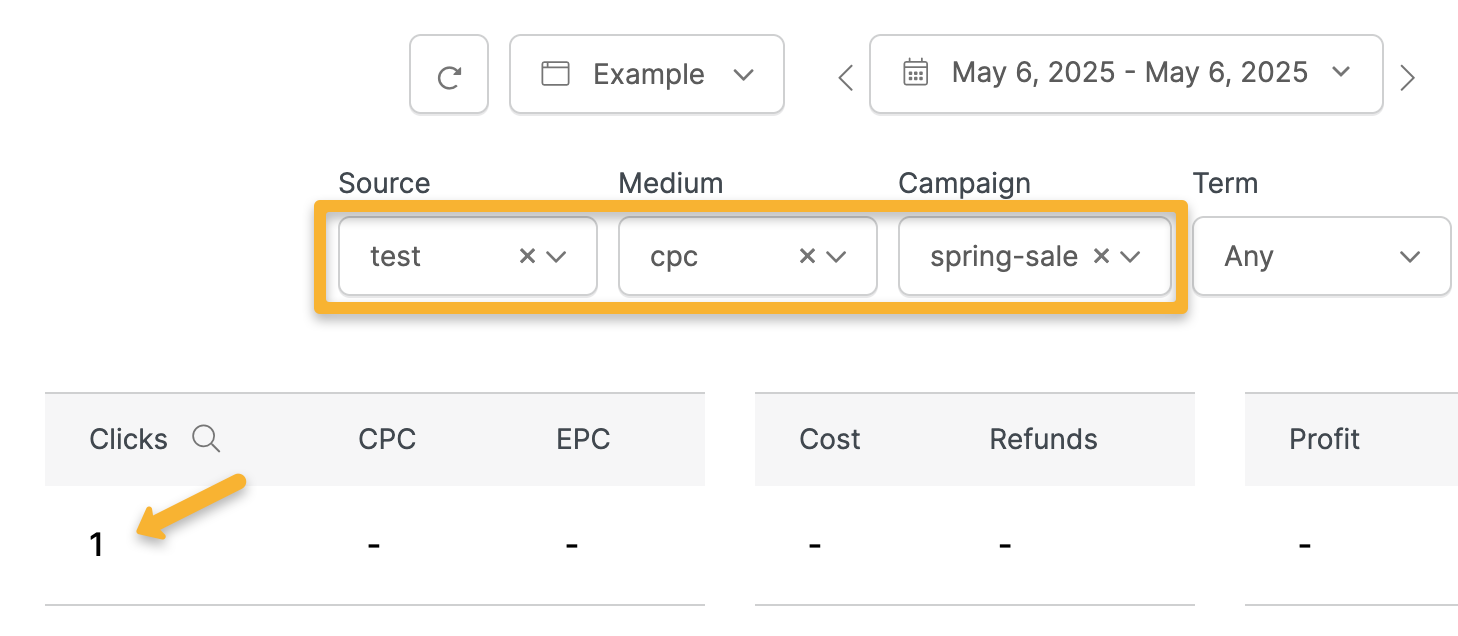
Check your stats for today, and you should see one click with “test” as the Source, “cpc” as the Medium and “spring-sale” as the Campaign.
Note: If you don’t see your test click at this stage, try testing the URL in an incognito window to make sure there aren’t browser issues or extensions affecting your test.
Step 3 – Test Your Actions (Optional)
“Actions” can be different events depending on your set up. For example, if you have a Shopify store, “Actions” are Add To Cart events.
It could also be an optin, a button click or a scheduled call, depending on your set up. Some set ups won’t have any “Action” events, such as a sales page that goes to a checkout page.
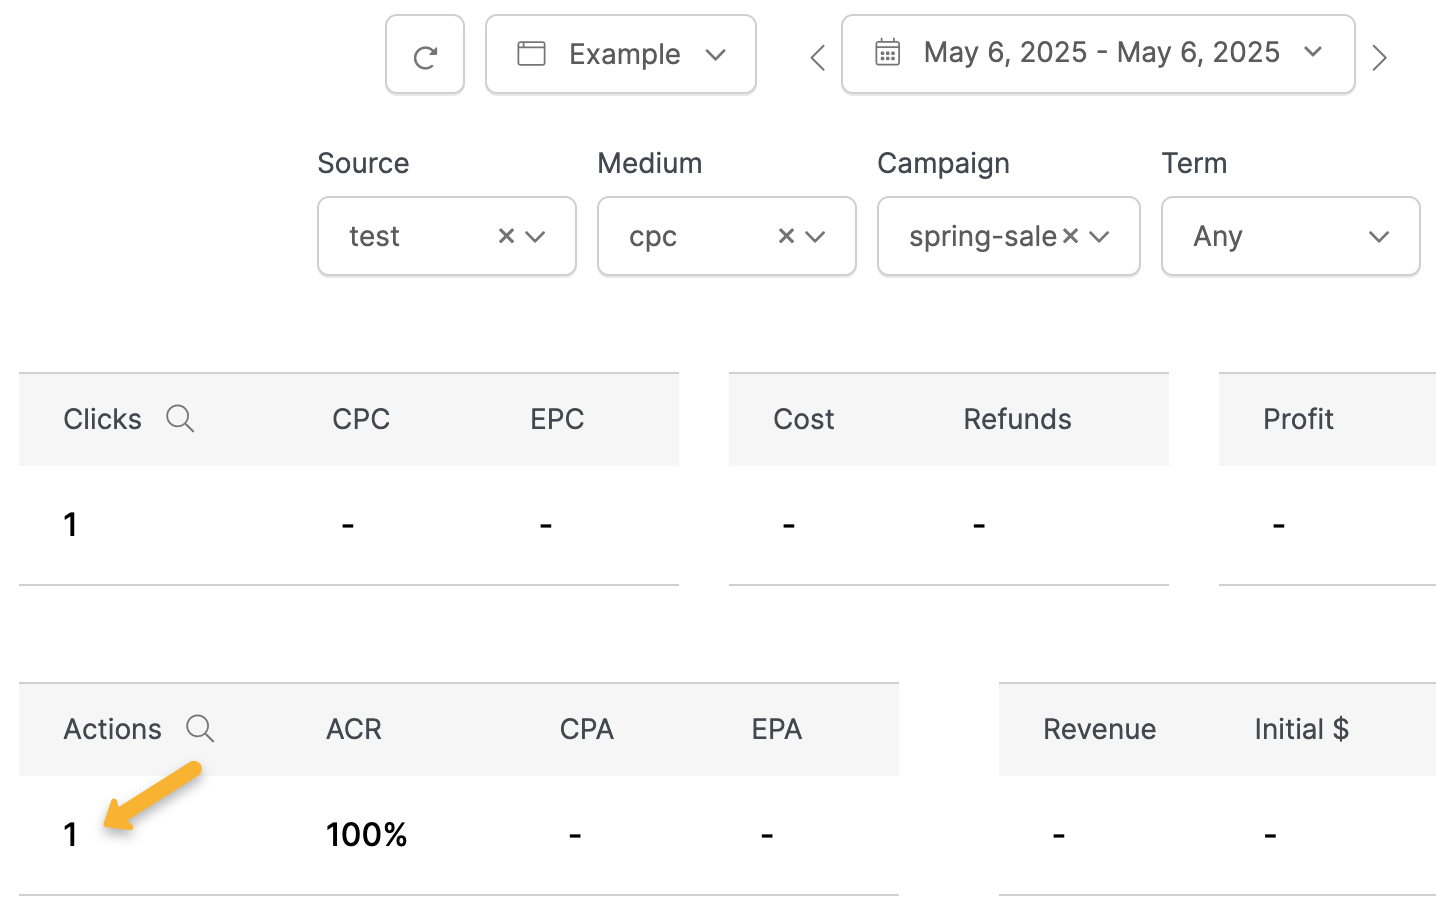
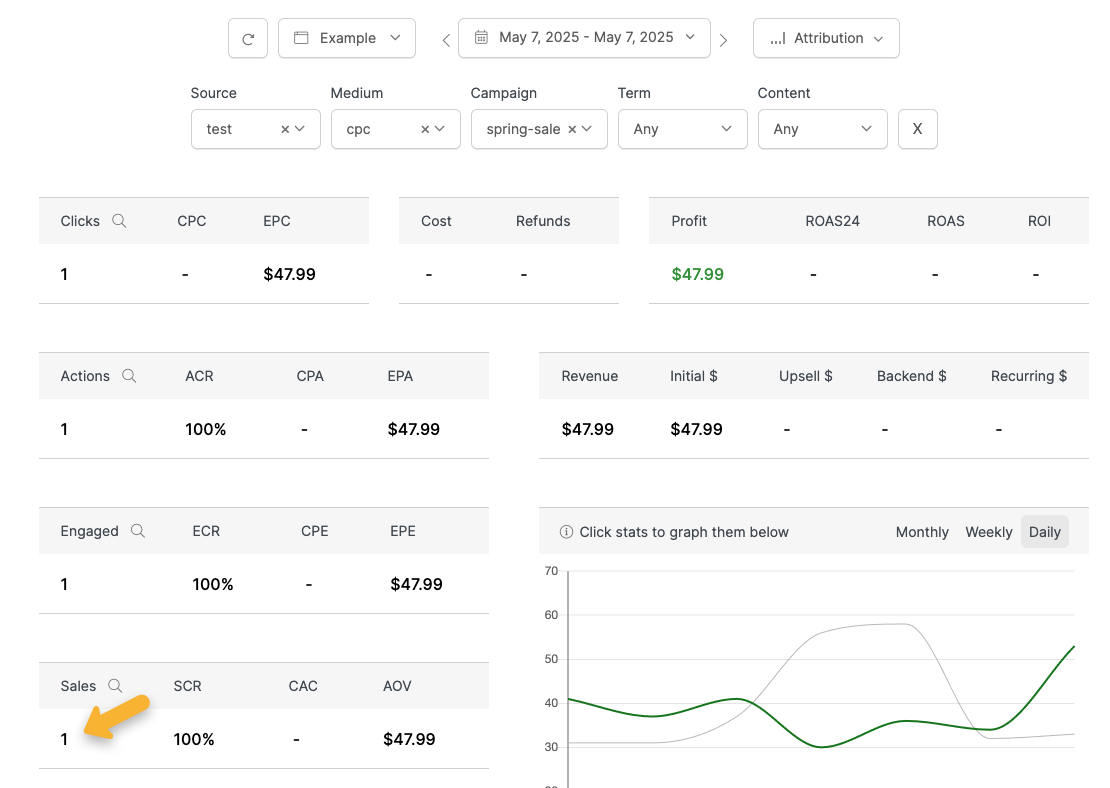
To test this, simply do a test add to cart, optin, button click or call schedule. You’ll see it under the same test UTMs as your click.
Step 4 – Test Your Engagements (Optional)
“Actions” can be different events depending on your set up. For example, if you have a Shopify store, “Engagements” are Initiate Checkout events.
In most cases, this will be someone reaching the checkout page, but it could also be a booked call or something similar.
You can test this step by simply reaching the checkout page or booking a test call after your test click. Once you’ve done that, you’ll see it under the same test UTMs as your click.
Step 5 – Test Your Sales (If Possible)
Depending on your set up, testing sales may or may not be possible.
For example, if you’re using one of our integrations such as ClickFunnels, HighLevel, Shopify or WooCommerce you will actually need to purchase your product to test your sales tracking.
If you’re tracking sales using a sales conversion code manually placed on your thank you page, you can test your sales tracking by simply visiting that page in the same browser as your test click.
Once you’ve made a test purchase, you’ll see your sale under the same test UTMs as your click.
Step 6 – Clear Your Test Data Again
Once you’ve verified everything is working correctly, select the “Edit” menu, then click “Delete Test Data”.
This will keep your data clean so you can easily check stats from live traffic.
As an affiliate, you’ll be able to test up until the checkout page, but you won’t be able to actually test sales unless you purchase the product.
To test your tracking, follow the steps below …
Step 1 – Clear Your Test Data
First, we’ll want to clear any testing history so it doesn’t affect this test. To do that, select the “Edit” menu, then click “Delete Test Data”.

This will delete all click and conversion data from your own IP address so you can do a fresh test.
Step 2 – Generate a Test Click
Next, we’ll test generate a test click with the landing page URL you’re going to be sending traffic to.
To do that, first go to the “Tools” menu, then select “URL Builder”.

Paste your landing page URL into the box, select the “Generate Test Click” tab, then click the test button.
Check your stats for today, and you should see one click with “test” as the Source, “cpc” as the Medium and “spring-sale” as the Campaign.
Note: If you don’t see your test click at this stage, try testing the URL in an incognito window to make sure there aren’t browser issues or extensions affecting your test.
Step 3 – Test Your Actions (Optional)
If you’re tracking button clicks or optins as “Actions” in ClickMagick, you can test that by simply clicking the button on your page or opting in after your test click.
Once you’ve done that, you’ll see it under the same test UTMs as your click.
Step 4 – Test Your Engagements (Optional)
This step only applies if you’re using an affiliate network that allows you to track checkout hits.
You can test this step by simply reaching the checkout page after your test click. Once you’ve done that, you’ll see it under the same test UTMs as your click.
Step 5 – Clear Your Test Data Again
Once you’ve verified everything is working correctly, select the “Edit” menu, then click “Delete Test Data”.
This will keep your data clean so you can easily check stats from live traffic.

Article 1005 Last updated: 10/22/2025 2:05:28 AM
https://www.clickmagick.com/kb/?article=1005