|
How do I track conversions using Make.com?
Tracking conversions with Make.com is a simple process, but it can differ depending on the app you’re connecting to.
In this example, we will be sending your System.io sales back to ClickMagick using Make.com.
Note: We’re using Systeme.io for example purposes only. If you are using Systeme.io, we have an integration for that. Learn more.
Step 1 – Make Sure You’re Collecting Visitor Information
Our Tracking Code automatically collects visitor information from your site. If you haven’t already, use our Website Code Wizard to add the correct tracking codes to your site.
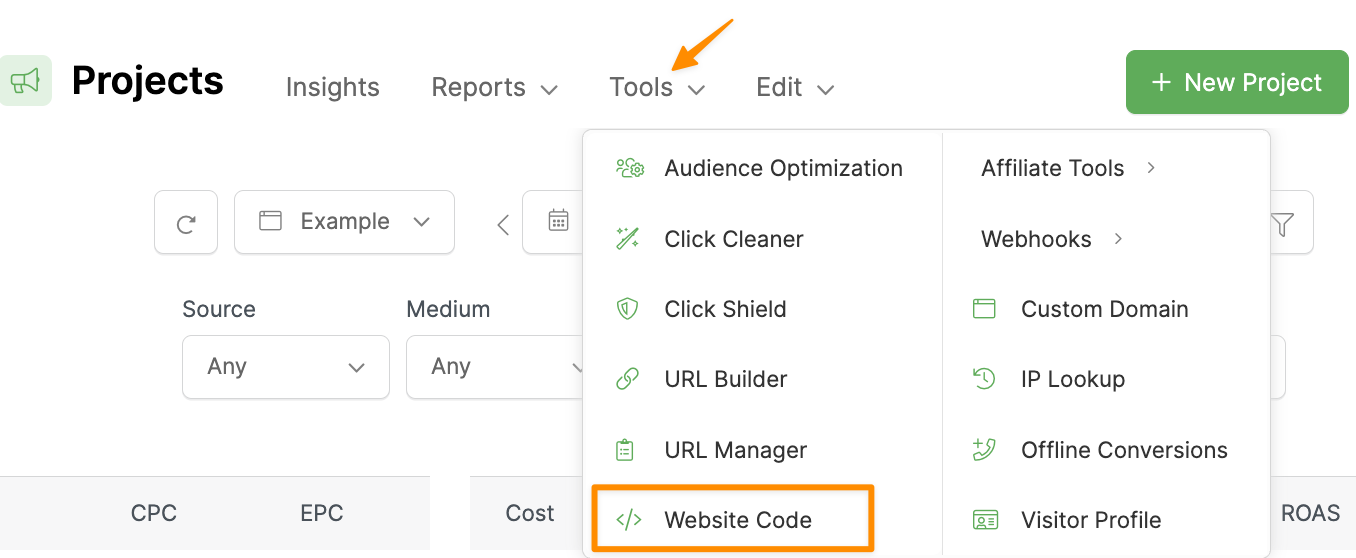
From your Project Dashboard, select Tools and then Website Code. Make sure there’s a tracking code on any page you collect information like email address, phone number, name etc.
Step 2 – Create a Scenario and Add a Trigger
In Make.com, click “Scenarios”, then click “Create a new scenario”.
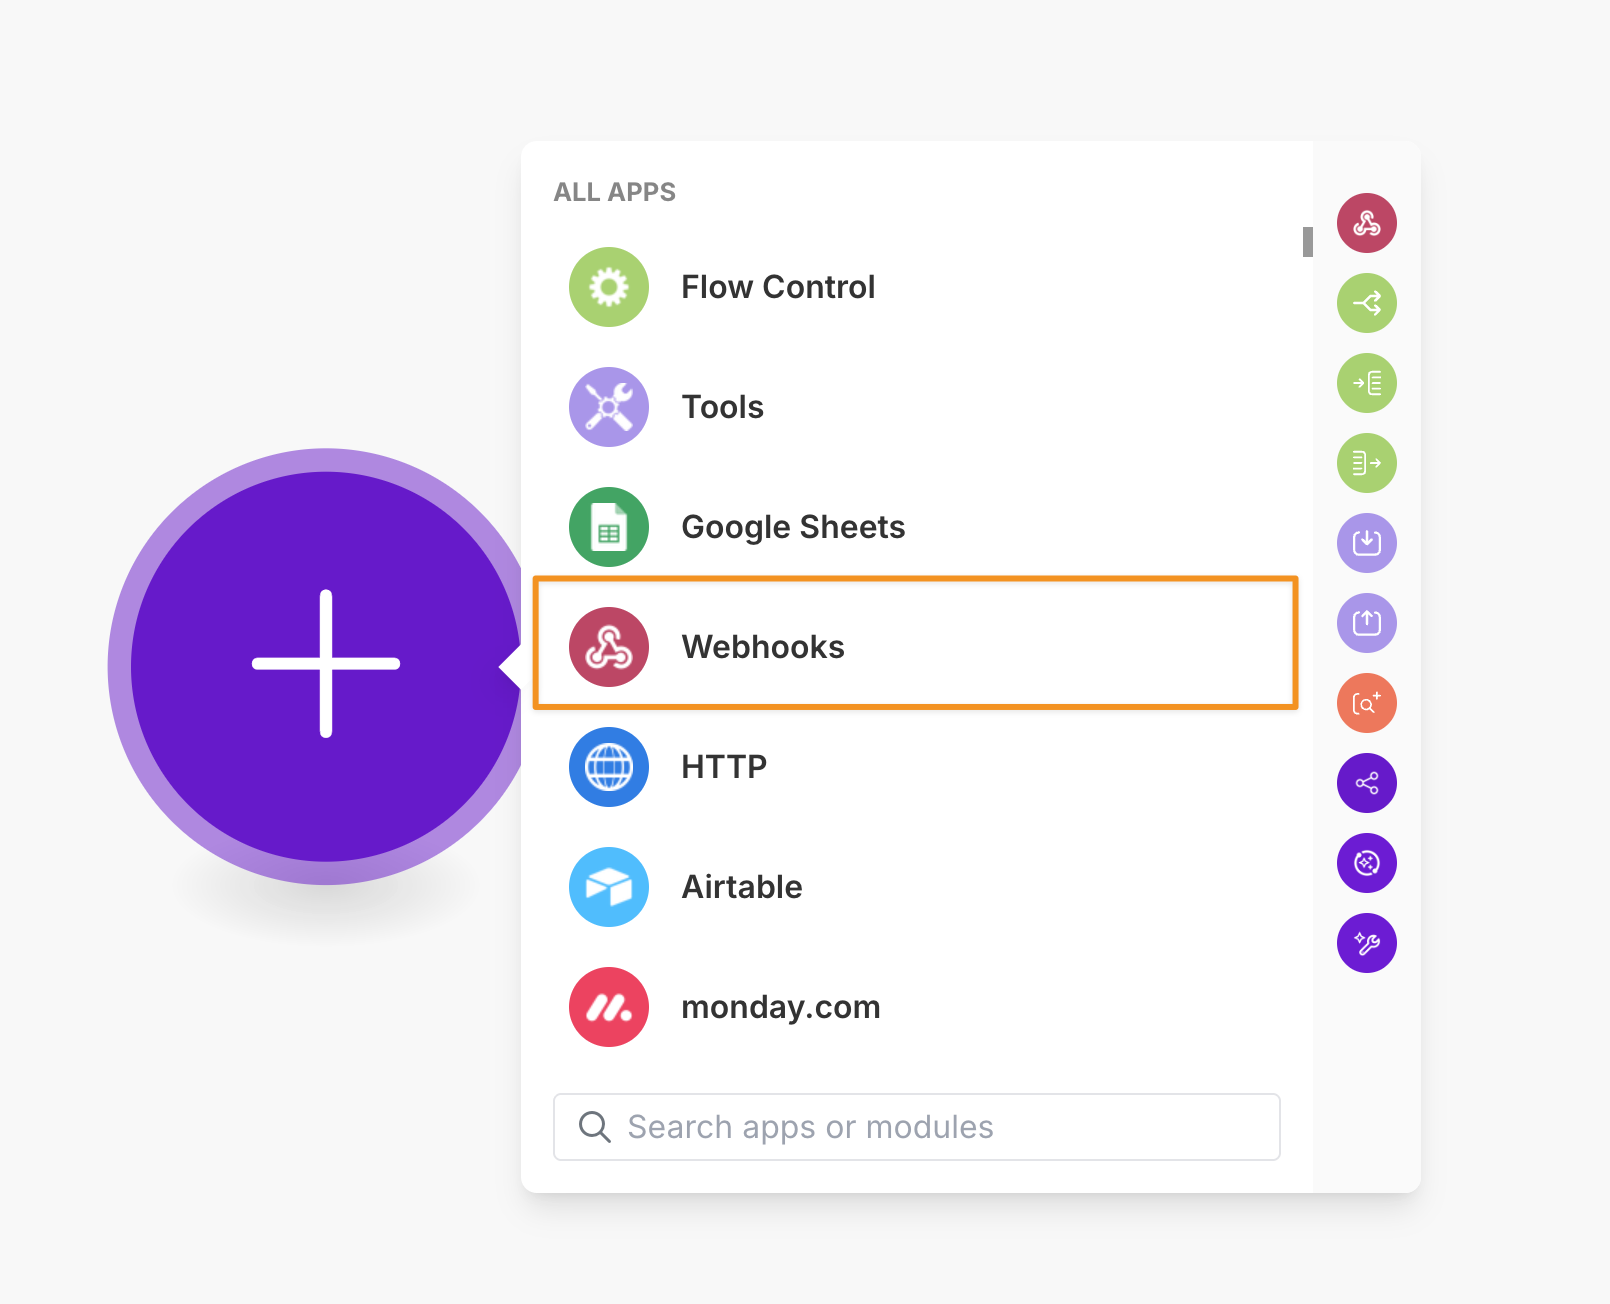
Next, we’re going to add a trigger. Click on the big plus icon, select “Webhooks” and then “Custom Webhook”.
Follow the process of creating the webhook by clicking on “Create Webhook” and giving it an appropriate name.
Now you have your webhook’s endpoint URL. Copy this to your clipboard.
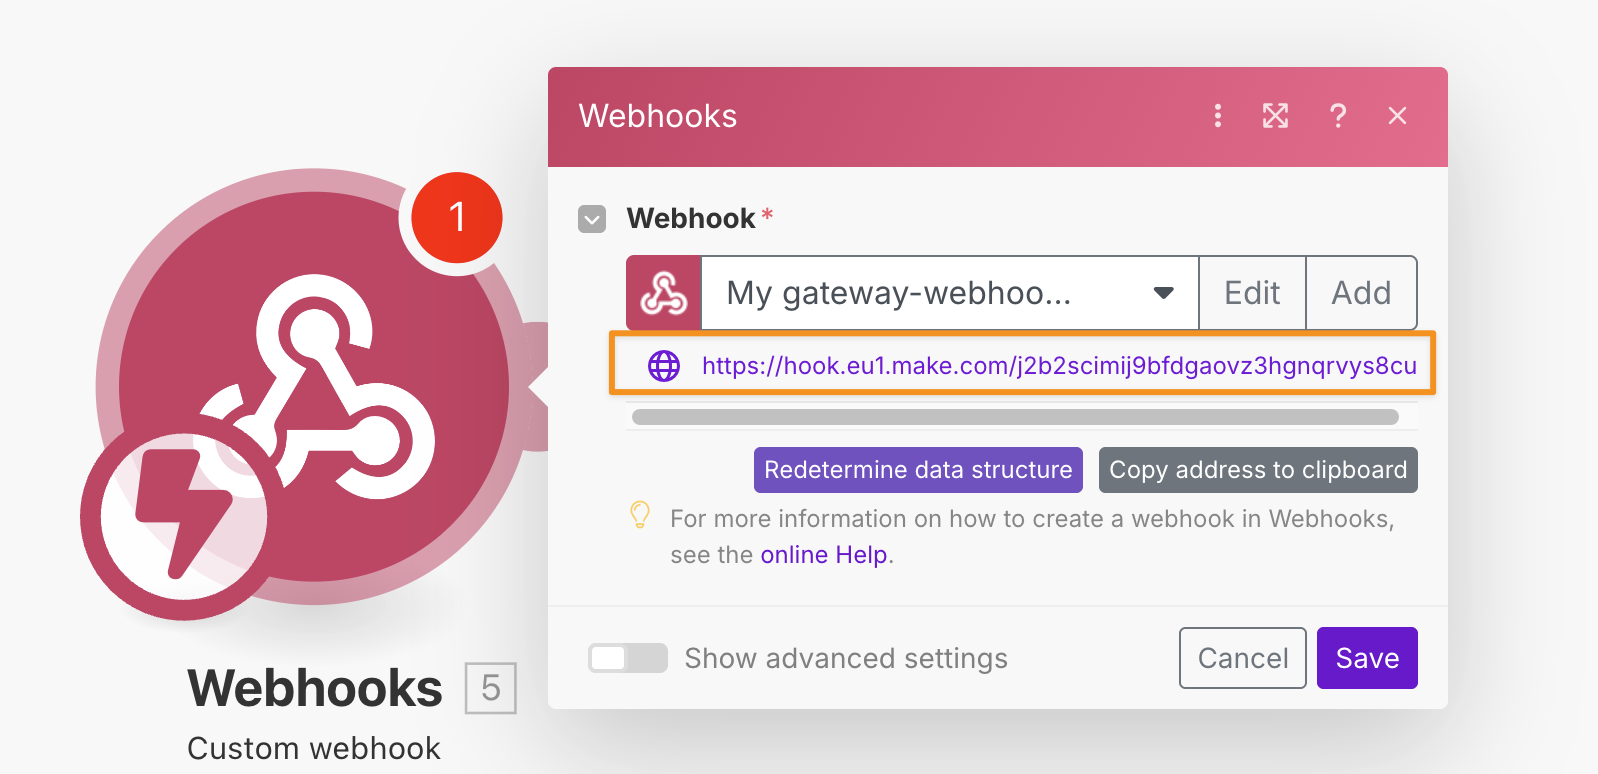
We also want to test the trigger by sending some data through it. This will be needed later on.
Click on the “Redetermine data structure” button and make a test purchase.
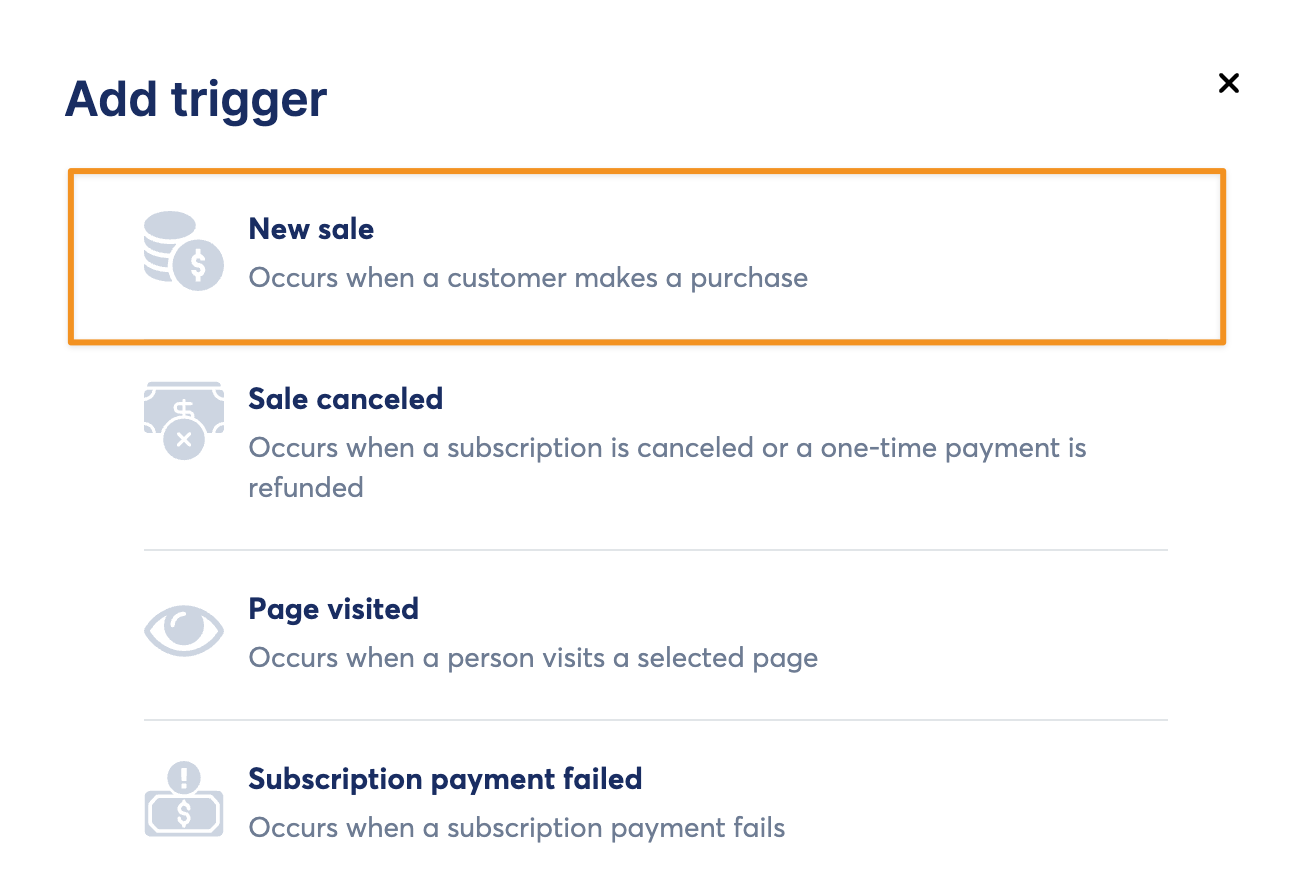
Step 3 – Create an Automation Rule in Systeme.io
In your Systeme.io account, locate the funnel step where the sale occurs, click on “Automation Rules” and add a new rule.
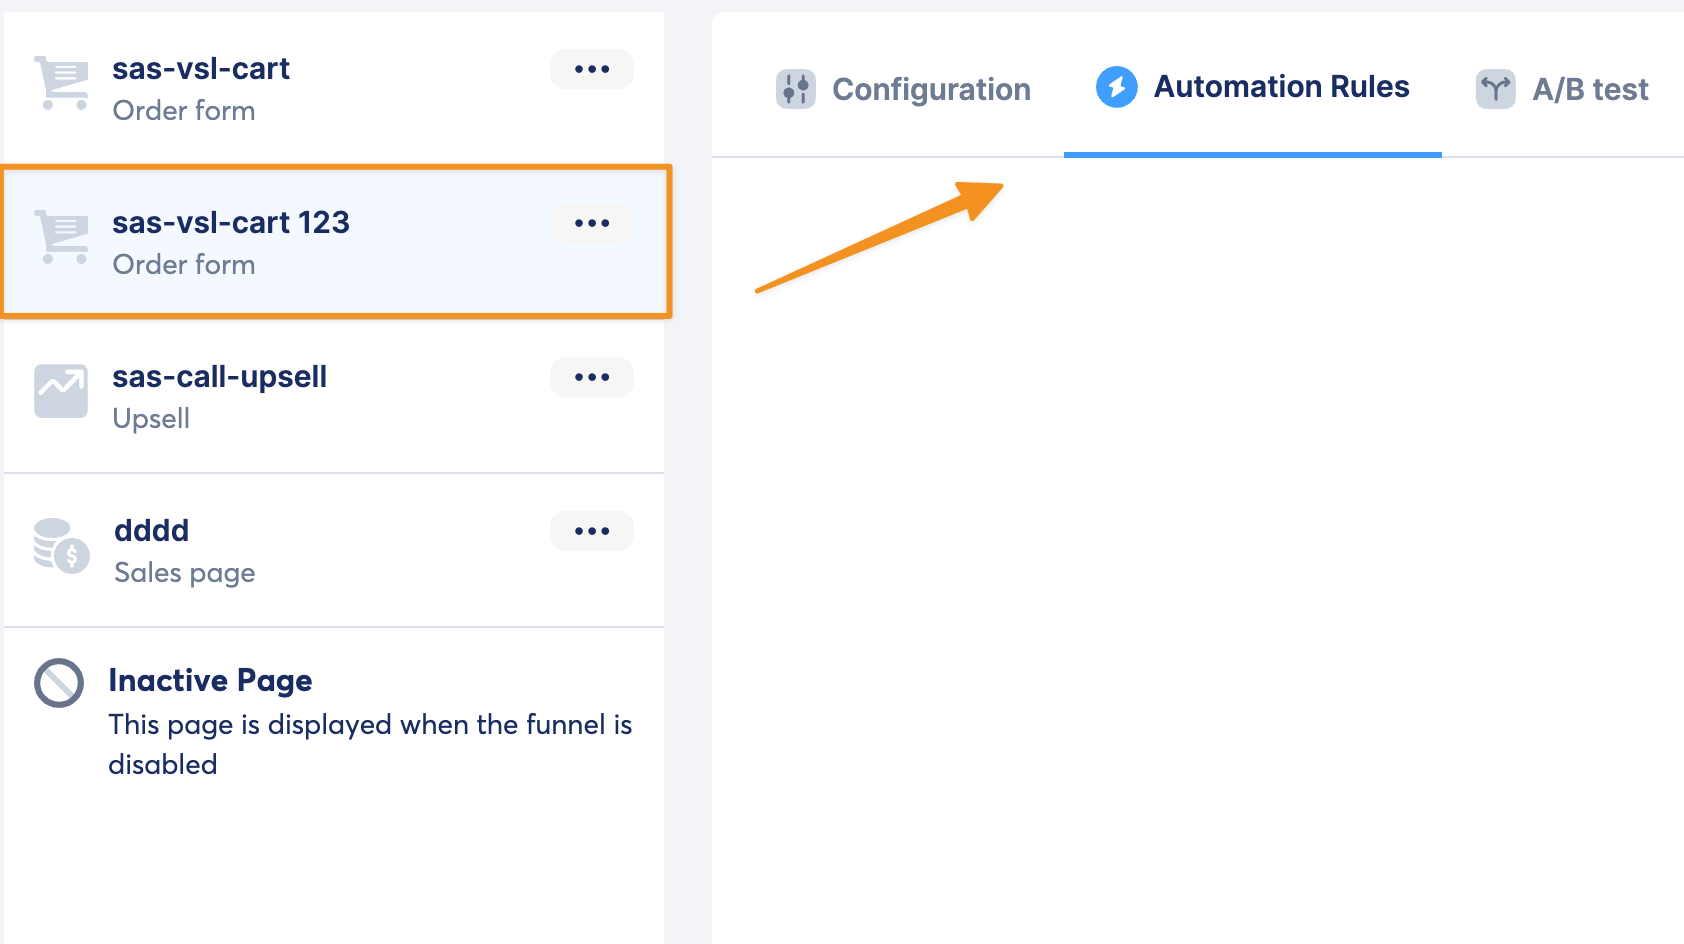
Select “New Sale” as the trigger.
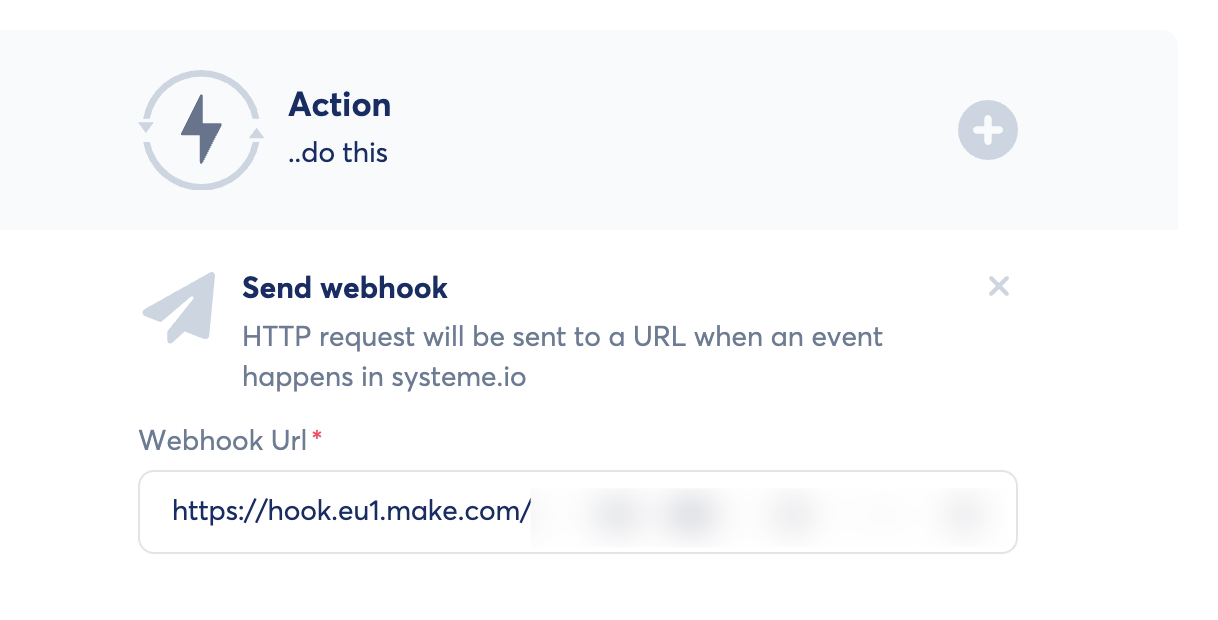
Select “Send Webhook” as the action, paste the URL from Make.com and save the rule.
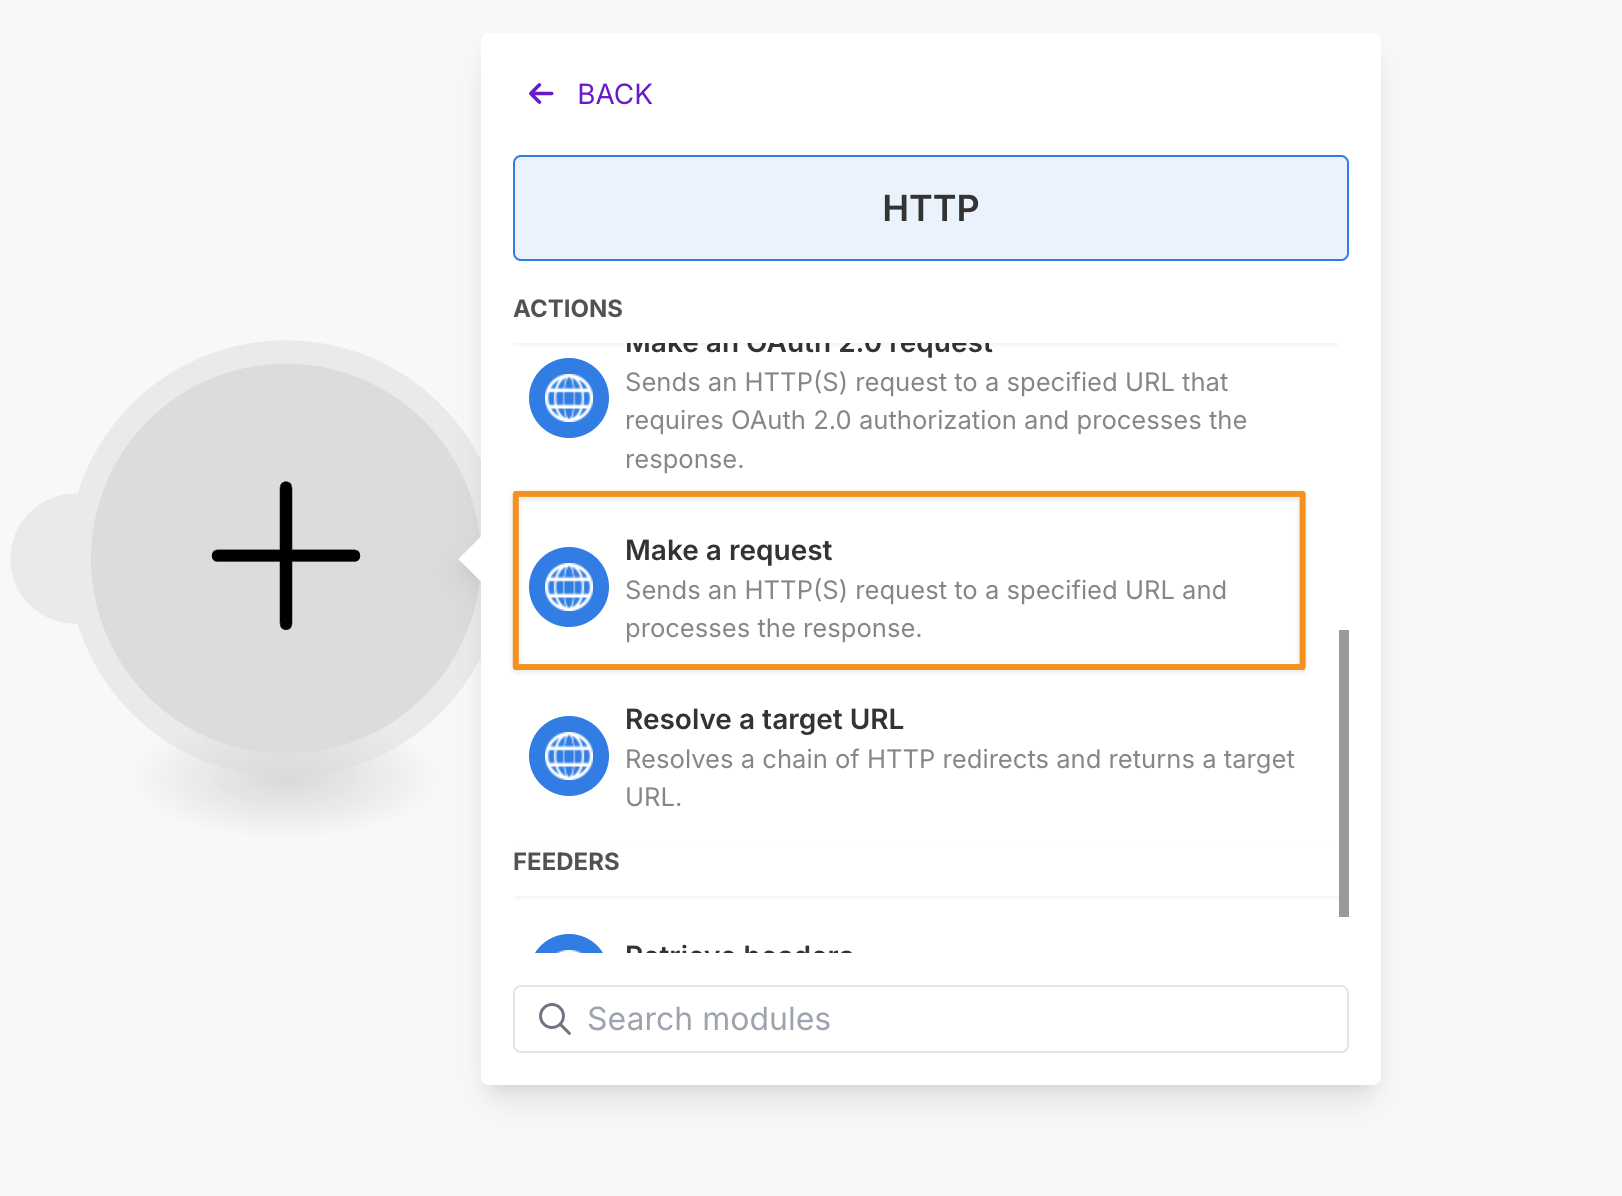
Step 4 – Create an Action in Make.com
Select “HTTP” and “Make a Request”
Depending on which conversion you want to track in ClickMagick, use one of the following URLs in the “URL” field:
| Actions | https://www.clkmg.com/api/a/post/?uid=[USERID] |
| Engagements | https://www.clkmg.com/api/e/post/?uid=[USERID] |
| Sales | https://www.clkmg.com/api/s/post/?uid=[USERID] |
Next, under “Query String”, enter
s1 into the first box and select the customer email address. Then, add another item and add
ref in field.If it’s a lead conversion, you can enter
lead or optin. For a sale, you can use sale.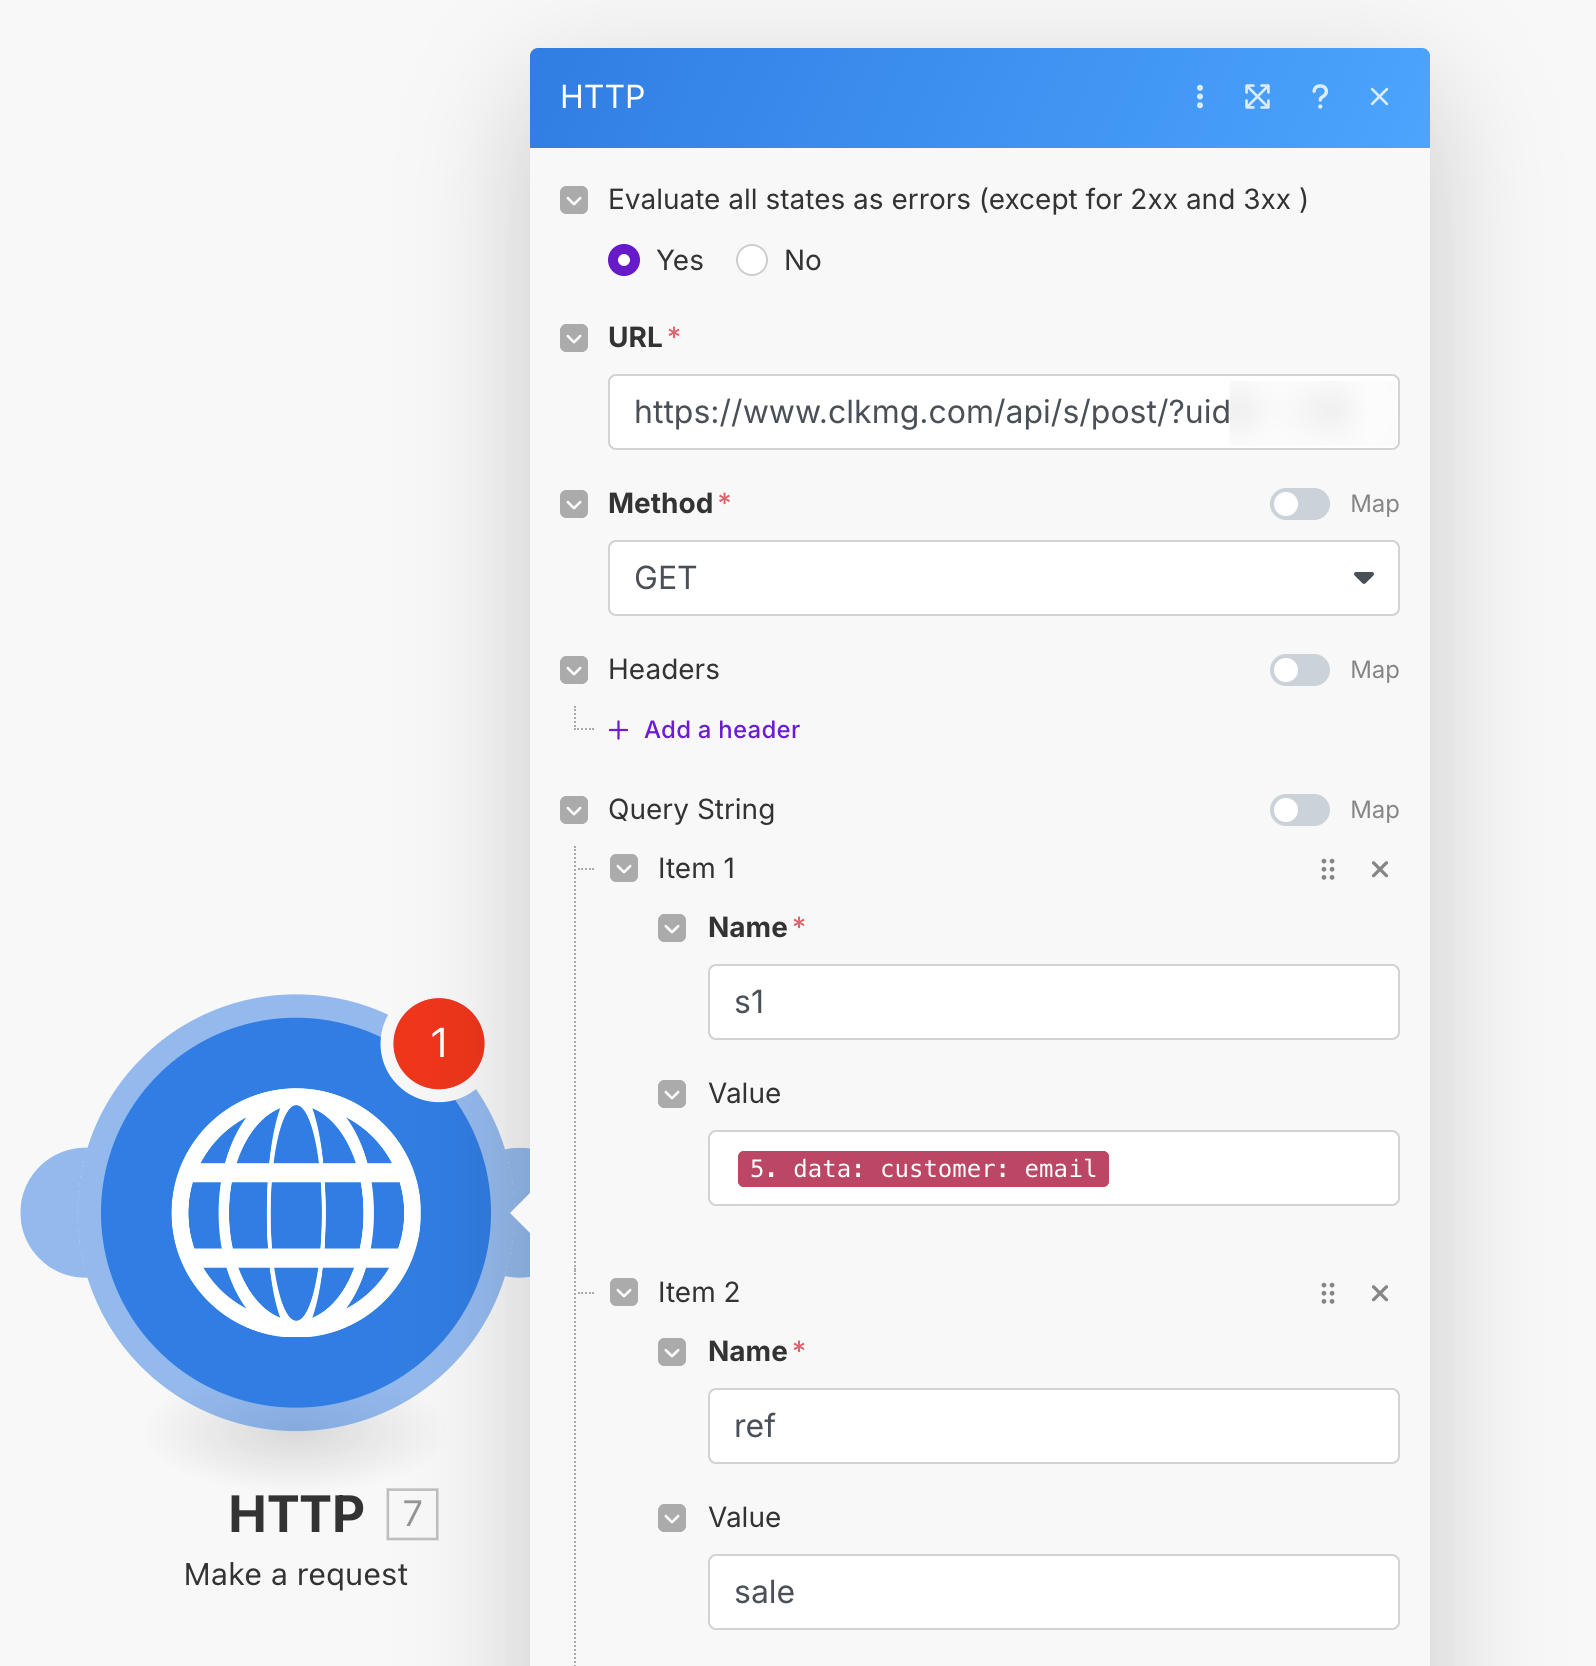
If you’re tracking an Action or Engagement, you’re done! Just run the scenario once and that’s it.
If you’re tracking a Sale, add another Item, use
amt as the name and select the amount of the transaction as the value.
Finally, run and save your Scenario and that’s it! Your conversions will automatically be sent to ClickMagick via Make.com.
Article 1031 Last updated: 10/22/2025 2:06:52 AM
https://www.clickmagick.com/kb/?article=1031