|
How do I track Facebook Lead Ads?
If you want to begin tracking your Facebook Lead Ads using ClickMagick, all you need to do is follow the instructions listed below. They explain how to connect your Lead Ads with ClickMagick’s tracking system so you can monitor performance, optimize results, and ensure everything is running correctly.
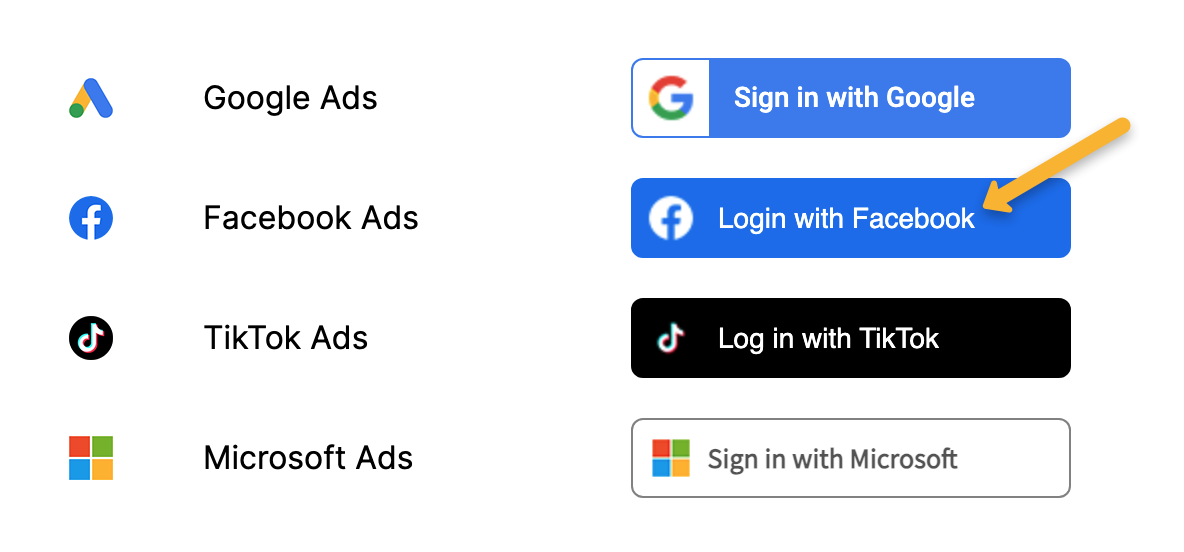
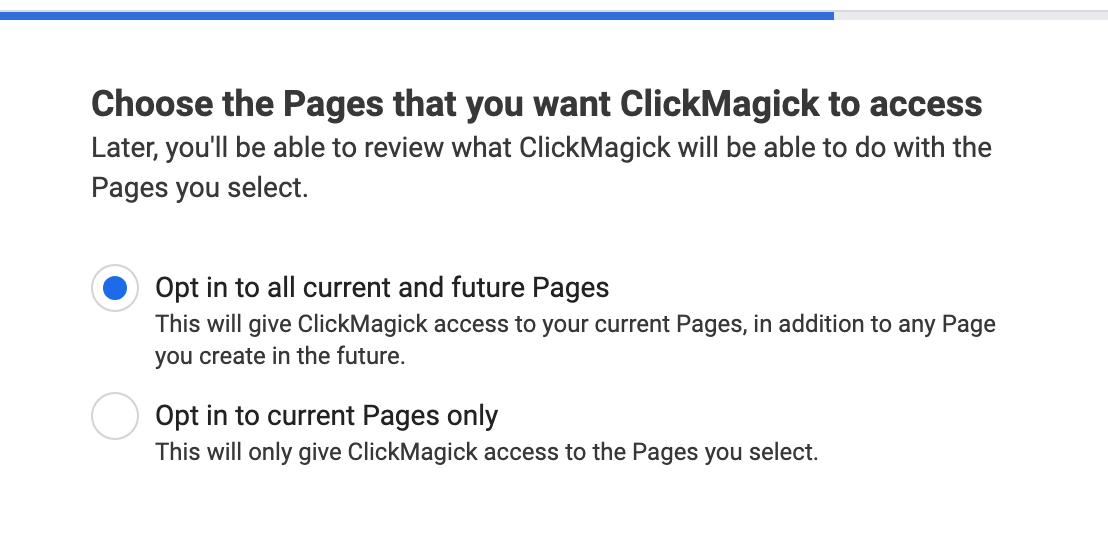
Step 1 – Integrate or update your Facebook Integration
I have never integrated a Facebook account

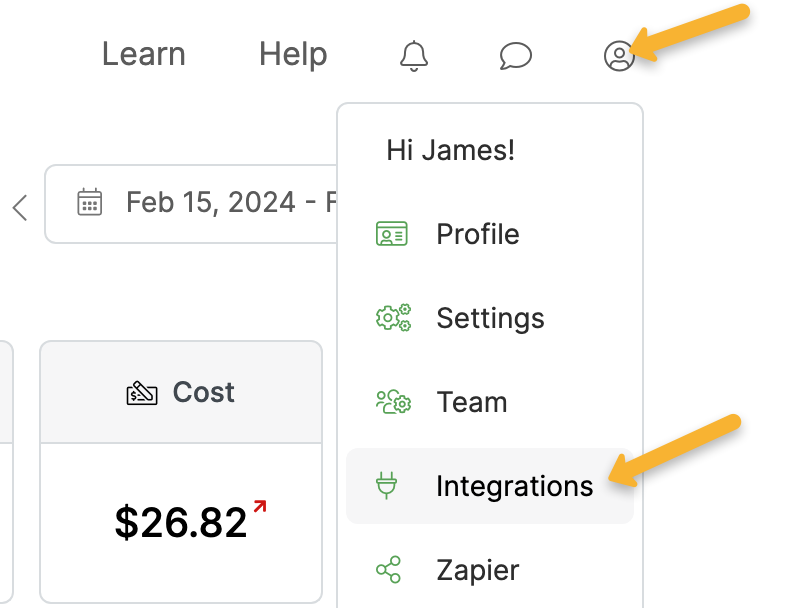
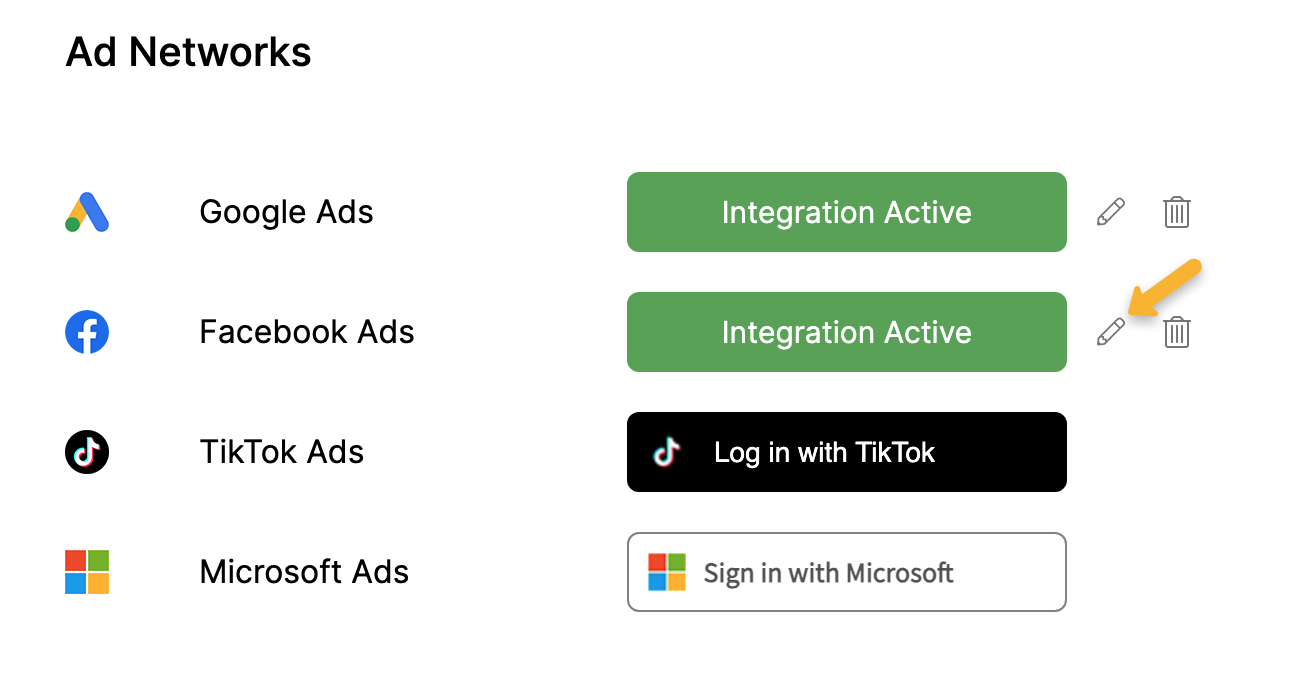
I have an existing Facebook integration


Step 2 – Add UTM tracking parameters to your lead forms
If you’re already using
utm_source, utm_medium and utm_campaign tracking parameters with your existing lead forms, and you only have a single ClickMagick project, you don’t actually need to complete this step.As soon as you complete the integration above your leads will begin tracking as Actions in ClickMagick by default, with the UTM parameters that you’re already using.
ClickMagick will also collect and record user info for each lead including their name and email address.
If you’re not already using UTMs with your lead ads, you have multiple Projects or you want to record your leads as Engagements, you’ll want to follow the steps below …
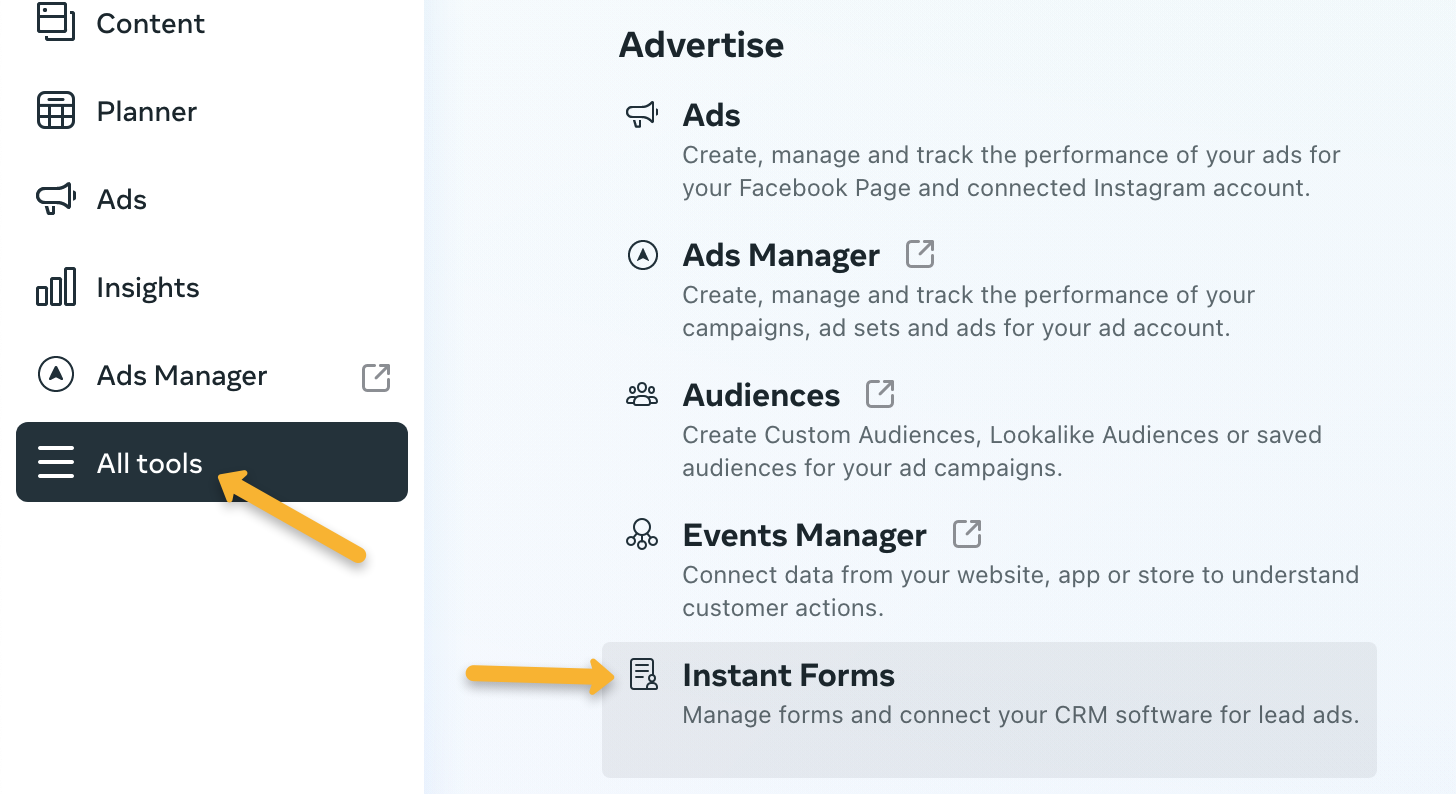
In Meta Business Suite, select the page you’re using and go to All Tools > Instant Forms.
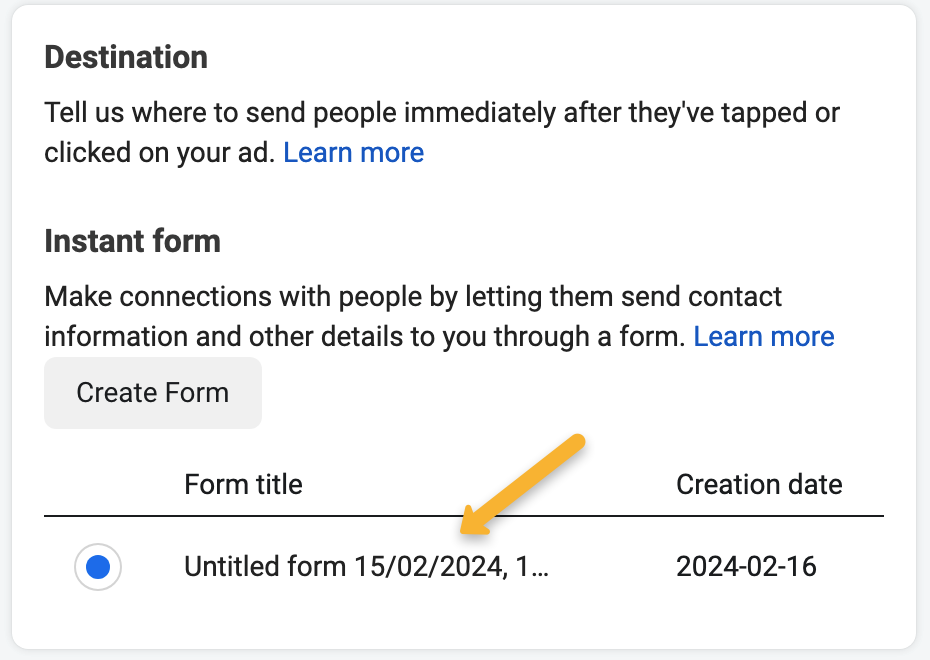
Facebook doesn’t allow you to edit an existing form that’s been published, so you’ll need to duplicate your current form or create a new one.
Next, go to the “Settings” tab in your new form.
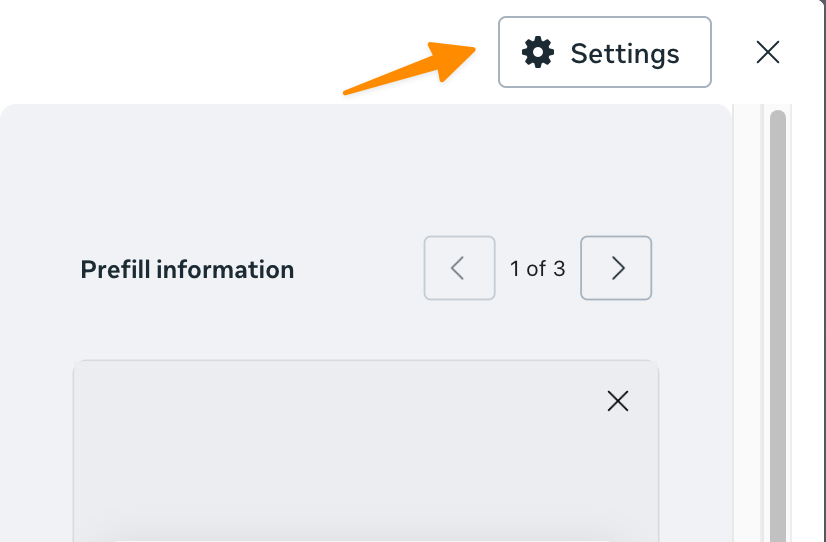
Then, “Tracking parameters”.
Here you’ll be able to enter your UTM parameters. As usual, at least
utm_source, utm_medium and utm_campaign are required.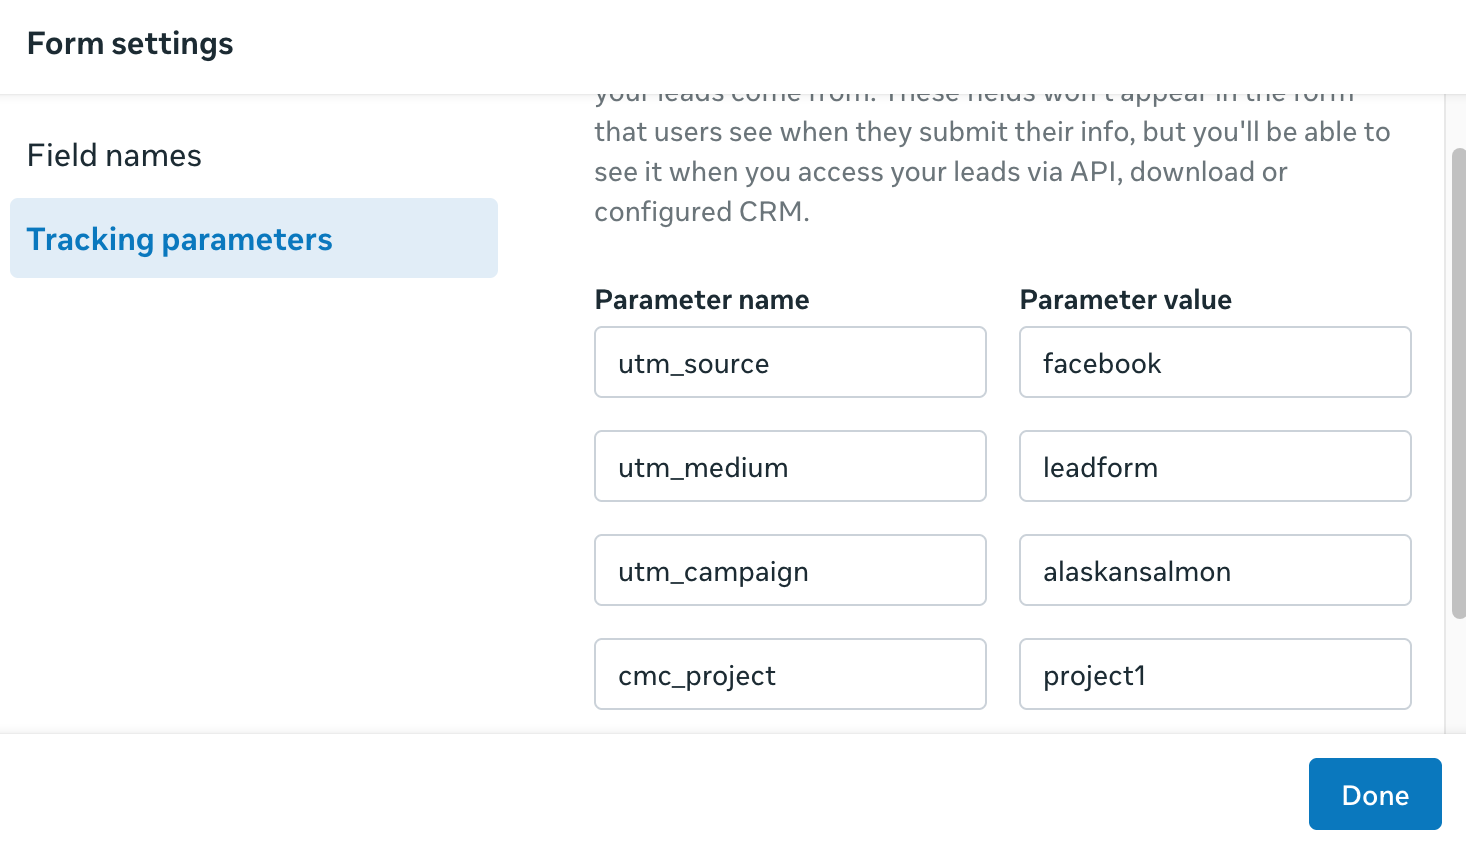
You can copy and paste the values below into the “Parameter name” box. Then enter whatever values you want in the “Parameter value” boxes. The
utm_term and utm_content tracking parameters are optional.utm_sourceutm_mediumutm_campaignutm_termutm_contentcmc_projectNote: Unfortunately, dynamic Facebook tokens like {{campaign.name}} don’t work with Lead Ads where the entire interaction takes place on the Facebook platform, and you’ll need to hard-code your UTM values.
As of 11/2025 we are investigating possible creative solutions so this won’t be necessary in the future.
As of 11/2025 we are investigating possible creative solutions so this won’t be necessary in the future.
Note: You do not need to add the
cmc_adid parameter. ClickMagick will receive all the information it needs about the ad when leads come in.If you only have a single Project, you don’t need to specify the
cmc_project parameter …But if you have multiple projects you should be sure to include the
cmc_project parameter so your leads are attributed to the correct project, and make sure the project value you enter exactly matches the name of your Project.Note: By default, your leads will be recorded as Actions in ClickMagick.
If you want them to be recorded as engagements instead, you can add
If you want them to be recorded as engagements instead, you can add
cmc_goal as a Parameter name and “e” as the Parameter value.After you’ve set up your new form with tracking parameters, all you need to do is start using it in your ads and your leads will begin tracking in ClickMagick. That’s it!
How clicks are processed for Facebook Lead Ads
People who click your lead ads don’t end up on your website, so ClickMagick can’t track these clicks normally. Facebook also doesn’t provide any info about these clicks, like the timestamp or user’s IP address.
Due to these limitations, here’s how clicks are “tracked” for Facebook Lead Ads …
The only info Facebook makes available is the total number of clicks your lead ads have received. So each time we process a lead, we also query Facebook’s API to find out how many total clicks that particular ad has received.
Then, when we record the lead in ClickMagick, we also record one or more clicks at the same time so the number of clicks in ClickMagick always matches the number of clicks that Facebook reports.
For each of these clicks we “create,” the Project and UTMs will always be exactly correct – and these are the only things that really matter.
For some of the other click details we’ll have to “guess” or use a default value. Here are the exact details:
Timestamp – the timestamp of the click will be set to within a few seconds prior to when the lead was generated.
Country – Facebook doesn’t provide any info that reveals the location of the user, so US is set by default.
Device – Facebook doesn’t provide any info that reveals the user’s device type, so Desktop is set by default.
IP – Facebook doesn’t provide any info that reveals the user’s IP address, so 10.10.10.10 is set by default.
VID – All clicks must have a Visitor ID, so one is randomly assigned to each click.
What should I check if my Lead Ads aren’t tracking?
1. Proper tracking relies on ClickMagick having access to the Facebook Page your lead ads are associated with. Check that the Facebook account you’ve integrated with ClickMagick has access to the Page in question.
2. Go to the settings for the Facebook account you’ve integrated with ClickMagick and look for Business Integrations. There you can view and edit the integration and add any Pages that are missing.
3. In your Facebook Business Manager, go to Settings → Integrations → Lead Access. If default access is granted, you will see a “Customize Access” button and there isn’t anything else to do here.
But if you see any other access, confirm that ClickMagick has access to the leads under the CRMs tab. If not, it will need to be added – or you’d need to revert to default access.
Article 916 Last updated: 11/21/2025 6:37:54 AM
https://www.clickmagick.com/kb/?article=916