|
How do I track conversions using Zapier?
Tracking conversions with Zapier is a simple process, but it can differ depending on the app you’re connecting to. This article covers the basics of sending conversions to ClickMagick using Zapier …
Note: Before following this article, check if we have an integration with your platform on our Integrations page. If we don’t have an integration yet, just submit a suggestion using the icon in your account. We’ll be happy to see if we can add it for you.
Step 1 – Make Sure You’re Collecting Visitor Information
Our Tracking Code automatically collects visitor information from your site. If you haven’t already, use our Website Code Wizard to add the correct tracking codes to your site.
You can find that by going to your Project Dashboard, selecting Tools, and then Website Code. Make sure there’s basic tracking code on any page you collect information like email address, phone number, name etc.

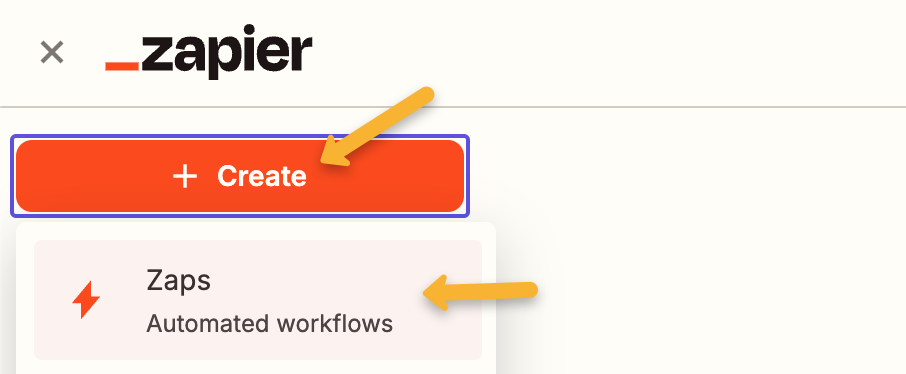
Step 2 – Create a Zap and Add a Trigger
In Zapier, click “Create”, then click “Zaps”.
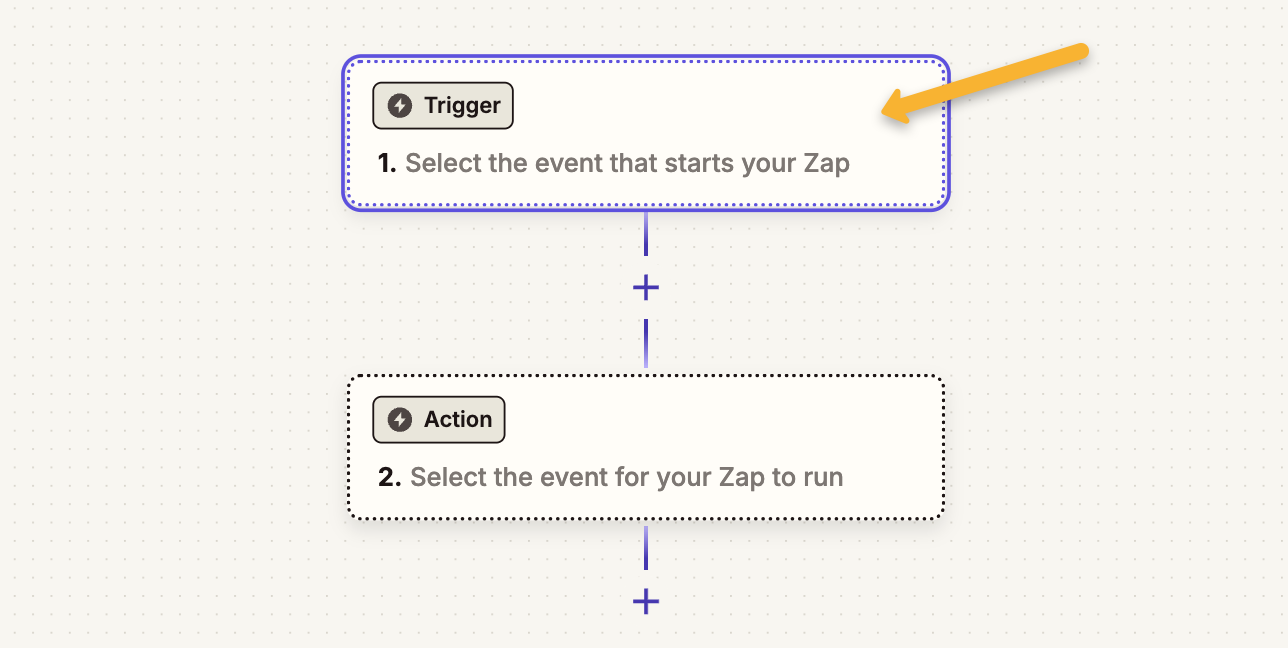
Next, we’re going to add a trigger. Click the “Trigger” area to add one.
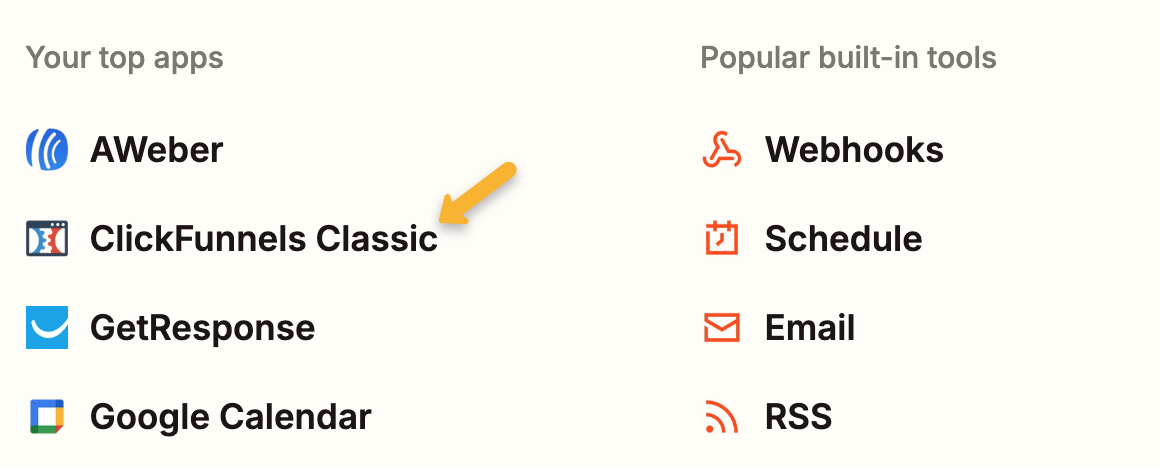
Select whichever app you want to send conversions from. In our example, we’re using ClickFunnels Classic.
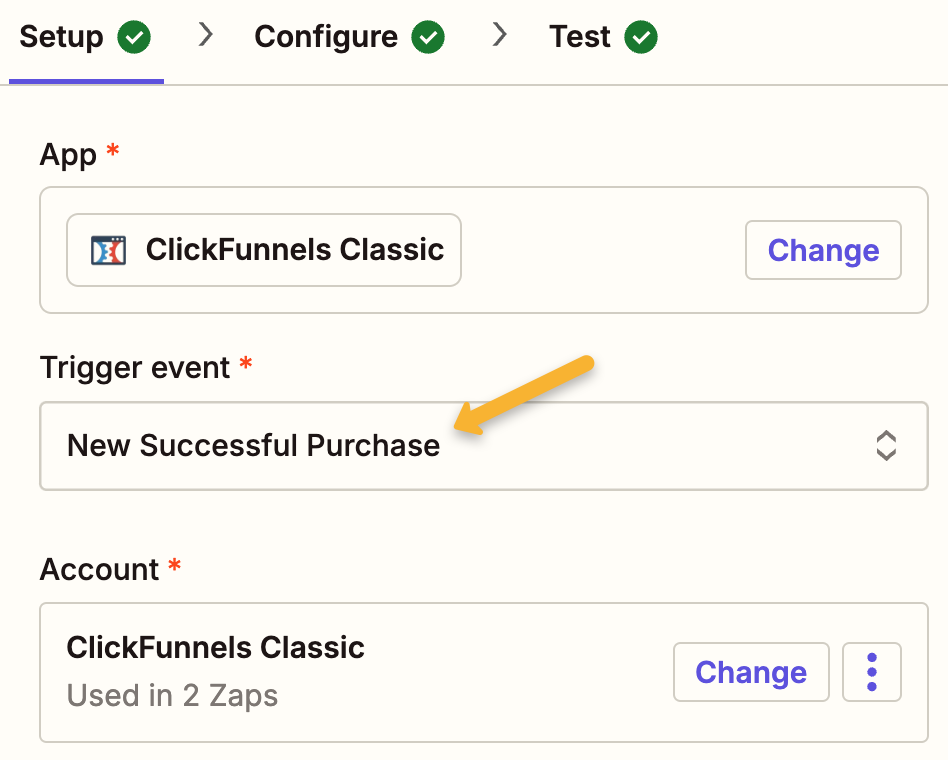
For the “Trigger event”, select the conversion event you want to send to ClickMagick. In our example, it’s going to be “New Successful Purchase”.
Under “Account”, follow Zapier’s step by step instructions to integrate your app with Zapier, then click “Continue”.
Note: We’re using ClickFunnels Classic for example purposes only. If you are using ClickFunnels, we have an integration for that. Learn more.
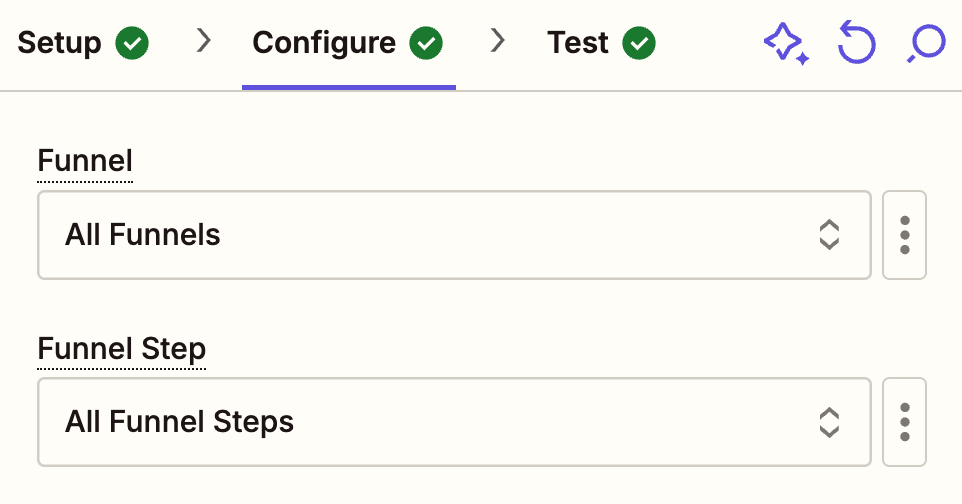
The options you see under “Configure” will differ depending on the app you’re using. It’s usually where you select which funnels or pages you want to be included in this trigger.
In our example, we’re selecting “All Funnels” and “All Funnel Steps” so it’s triggered for all sales.
Next, Click “Continue”, then “Test Trigger”. This will pull in some previous sales or leads to use as a test.
Select any one of these records to use as a test and click “Continue with selected record”.

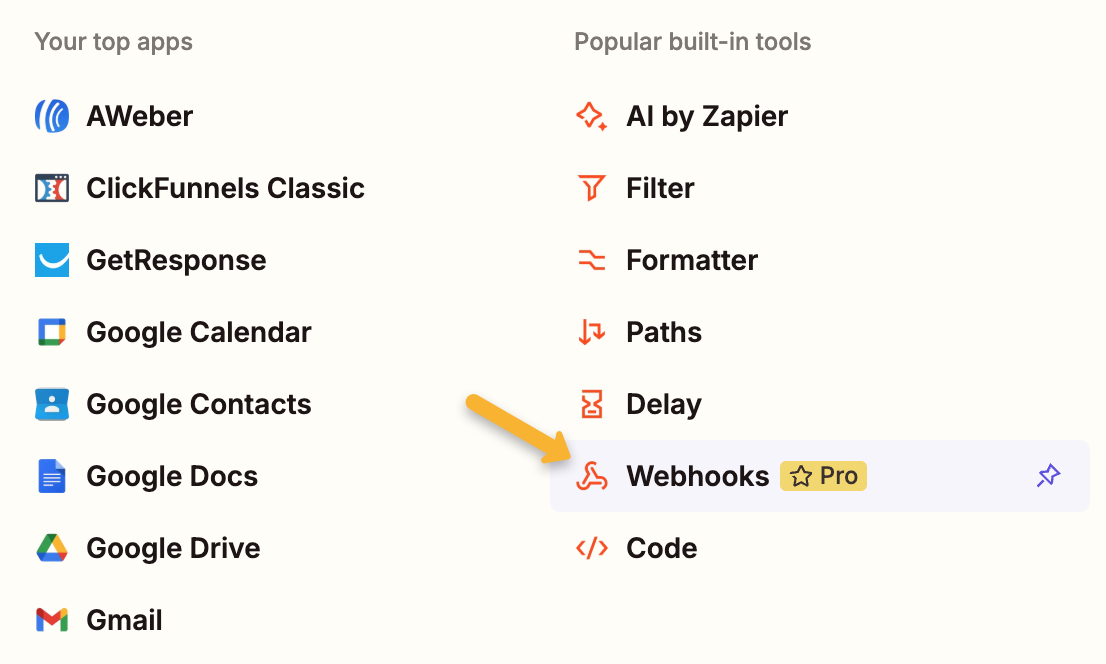
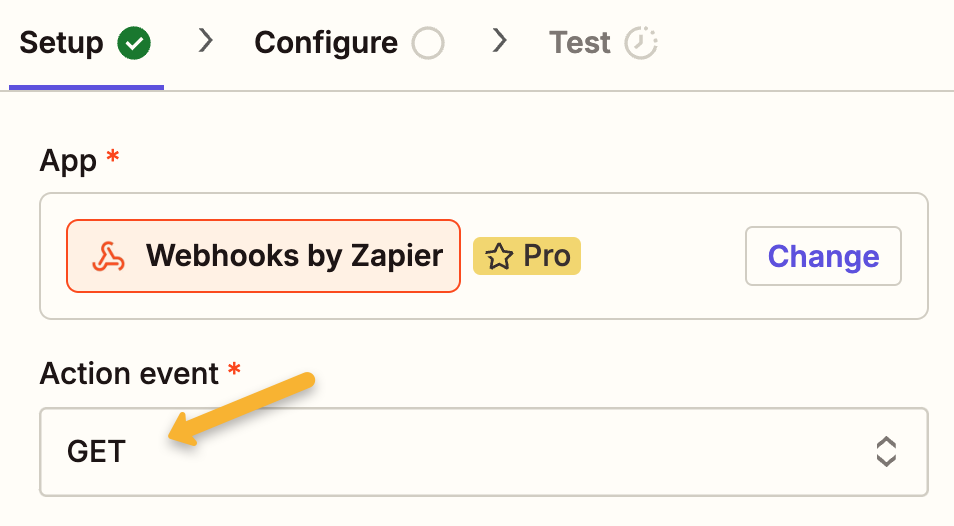
Step 3 – Create a Webhook in Zapier
Select “Webhooks”.
Select “GET” as the “Action event”.
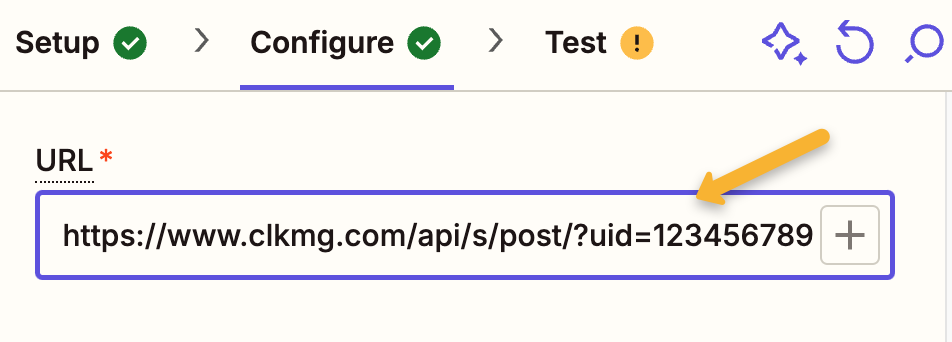
Depending on which conversion you want to track in ClickMagick, use one of the following URLs in the “URL” box:
| Actions | https://www.clkmg.com/api/a/post/?uid=[USERID] |
| Engagements | https://www.clkmg.com/api/e/post/?uid=[USERID] |
| Sales | https://www.clkmg.com/api/s/post/?uid=[USERID] |
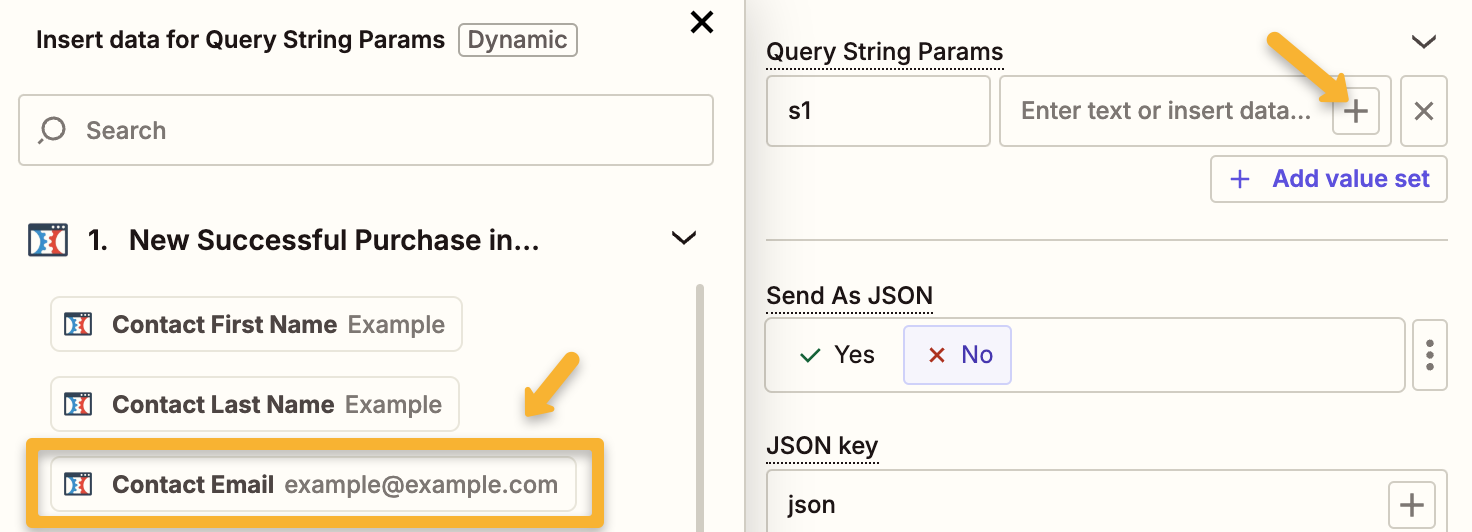
Next, under “Query String Params”, enter
s1 into the first box. Then click the “+” icon next to “Enter text or insert data”.Select the customer email address from whatever app you’re using.
Next, click on “+ Add value set” and add in
ref in the left hand box. In the “Enter text or insert data” box, enter what the conversion is. For example, if it’s a lead conversion, you can enter
lead or optin. For a sale, you can use sale.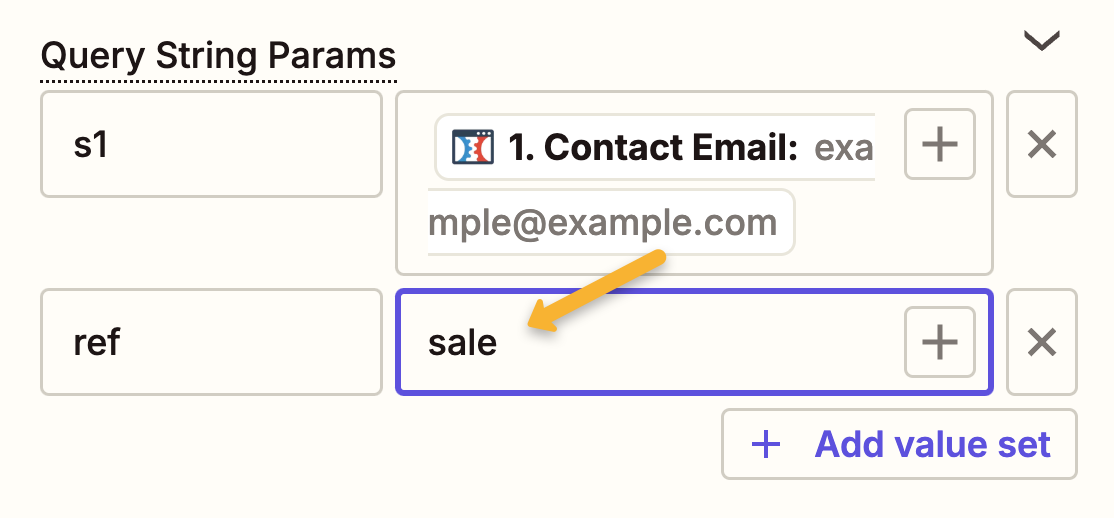
If you’re tracking an Action or Engagement, you’re done! Just test and save your Zap and that’s it.
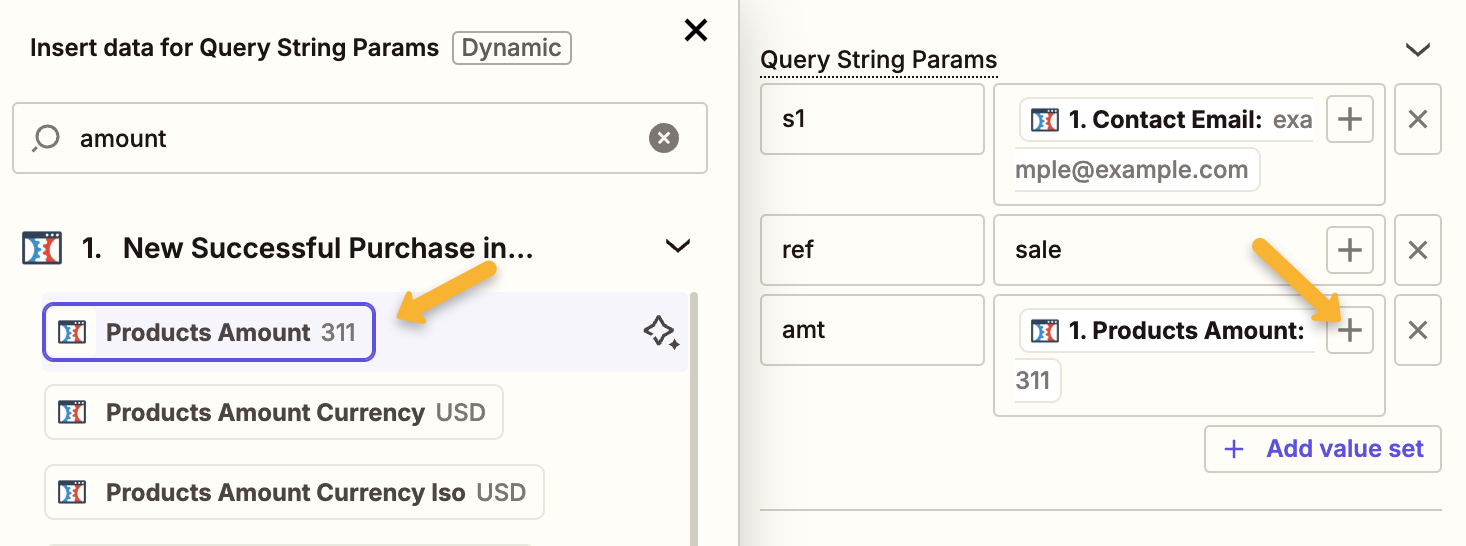
If you’re tracking a Sale, click on “+ Add value set” and add
amt in the left hand box. Then click the “+” icon next to “Enter text or insert data” and select the order amount from whatever app you’re using.
Finally, test and save your Zap and that’s it! Your conversions will automatically be sent to ClickMagick via Zapier.
Article 957 Last updated: 10/22/2025 1:45:19 AM
https://www.clickmagick.com/kb/?article=957